Setting Alarm And Clock—Late Model Tractors
RXA0098831-UN-05AUG08
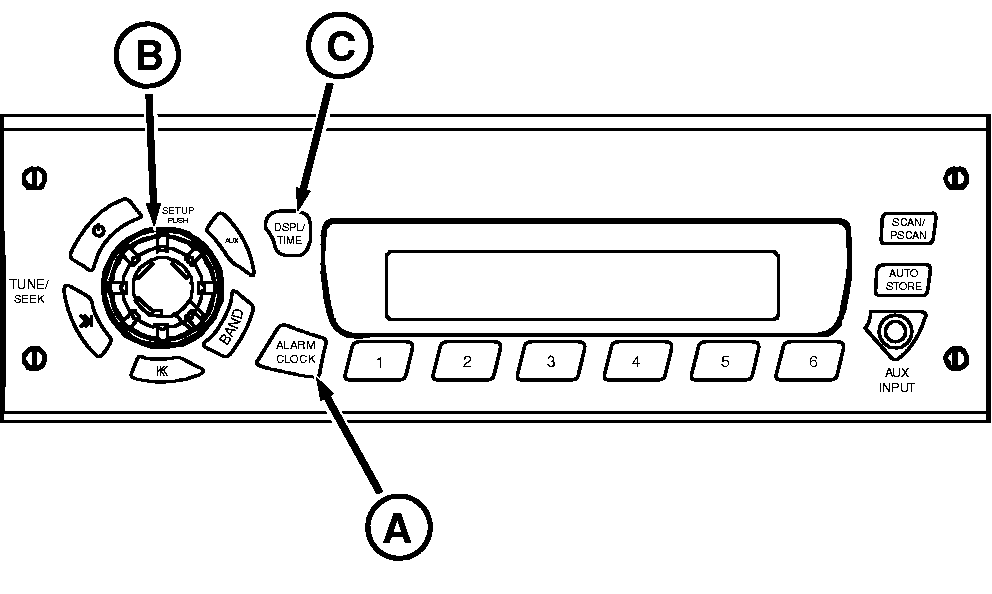
Radio
A - ALARM CLOCK
B - SETUP
C - DSP/TM SET
Setting The Alarm
- With radio on, press and hold ALARM CLOCK (A) button until you see the “ALARM” icon and SET. The hour digits for alarm time will begin to flash.
- Rotate SETUP (B) knob to change the hour. Rotate the knob clockwise to increase and counterclockwise to decrease the hour.
- Press ALARM CLOCK button again until minutes digits flash.
- Rotate SETUP knob to change minutes. Rotate the knob clockwise to increase and counterclockwise to decrease minutes.
- Press ALARM CLOCK again until SET TONE appears on display.
- Press ALARM button again until VOL appears on display. Press button again and you will hear alarm tone. Rotate SETUP knob clockwise to increase and counterclockwise to decrease volume.
- Press ALARM CLOCK button again to finish and return display to normal operation. Alarm icon will appear on display to indicate that alarm is active.
NOTE: If you do not press any button or rotate knob for 5 seconds during alarm set process, alarm clock setup will be cancelled and radio will return to normal operation, keeping whatever setting changes have been made.
Setting Clock
- Switch ignition to ON position.
- Press and hold DSPL/TM SET (A) button until the ”hours” and “minutes” digits flash and you hear a beep.
- Press DSPL/TM SET (A) button again until “hours” digits flash.
- Rotate SETUP (B) knob to change the hour. Rotate the knob clockwise to increase and counterclockwise to decrease the hour.
- Press DSPL/TM SET button again until “minutes” digits flash.
- Rotate SETUP knob to change minutes. Rotate the knob clockwise to increase and counterclockwise to decrease minutes.
- Press DSPL/TM SET button again to complete time set procedure. Display will return to default display.
|
OURX935,000045B-19-20080808 |