Independent Link Suspension Steering Stop Settings
|
|
|
|
|
|
|
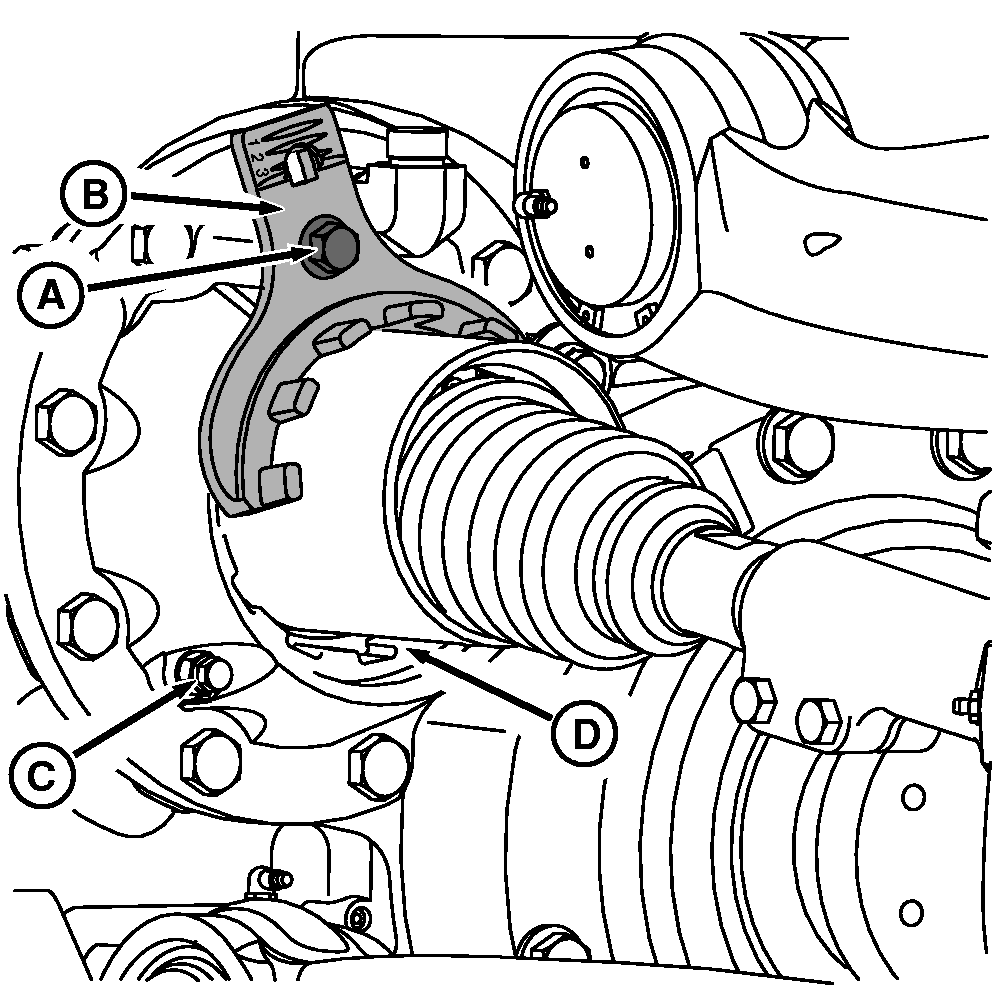
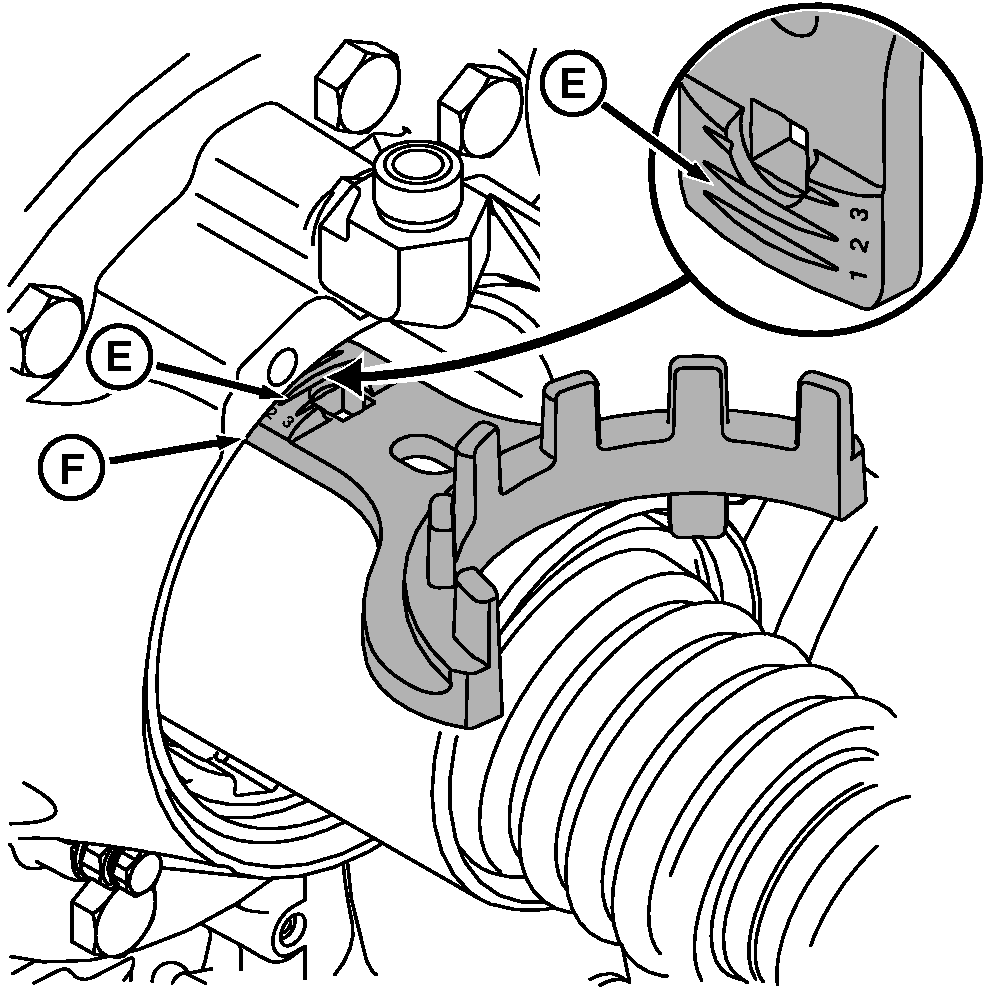
2. Remove cap screw (A) and wrench (B) on axle housing. 3. Loosen bleed screw (C) and jam nut. NOTE: To check a steering stop position of zero, insert wrench as shown in right-hand illustration, the wrench will be flush with outer flange (F). 4. Check current rod guide (D) position using position marks (E) on wrench. 5. Turn rod guide (D) using wrench (B) to adjust distance to correct steering position. |
6. Adjust guide minimally to reinstall wrench and retaining cap screw (A). Specification
7. Tighten bleed screw (C) and jam nut. Bleed Screw and Jam Nut - Specification
8. Repeat procedure on opposite side of axle housing. IMPORTANT: Settings allow 25 mm (1 in.) minimum clearance at maximum turn and full oscillation. Fenders may deflect against side frame during turn. Clearance and interference must be checked under full oscillation and full turn. 9. Verify clearance by turning fully left then fully right. |
 CAUTION:
For tractors equipped with front hitch, avoid possible personal injury and equipment damage. DO NOT use the front hitch to lift the tractor. Use correct lifting equipment.
CAUTION:
For tractors equipped with front hitch, avoid possible personal injury and equipment damage. DO NOT use the front hitch to lift the tractor. Use correct lifting equipment.
OURX935,0000135 -19-17JAN03-1/1 |