Adjust Track Settings
|
|
|
|
|
|
* Use long spacer for 8030 Series Track Tractors which have cast frame. Short spacer in track |
adjustment kit is for 8000T, 8000T TEN and 8020T Series Track Tractors equipped with steel frames. |
OURX935,000059F -19-30JAN08-1/9 |
|
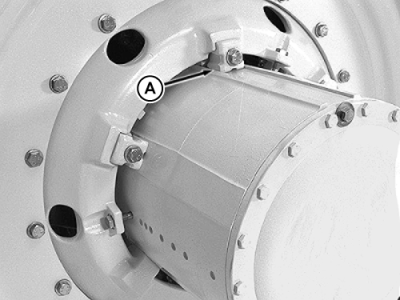
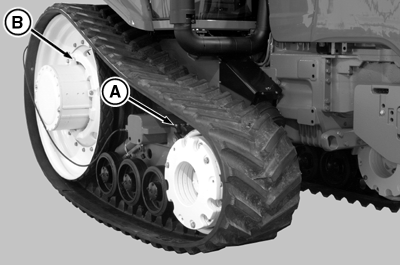
NOTE: Surfaces between mid-frame beam and track frame must be clean of debris when adjusting tread settings. See your John Deere dealer for Track Adjustment Tool JDG1849. IMPORTANT: Remove all idler wheel weights, if installed, before adjusting track tread width. 1. Park tractor on firm, level surface, counter-rotating tractor until rear drive wheel center wedges (A) of both hubs are directly on top. |
|
OURX935,000059F -19-30JAN08-2/9 |
|
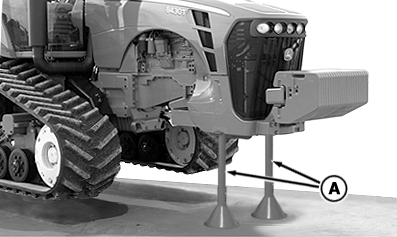
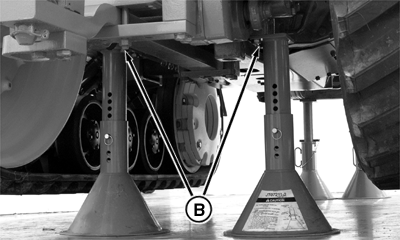
2. Raise entire tractor keeping tractor level front to back. Lift tractor until approximately 76 mm (3 in.) clearance exists between belt tread and ground. NOTE: Support stands are available from your John Deere dealer. 3. Attach support stands to front frame support (A) and rear, bolted to differential case plates (B). 4. Loosen track. See Track Tensioning and Detensioning in this section.
|
|
 CAUTION:
Avoid possible personal injury. Tractor must be fully supported and stable using support stands of sufficient capacity before adjusting tracks.
CAUTION:
Avoid possible personal injury. Tractor must be fully supported and stable using support stands of sufficient capacity before adjusting tracks.
OURX935,000059F -19-30JAN08-3/9 |
|
|
|
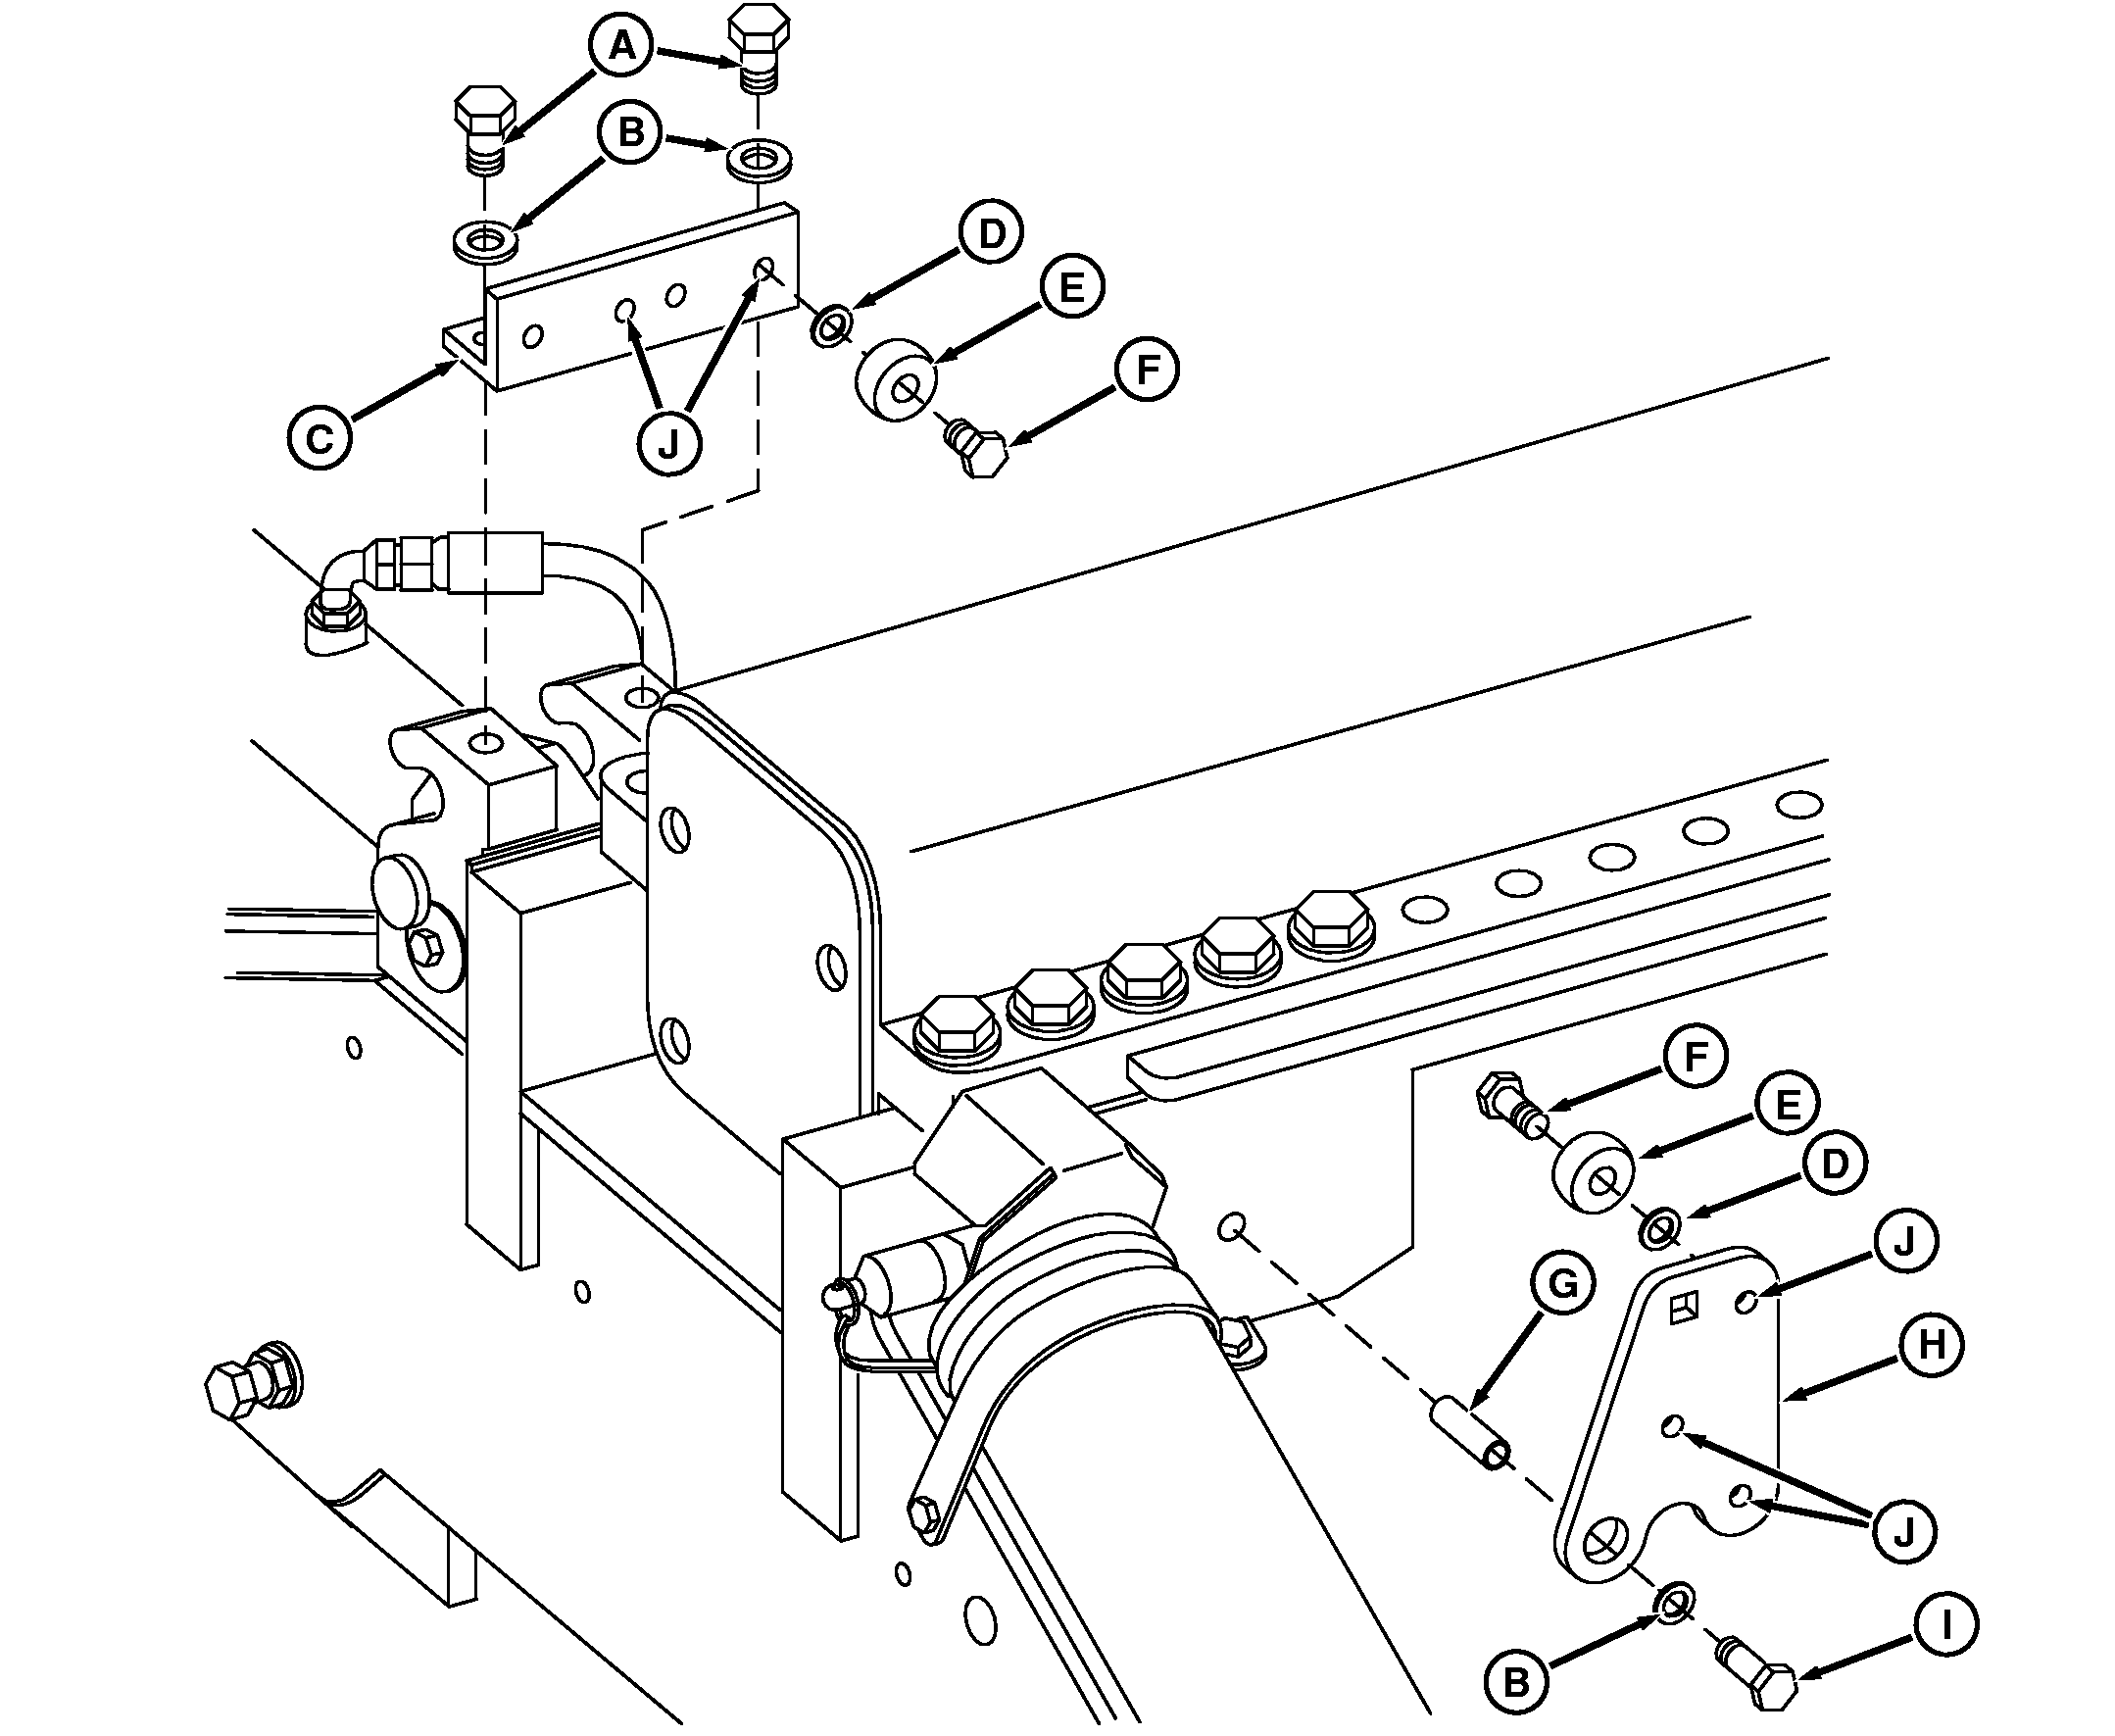
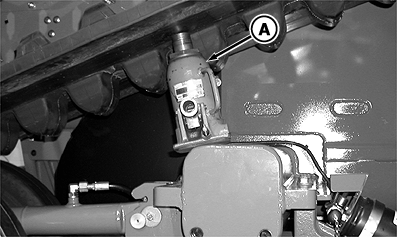
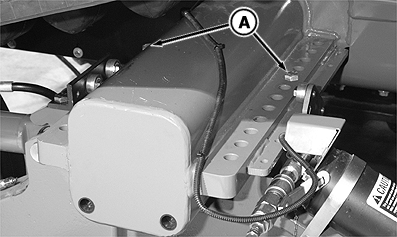
NOTE: Use bottle jack to support track. Keep jack in place when installing adjustment tool, making tread adjustments and removing tool. 5. Position bottle jack (A). |
6. Remove four of five front and four of five rear track frame cap screws (B). |
OURX935,000059F -19-30JAN08-4/9 |
|
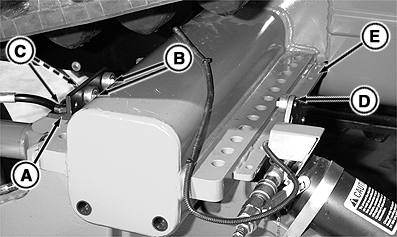
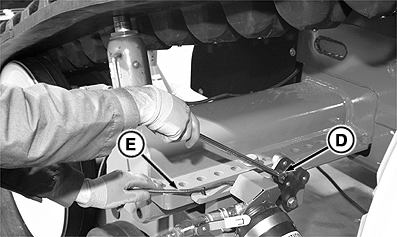
NOTE: Washer should be against bracket to allow bearing to turn. 7. Install bracket (A) and two bearings (B) with bolts (C) and washers in holes on top of tension cylinder bracket. 8. Install cam assembly (D) with M16 x 60 cap screw into tapped hole on the trailing edge of track frame and with long spacer between the hole and cam assembly. 9. Apply a small amount of lubricant on track frame (E) to allow adjustment kit to slide in or out. 10. Remove final two cap screws holding track frame to mid-frame beam. NOTE: Track frame should be hanging on rollers with track dragging on ground. |
|
OURX935,000059F -19-30JAN08-5/9 |
|
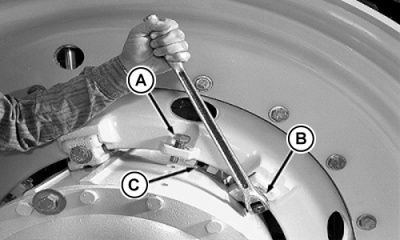
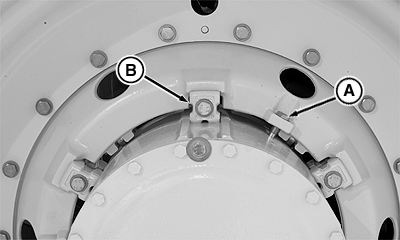
11.
Loosen three positioning screws (A).
DO NOT REMOVE SCREWS.
12. Alternately loosen three tapered wedge cap screws (B), approximately 10-15 mm (0.4-0.6 in.), until drive wheel rollers (C) drop down onto hub. 13. Remove cap screws and wedges. 14. Remove loose paint, dirt and debris from hub, wedges and cast wheel support. 15. Install a 1/2 in. breaker bar into cam (D) and while holding wiring harness (E) out of the way, push down so cam goes over center. |
|
OURX935,000059F -19-30JAN08-6/9 |
|
IMPORTANT: Avoid damaging sensor harness. Install tie bands as necessary to keep wiring harness out of the way. 16. Slide track frame and drive wheel to new position. Push cam back over center to hold track frame in position. NOTE: LOCTITE ® can be purchased through your John Deere dealer part number TY9370 Threadlocker in US or TY9477 in Canada. 17. Apply LOCTITE 242 and install and hand tighten two cap screws (A) so lower track frame is tight against mid-frame front beam. |
|
|
LOCTITE is a trademark of Loctite Corp. | OURX935,000059F -19-30JAN08-7/9 |
|
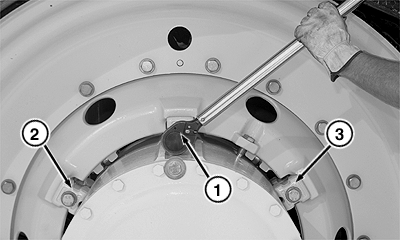
18.
Install the three positioning screws (A) in new positioning holes.
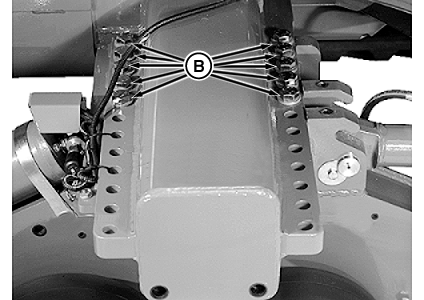
19. Install and alternately tighten wheel wedge cap screws (B) to specification. Always tighten center cap screw (1) first, the left cap screw (2), then the right cap screw (3). Specification
20. Torque wheel wedge cap screws to intermediate torque. Specification
21. Torque wheel wedge cap screws to final torque.
Specification
|
|
OURX935,000059F -19-30JAN08-8/9 |
|
22.
Tension the track. See Track Tensioning and Detensioning in this section.
23. Remove tread adjustment kit. 24. Apply LOCTITE 242 and install the eight remaining track frame cap screws (A). Alternately tighten to torque.
Specification
25. Remove support stands and lower tractor to the ground. 26. Align step assembly with the center of the track. See Positioning Steps in Operator Station section. 27. Align track. See Aligning Track in this section. 28. Check track tension and tighten if necessary. Remove track tension hose. IMPORTANT: Repeat tightening sequence (1), (2) and (3) multiple times until torque is stable. 29. Retighten wheel wedge cap screws (B) to torque specifications. Repeat:
Specification
30. Tighten drive wheel cap screws to torque specification;
Specification
|
|
OURX935,000059F -19-30JAN08-9/9 |