Replacing Auxiliary Drive Belt
|
|
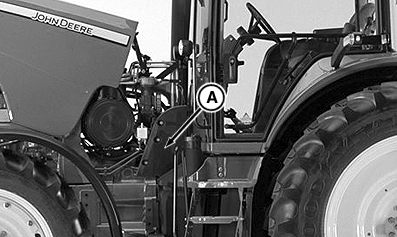
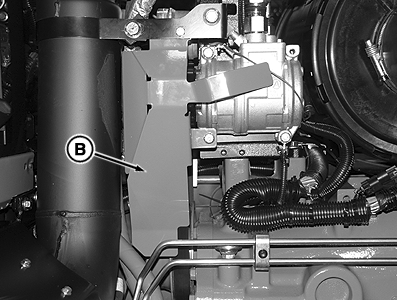
| 1. Open hood. Remove left-hand shield (A) and right-hand shield (B). |
OURX935,0000464 -19-21APR08-1/2 |
|
|
|
|
|
|
|
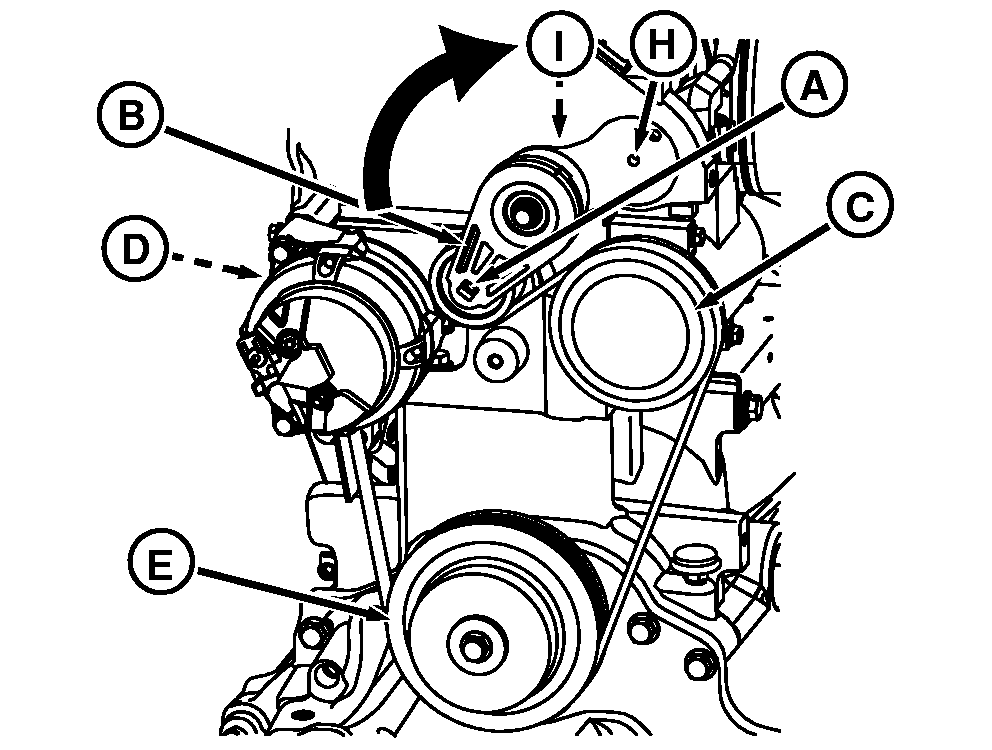
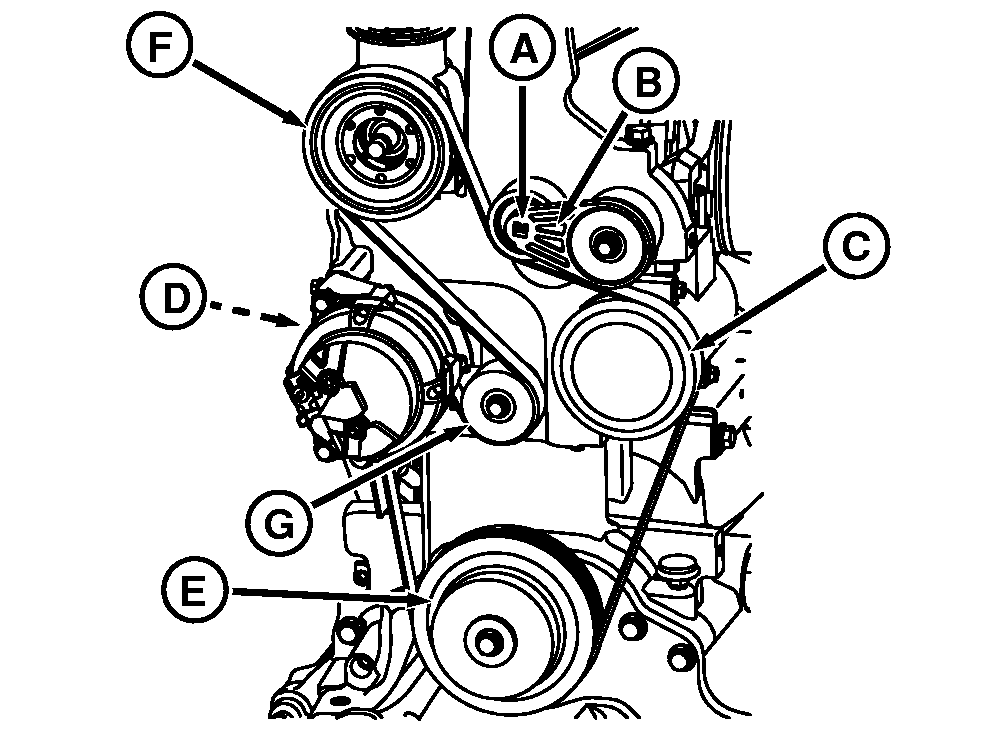
IMPORTANT: Keep tension off belt during removal. 2. Insert 1/2 in. drive tool into square hole (A) in tensioner arm (B). 3. Push up on tool handle to relieve tension on drive belt. 4. Remove belt from air conditioner pulley (C). NOTE: Tractors with air brake have tension arm installed in tension arm hole (H). Tractors without air brake have tension arm installed in tension arm hole (I). 5. For tractors with air brake only, remove belt from air brake pulley (F) and idler (G). 6. Remove belt from alternator pulley (D). NOTE: Clearance between transmission auxiliary drive pulley and tractor frame is minimal. |
7. Remove belt from auxiliary drive pulley (E). 8. Discard old belt. NOTE: There is minimal clearance between transmission auxiliary drive pulley and tractor frame. Do not damage new belt when installing. 9. Install new belt to auxiliary drive pulley, then on the alternator pulley. 10. For tractors with air brake, install belt on air brake pulley and idler. 11. Install belt on air conditioner pulley. 12. Remove 1/2 in drive tool restoring tension on new belt. 13. Install shield and close hood. |
OURX935,0000464 -19-21APR08-2/2 |