Removing and Installing Fan Belt
-
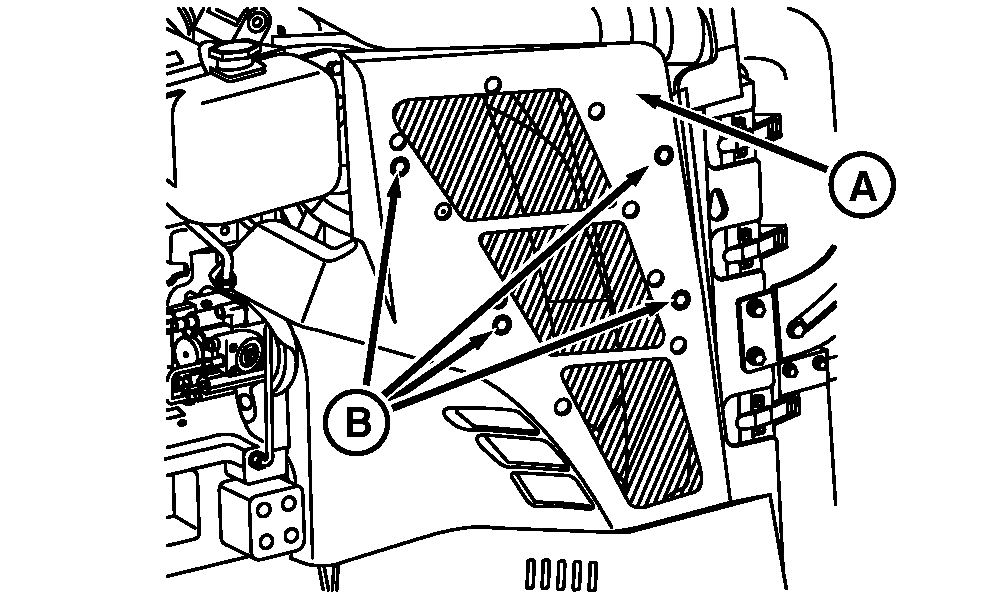
RXA0085938-UN-18JAN06Remove Front Side Panel
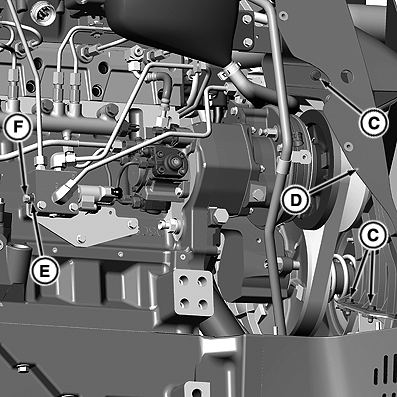
RXA0096735-UN-20DEC07Bleeding Drive Assembly
A - Side Panel
B - Cap Screws
C - Cap Screws
D - Diverter Panel
E - Jam Nut
F - Bleed Screw
Raise hood. -
Remove four cap screws (B) and right-hand front side panel (A).
-
Remove three cap screws (C) and lift diverter panel (D) out.
IMPORTANT: Removing bleed screw will drain oil. Loosen bleed screw only enough to bleed oil back into reservoir (a maximum of two full turns).
-
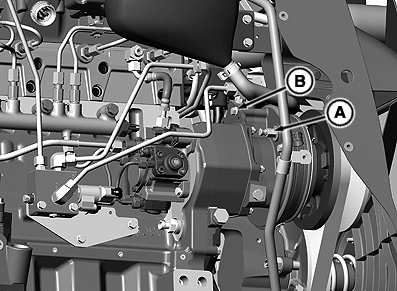
Loosen jam nut (E), then loosen bleed screw (F).
-
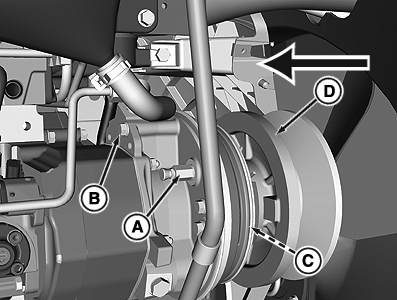
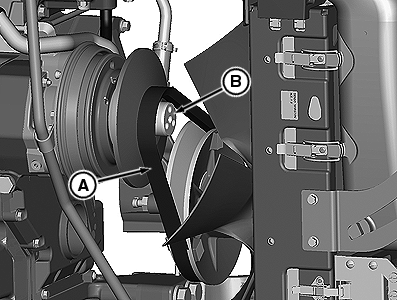
Remove vent adapter (A) from vent hole, then remove service cap screw (B) from storage hole.
RXA0096736-UN-24JUL08Pull Inner Sheave Rearward
A - Vent Adapter
B - Service Cap Screw
C - Piston Plate
D - Rear Sheave
-
Install service cap screw through vent hole in piston plate (C) and thread into inner sheave housing.
-
Tighten to carefully pull rear sheave (D) rearward until it stops.
NOTE: Bleed screw must be closed for proper tension to be applied to belt once tractor is started.
-
Close bleed screw, tighten to specification and tighten jam nut.
Item Measurement Specification Bleed Screw Torque 25 N·m 221 lb-in. Tractor may be equipped with either a 3 cap screw or a 6 cap screw fan drive.
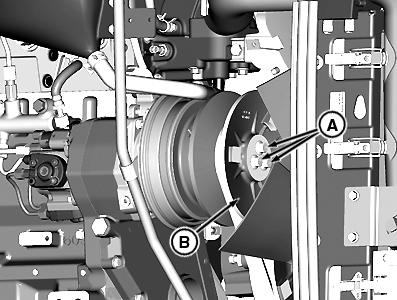
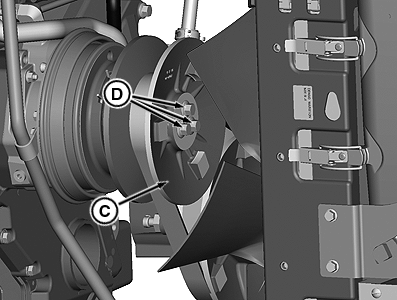
RXA0108318-UN-23JUN10For Three Cap Screw Sheave Remove Cap Screws And Outer Sheave

RXA0111804-UN-28OCT10For Six Cap Screw Sheave Remove Cap Screws And Outer Sheave
A - Cap Screws
B - Outer Sheave
-
Remove cap screws (A).
IMPORTANT: When prying outer sheave (B) forward, make sure that belt contact surface of pulley is not damaged.
-
Pry outer sheave evenly off shaft.
-
Remove belt through opening between fan and fan hub.
-
Discard old belt.
-
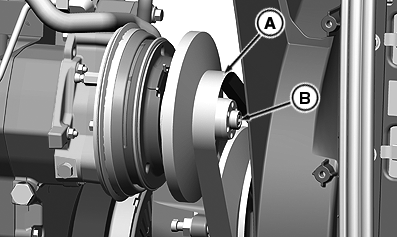
Install new fan belt (A) between fan and fan hub.
RXA0108320-UN-22JUN10Install Belt On Three Cap Screw Shaft
RXA0095841-UN-29AUG07Install Front Sheave And Three Cap Screws
RXA0111805-UN-28OCT10Install Belt On Six Cap Screw Shaft
RXA0111806-UN-28OCT10Install Front Sheave And Six Cap Screws
A - Belt
B - Drive Shaft
C - Front Sheave
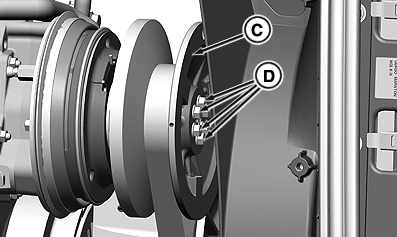
D - Cap Screws
-
Pull or gently pry belt onto drive shaft (B) and against rear sheave.
IMPORTANT: When installing front sheave (C), make sure that belt remains loose and is not pinched between sheaves.
Clean mating surfaces of front sheave and shaft.
-
Install front sheave.
-
Tighten cap screws (D) to specification.
Item Measurement Specification 3 Cap Screw Drive Pulley-to-Drive Cap Screws Torque 130 N˙m (96 lb-ft) 6 Cap Screw Drive Pulley-to-Drive Cap Screws Torque 37 N˙m (27 lb-ft) -
Check bleed screw to make sure it is closed and belt is loose between sheaves.
IMPORTANT: If service cap screw is left in vent hole, fan cannot adjust causing tractor to overheat.
RXA0097840-UN-25APR08Return Vent Adapter To Vent Hole And Service Cap Screw To Storage Hole
A - Vent Adapter
B - Service Cap Screw
-
Remove vent adapter (A) from storage hole and service cap screw (B) from vent hole.
-
Install vent adapter in vent hole and service cap screw in storage hole. Torque to specification.
Item Measurement Specification Fan Drive Hardware Vent Adapter Torque 24 N˙m (18 lb-ft) Service Cap Screw Torque 13 N˙m (9 lb-ft) -
Install diverter panel and right-hand side front shield and torque to specification.
Item Measurement Specification Diverter Panel Cap Screws Cap Screw Torque 20 N˙m (15 lb-ft) -
NOTE: Starting engine with belt loose between pulleys allows belt to climb out of groove between pulleys. Belt will correctly position itself within a few seconds after engine is started.
Start engine and run at idle for 15 seconds. Turn off engine.
-
Remove right-hand side front shield and make sure that belt is correctly positioned between pulleys.
 CAUTION: Keep hands away from exposed fan blades. Blades have
sharp edges which may result in personal injury.
CAUTION: Keep hands away from exposed fan blades. Blades have
sharp edges which may result in personal injury. -
Install right-hand front side panel.
|
OURX935,0000264-19-20110311 |