Setting Implement Selection
Implement Selection Display
|
|
|
|
|
|
|
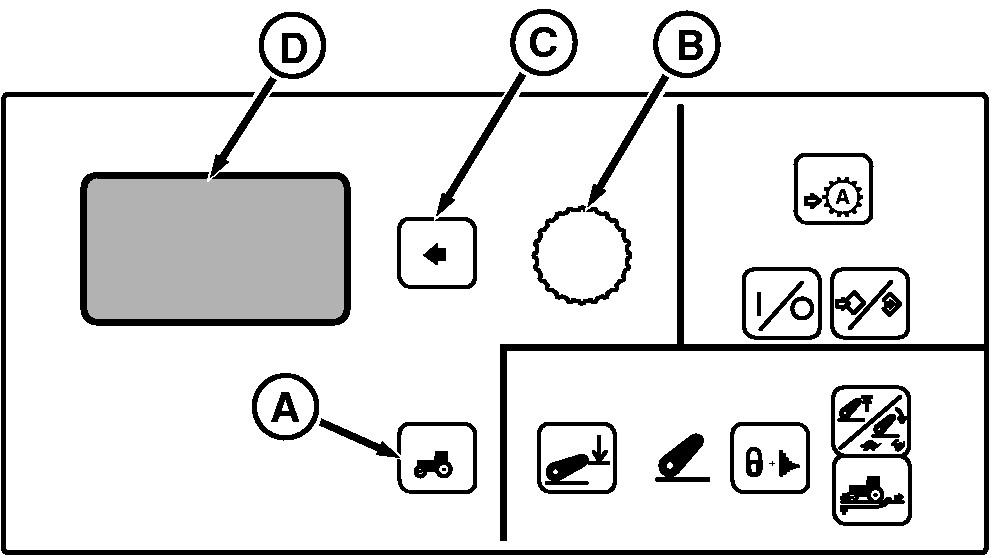
Press Settings Switch (A) to view menu items on Display (D). Rotate Command Dial (B) to highlight Implement Sel and press Select Switch (C).
Menu Items on Display (D)
Using Command Dial, scroll through available selections until desired setting (code) is highlighted and press Select Switch.
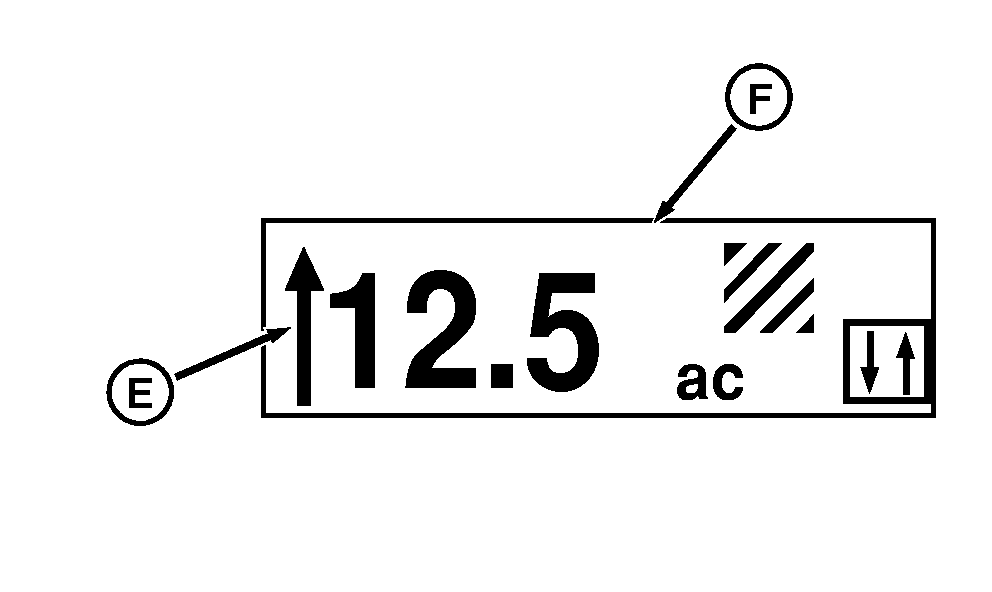
IMPLEMENT SEL: This function identifies the input source that will determine when the CommandCenter |
is measuring performance related information, such as Area-per-Hour, Fuel-per-area, Distance Counter, and Area Covered. The source could be any implement, the implement switch, the rear hitch switch or PTO switch, any EH SCV control or can be set to manual mode. The position arrow (E) indicates if implement is raised (arrow up) or lowered (arrow down). Measurements are being recorded only when the position arrow is down and stop recording when arrow is up.
NOTE: SCV functions will only appear if tractor is equipped with TouchSet hydraulic controls. When HCU, EH SCV 1, 2, 3, or 4, PTO is selected, measurement recording will take place when chosen system is engaged. Measuring will turn off when chosen system is disengaged. In Manual mode, the implement position arrow and corresponding measuring is controlled by the Select Switch. Total Area Covered Display (F) must be selected on the CommandCenter for manual mode to function. Once the implement is lowered, press Select Switch (C) to point position arrow down and start accumulating measurements. Then when the implement is raised, press the Select Switch (C) again to reverse arrow position and stop measuring. |
RW29387,0000054 -19-07MAR09-1/3 |
|
When Auto Seek is selected, the first detected "engaged" signal seen by the controller causes the implement arrow to point down and start accumulating measurements (distance and area). The function of the first detected device will highlight on the screen and |
change back to Auto Seek when that device is disengaged. "AS" is shown at the end of the function to indicate that the highlighted function is engaged via the auto seek function. |
RW29387,0000054 -19-07MAR09-2/3 |
|
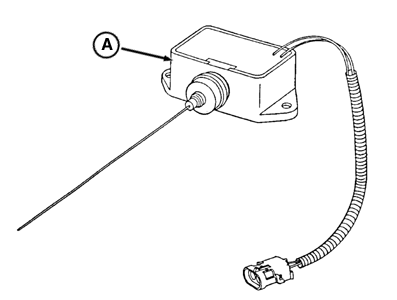
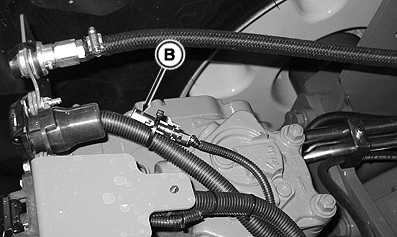
Implement mounted implement switch (A) needs to be introduced to the controller when first used, so its feedback signal will be recognized. Attach the implement switch harness connector to tractor harness connector (B) above SCV stack. At first time use, highlight Implement Switch setting, lower implement and press Select Switch to point position arrow down and start accumulating measurements; then when the implement is raised, the position arrow will reverse and measuring will stop automatically. Once the Implement Switch is introduced to the system (Implement Switch highlighted, implement lowered, Select Switch pressed), it will function automatically the same as other systems.
|
|
RW29387,0000054 -19-07MAR09-3/3 |