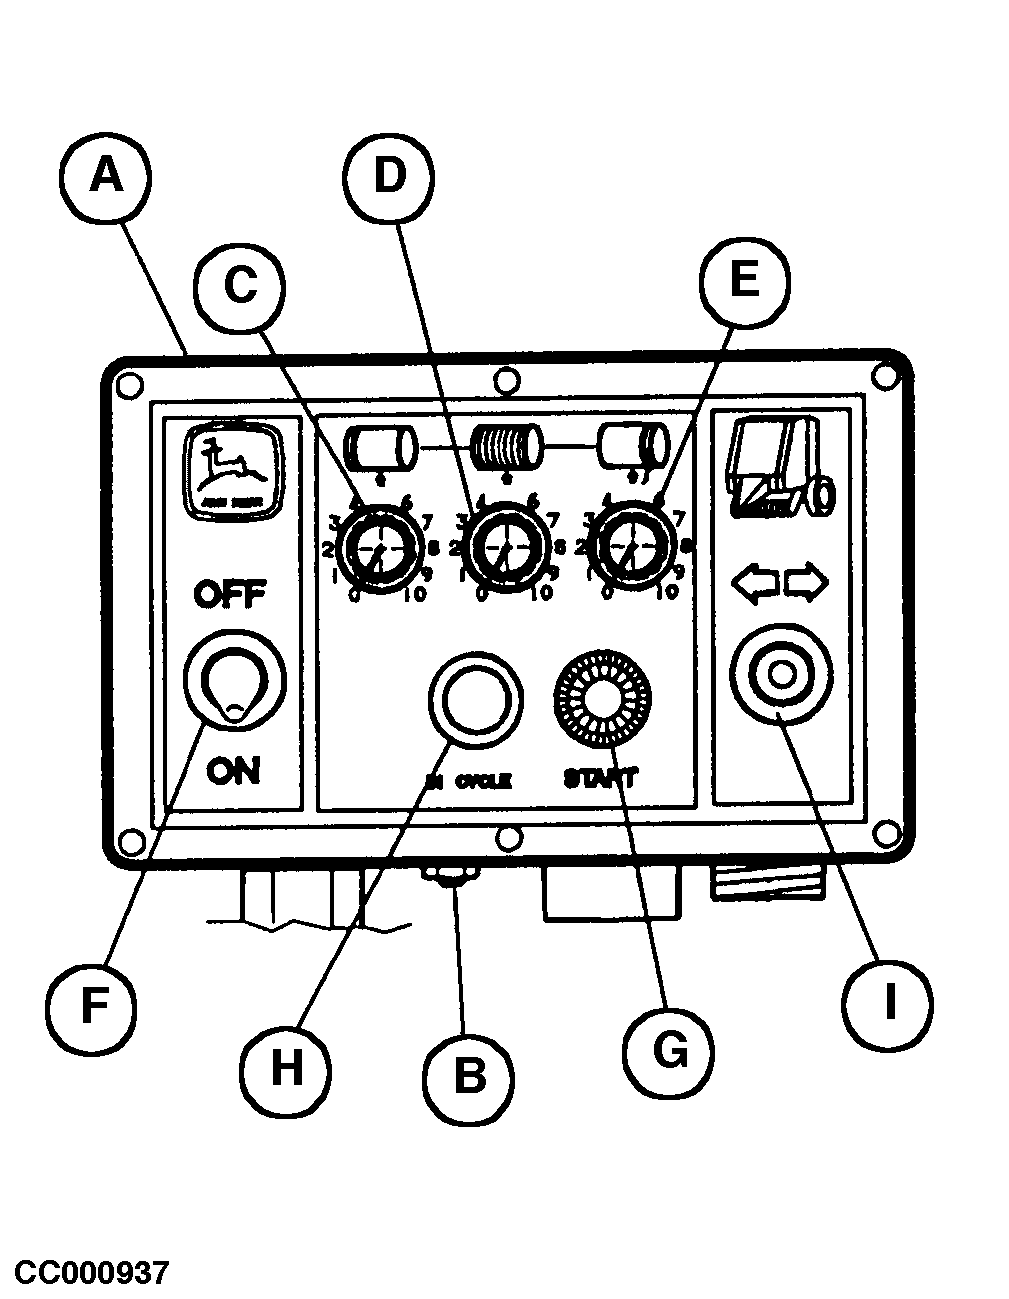
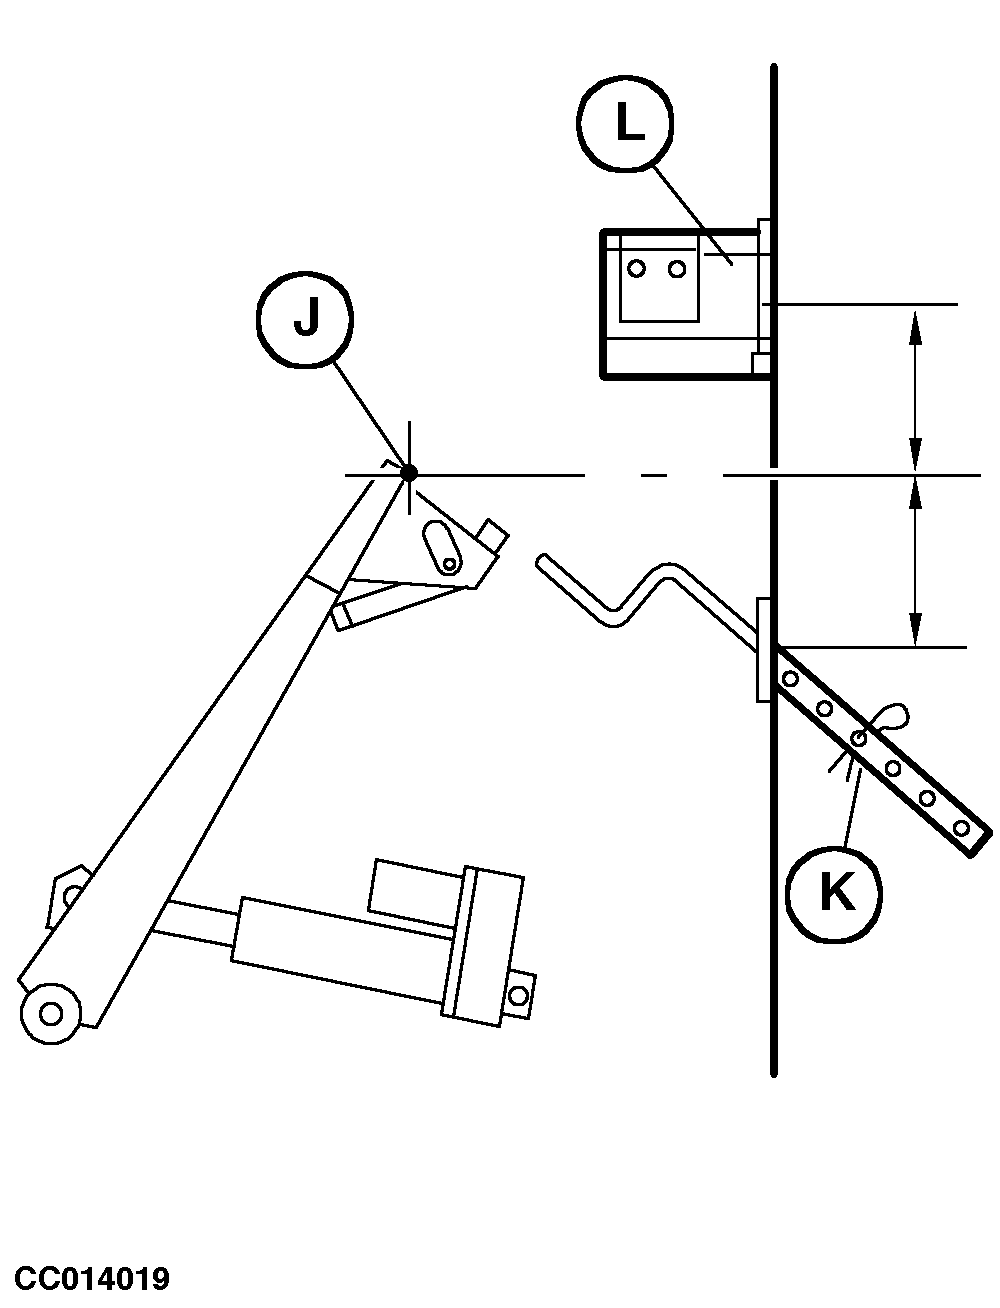
Electronic Wrapping Control MonitorThe Electronic Wrapping Control Monitor (A) allows a programmed or manual bale twine wrapping mode. Programmed Twine Wrapping ModeProceed as follows to programme the twine wrapping cycle: 1. Determine the twine arm re-extension point (J) (before twine arm returns to its home position) by using the adjustable screw (B). This re-extension allows more twine coils at the end of bale wrapping (e.g. when baling straw). Turn screw (B) clockwise or counterclockwise to adjust distance of re-extension point (J) from the side of the bale chamber. As a basic adjustment, re-extension point (J) should be located between twine guide (K) and twine knife (L) as shown opposite. NOTE: Factory setting of re-extension point is about 120 mm (4.72 in.) from the side of the bale chamber. NOTE: Re-extension point and twine guide adjustments should match together so that no interferences occur. See "Adjusting Twine Guide" in "Operating the Baler - General Purposes" Section.
|
|
AG,OUCC006,506 -19-31AUG00-1/3 |
|
2. Select wrapping time sequence by adjusting the potentiometers (C)-(D)-(E) to determine the twine distribution across the bale. Turn potentiometer (C) clockwise to adjust the stop time of twine arm in its upmost extended position from 0.1 to 10 seconds. Turn potentiometer (D) clockwise to adjust the wrapping time across the bale during twine arm retraction from 8 to 70 seconds. Turn potentiometer (E) clockwise to adjust the twine arm re-extension time at the re-extension point determined by adjustable screw (B) from 0 to 5 seconds. Setting of potentiometer (E) to the position "0" will result in no re-extension of the twine arm. Switch ON switch (F), monitor is now ready to operate. NOTE: Push on "START" button (G) to activate the programmed mode when the bale has not reached the desired bale diameter. See "Wrapping a Bale-Programmed Mode" in this Section. "IN CYCLE" light (H) glows continuously once "START" button (G) is pushed or when twine arm is automatically tripped by the bale diameter switch, and will flash at the end of wrapping cycle. If necessary, till the light is glowing, a new wrapping cycle can be started by pushing "START" button (G). NOTE: Manual Control switch (I) can be used to interrupt the programmed mode at any time. The manual mode is then ready to be used. See "Manual Twine Wrapping Mode" in this Section. NOTE: The sound level of the buzzer is adjustable. |
|
AG,OUCC006,506 -19-31AUG00-2/3 |
|
Manual Twine Wrapping Mode
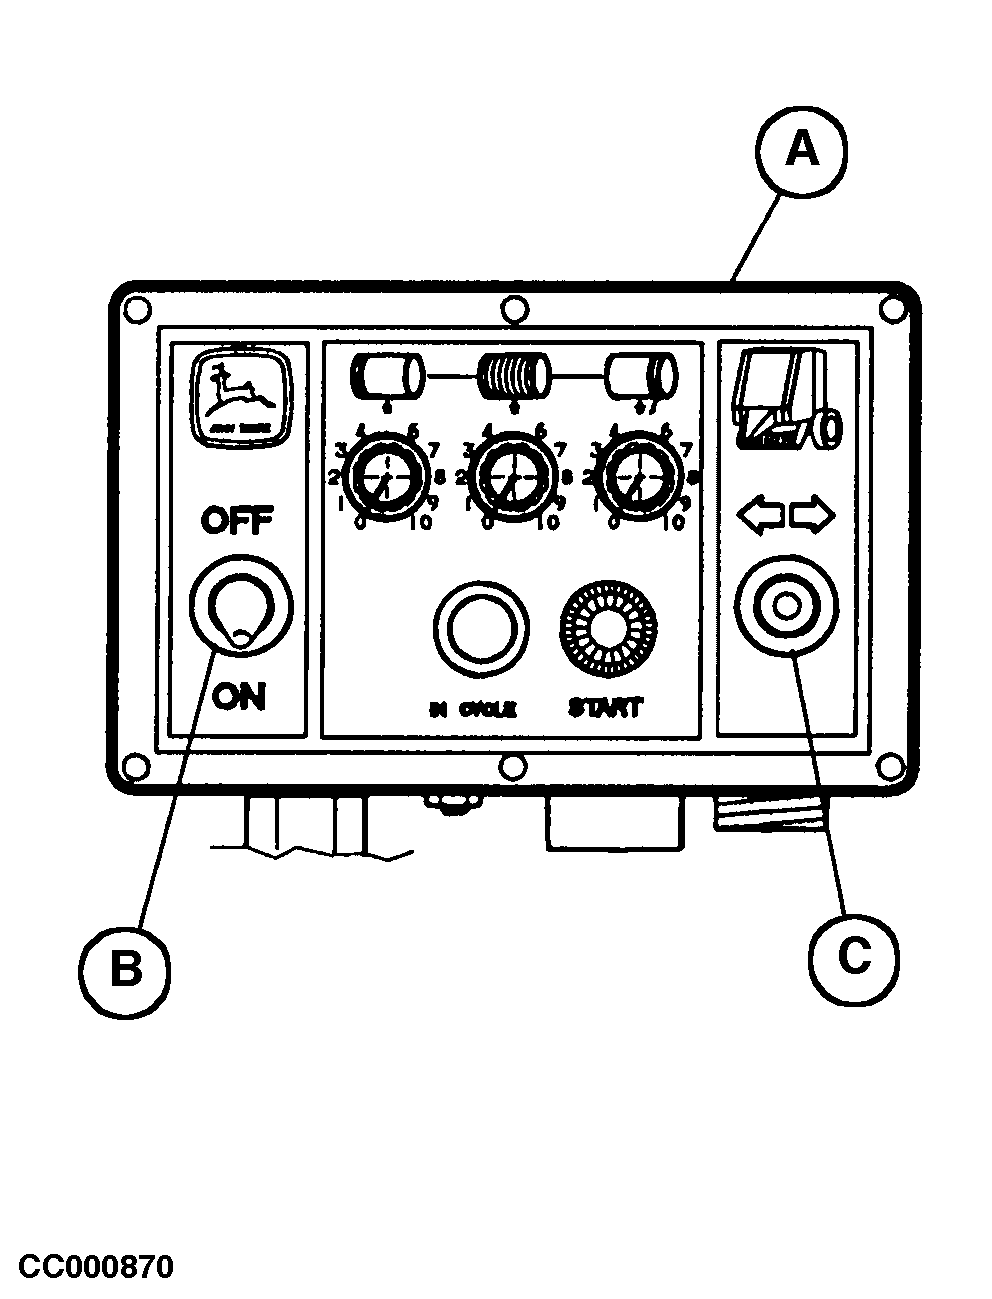
Switch ON switch (B). Use the manual control switch (C) to distribute the twine across the bale. See "Wrapping a Bale-Manual Mode" in this Section. IMPORTANT: Monitor is protected by circuit breaker. If control switch (C) is actuated with the twine arm actuator fully extended or fully retracted, circuit breaker will trip. In this case, wait a few seconds for the breaker to cool down and then reset by switching monitor OFF and ON again.
|
|
AG,OUCC006,506 -19-31AUG00-3/3 |


