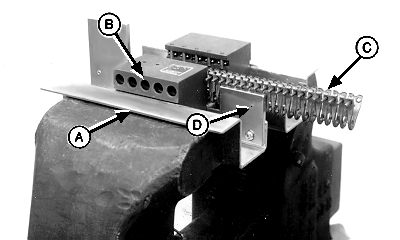
Installing Mato Belt HooksPut belt lacing tool (A) in a vice with holes (B) to the front. Install the first five segments of belt hooks (C) in lacing tool. Make sure rivets are inside the lacing tool holes (B). Two rivets per segment must be inserted in the same hole. Segments should contact guide (D). Tighten vice until segments are lightly gripped and the belt can easily be inserted. |
|
CC,570RB003547 -19-15SEP98-1/5 |
|
Clinching Hooks in Belt
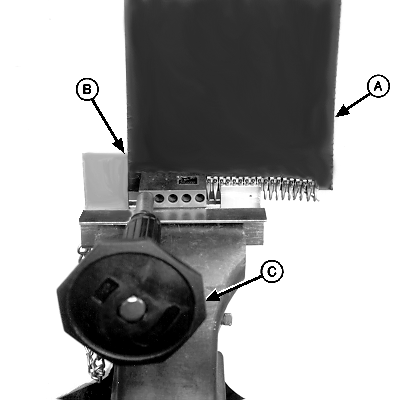
Install belt (A) in hooks with diamond pattern to the rear. Align edge of belt with guide (B). Push belt down uniformly to the stop pins. Hooks should also be down against stop pins. Close vice to exert pressure on hooks. This will ensure correct riveting. Make sure belt is positioned squarely in lacing tool and hooks. IMPORTANT: Using too large a hammer or striking punch too hard can damage lacing tool or belt splice. Using punch (C), drive the rivet in the left hole first trough the belt until shoulder on punch contacts lacing tool jaw. Hit punch an additional time to ensure contact between shoulder and lacing tool jaw. Working from right to left, drive the remaining rivets through the belt in the same way. |
|
CC,570RB003547 -19-15SEP98-2/5 |
|
Driving Rivets With Punch
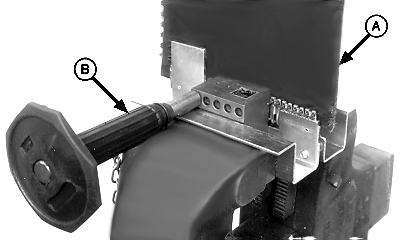
Open vice. Move belt (A) and lace until rivets on the next five segments are inside lacing tool holes. Position belt squarely in lacing tool. Close vice to exert pressure on hooks, Using punch (B), drive the rivet in the left hole first trough the belt until shoulder on punch contacts lacing tool jaw. Hit punch an additional time to ensure contact between shoulder and lacing tool jaw. Working from right to left, drive the remaining rivets through the belt in the same way. |
|
CC,570RB003547 -19-15SEP98-3/5 |
|
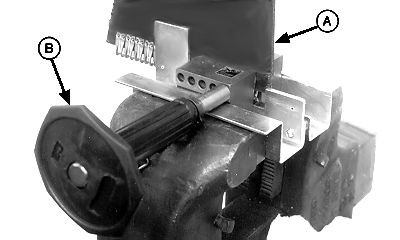
Open vice. Move belt (A) and lace until rivets on the last four segments are installed inside lacing tool holes. Position belt squarely in lacing tool. Close vice to exert pressure on hooks. Using punch (B), drive the rivet in the left hole first trough the belt until shoulder on punch contacts lacing tool jaw. Hit punch an additional time to ensure contact between shoulder and lacing tool jaw. Working from right to left, drive the remaining rivets through the belt in the same way. |
|
CC,570RB003547 -19-15SEP98-4/5 |
|
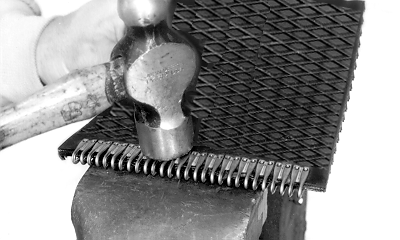
Checking Hook Clinch
Remove belt from vice and inspect hooks. All rivets should be driven through belt and show punch marks in center of rivet. IMPORTANT: Do not hit the loop area of the fastener when using hammer to flatten heads of rivets. Do not hit rivets too hard or rivets may buckle and damage joints. Put belt and splice on a solid base. Flatten heads of rivets using the flat face of a small hammer. Strike several rivets at a time using a light "tapping" motion. Rivets should be flush with splice. See "Installing Belts" in this Section for proper installation. |
|
CC,570RB003547 -19-15SEP98-5/5 |
