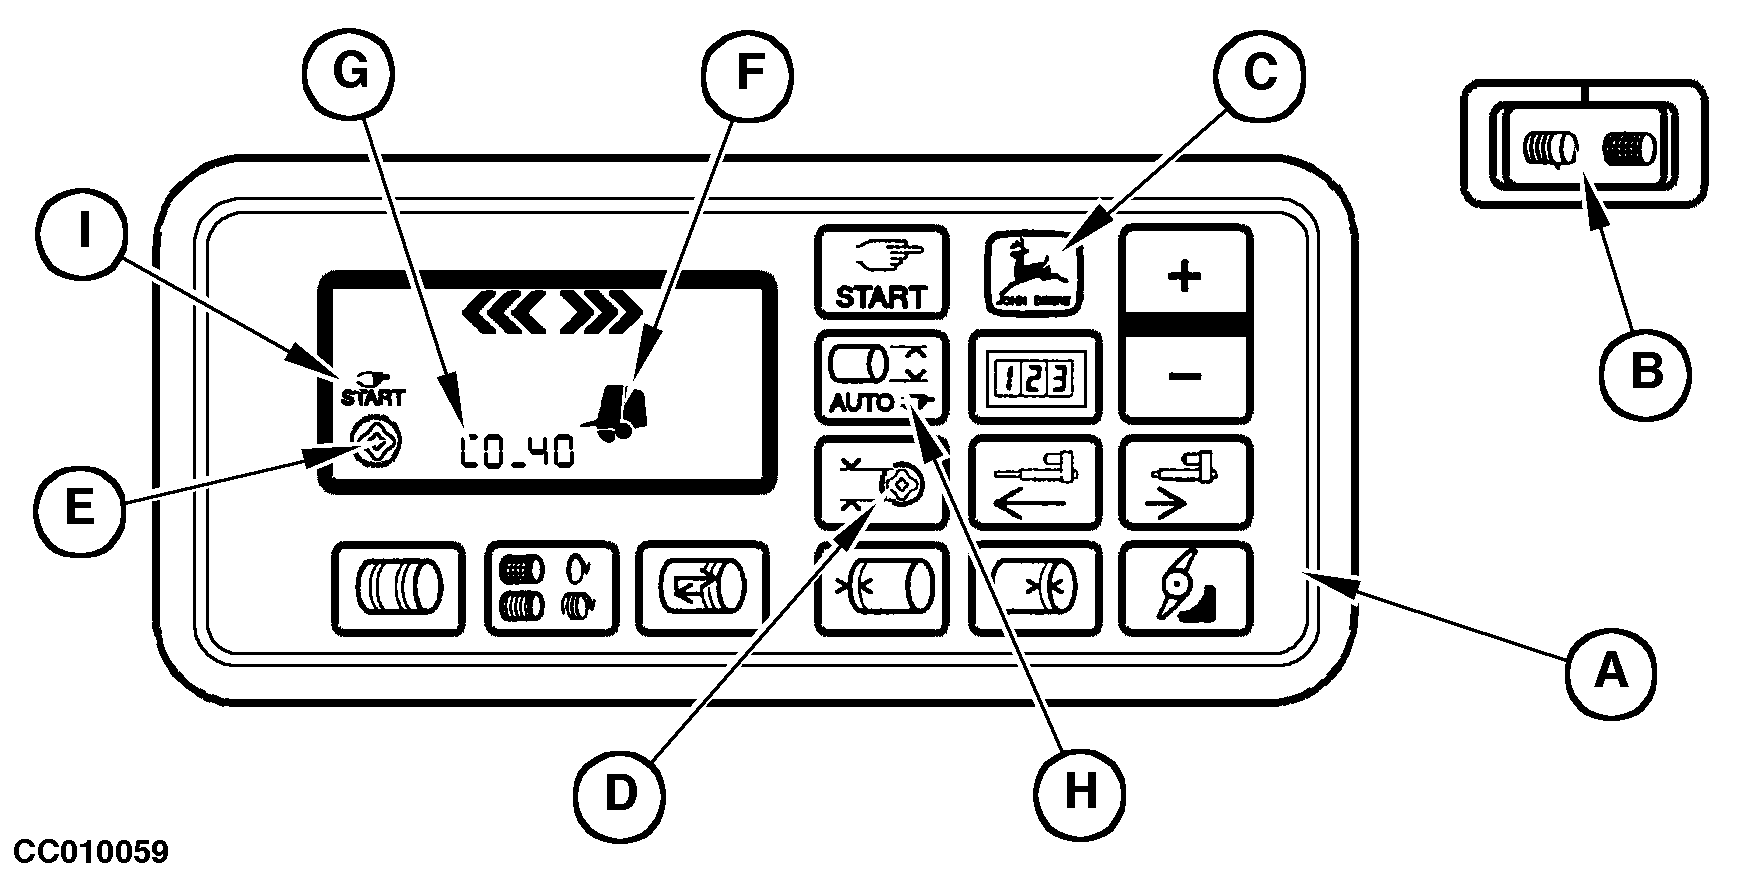
Operating BaleMaster Monitor (First Use)

|
|
The monitor (A) is based on an easy use concept and can be operated once connected and switched ON. Nevertheless, to be better familiarized with the monitor display and reactions, here is a summary of what operator should do prior to start baling: Choose the wrapping mode using the selector switch (B) to switch ON the monitor in NET or TWINE mode. On baler with flax equipment, select this mode by holding DEERE key (C) while switching ON in TWINE mode Press once on SOFT CORE key (D) if this mode is desired. Soft core indicator (E) will light to confirm this choice. Check that GATE CLOSED (F) is ON. If not, take corrective action. On baler with precutter device, check that knives in cutting position are required. Digit (G) indicates that knives are in cutting position. Choose between the automatic or manual wrapping modes by pressing AUTO key (H) successively. At start up, manual mode (I) is automatically selected. |
The monitor is now ready for operation. Initial settings can be then modified or the operator can start to bale as desired. See "Forming a Bale" in this Section. For a complete setup of the monitor or to get full information on how to use it, refer to the following paragraphs:
|
CC,570RB003956 -19-15SEP98-1/2 |
|
|
CC,570RB003956 -19-15SEP98-2/2 |