Detaching 531, 551, 631, 651, 661, 731 and 751 Loaders
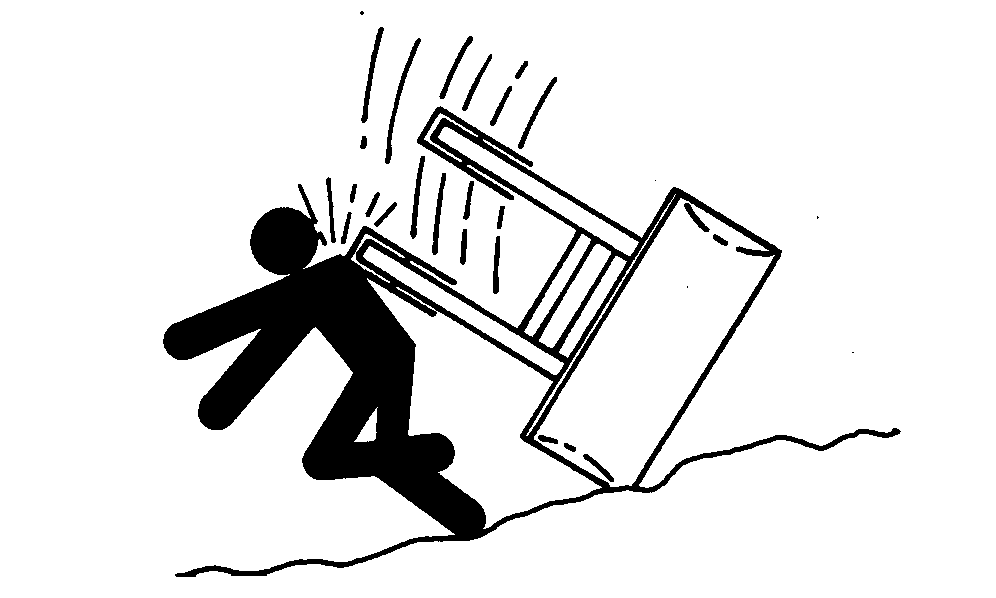
To prevent serious injury, loader must be detached by the tractor driver himself. To help prevent personal injury caused by a falling loader, always detach on a hard, level surface. Equip the loader with a bucket, manure fork or pallet fork for parking. Never use a round bale gripper or round bale elevator to park the loader. |
|
 CAUTION:
DO NOT allow bystanders while detaching the loader.
CAUTION:
DO NOT allow bystanders while detaching the loader.
OUCC006,00009E8 -19-14AUG03-1/12 |
|
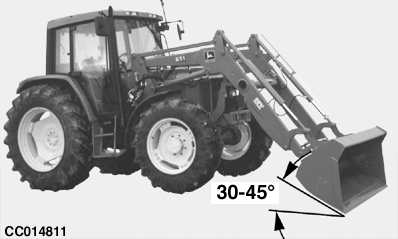
1.
Dump bucket 30° to 45°.
2. Lower bucket to ground and apply down pressure to raise front wheels just off ground. 3. Engage parking lock, apply handbrake, shut off engine, remove key and lock loader operating levers. |
|
OUCC006,00009E8 -19-14AUG03-2/12 |
|
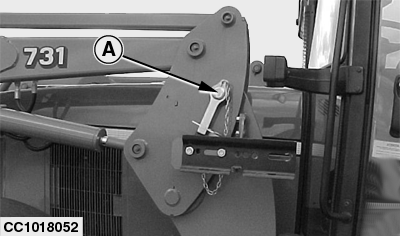
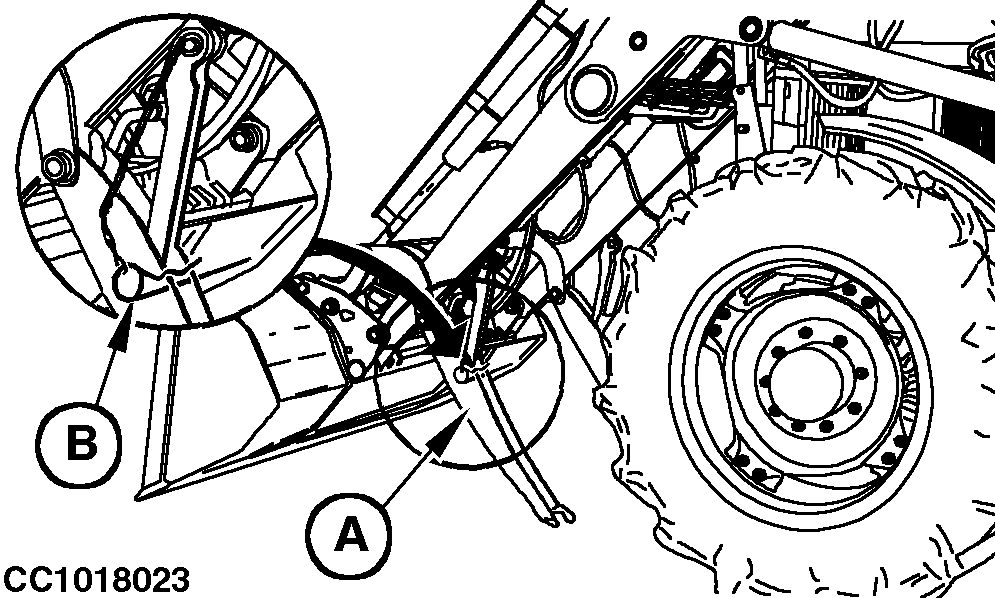
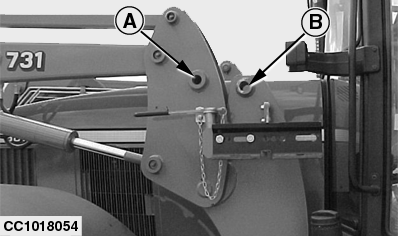
4.
Unlock left-hand mounting pin (A) and pull it out.
Store it in the provided support (B).
|
|
OUCC006,00009E8 -19-14AUG03-3/12 |
|
5.
Lower parking stands.
a. Support left parking stand (A) and remove spring pins (B). Release parking stand (A). The parking stand (A) must fall down due to its own weight. Secure parking stand in operating position with spring pins (B).
|
|

OUCC006,00009E8 -19-14AUG03-4/12 |
|
b. Support right parking stand (A) and remove spring pins (B). Release parking stand (A). The parking stand (A) must fall down due to its own weight. Secure parking stand in operating position with spring pins (B). NOTE: To prevent loader from sinking in soft ground, place boards under parking stands.
|
|
OUCC006,00009E8 -19-14AUG03-5/12 |
|
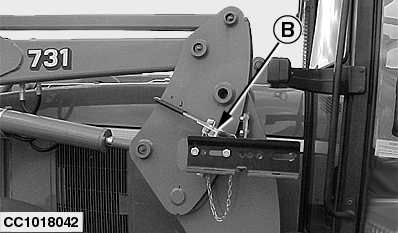
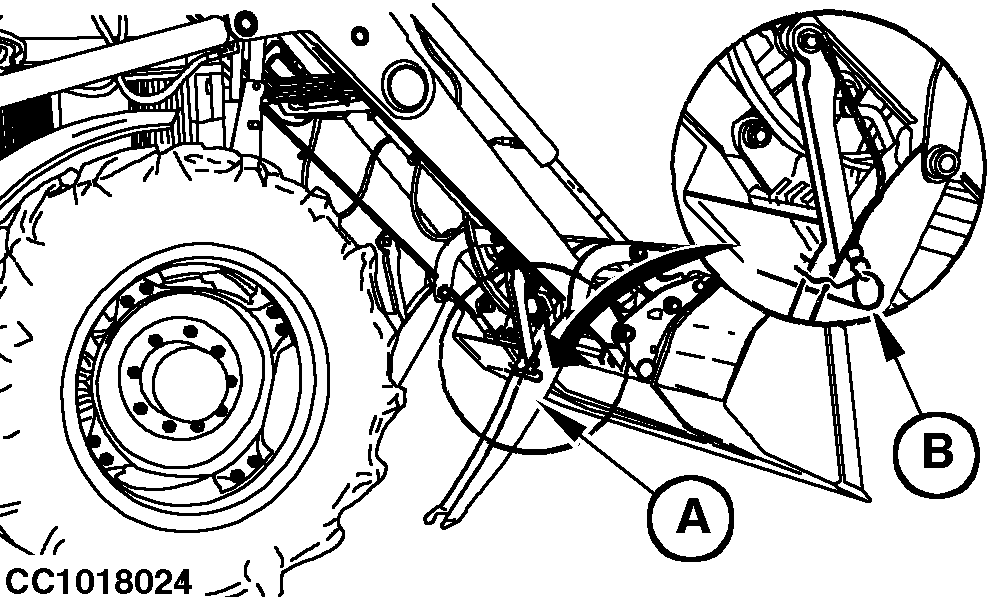
6.
Unlock right-hand mounting pin (A) and pull it out.
Store it in the provided support (B).
|
|

OUCC006,00009E8 -19-14AUG03-6/12 |
|
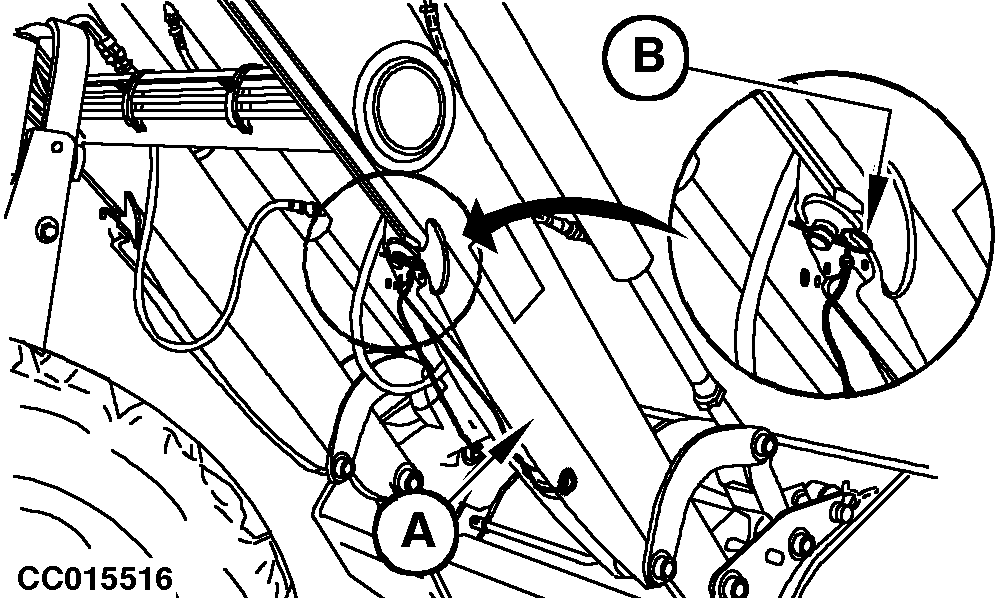
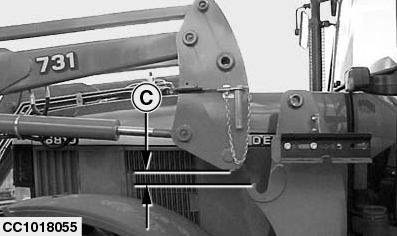
7.
Start engine, place transmission in NEUTRAL, release handbrake.
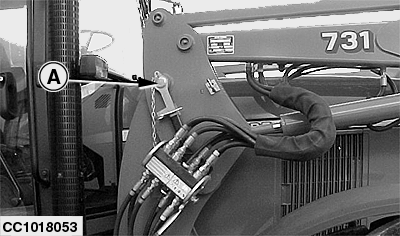
8. Extend lift cylinders until bushings (A) are ahead of bushings (B). 9. Slowly roll bucket back until loader is lifted (C) 100 mm (4 in.) out of mounting frame hooks. NOTE: Move tractor as needed to keep hoses loose. If the tractor is equipped with front fenders, sufficient clearance must be maintained between bottom of mast and top of fenders to clear tractor with the loader. 10. Engage parking lock, apply handbrake, shut off engine.
|
|
OUCC006,00009E8 -19-14AUG03-7/12 |
|
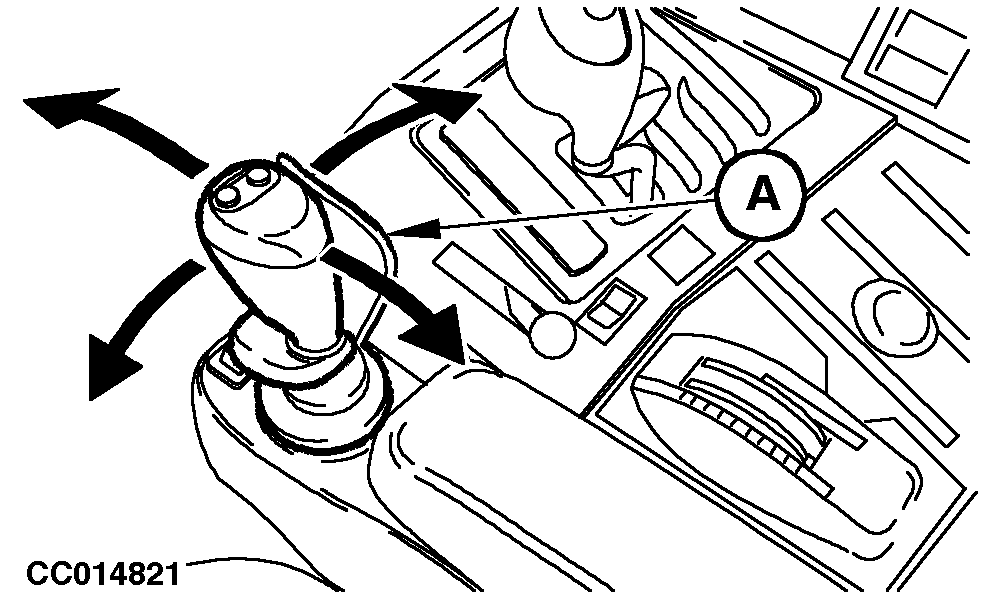
11.
Relieve hydraulic pressure.
a. Tractors with armrest-integrated multi-function lever Turn key switch on, switch on the lever and move lever forward and back, side to side. NOTE: Interlock switch actuator (A) prevents accidental actuation of the multi-function lever. The lever can be operated only when the actuator (A) is open (the operator's hand must hold it open). See your tractor operator's manual for more information. |
|
OUCC006,00009E8 -19-14AUG03-8/12 |
|
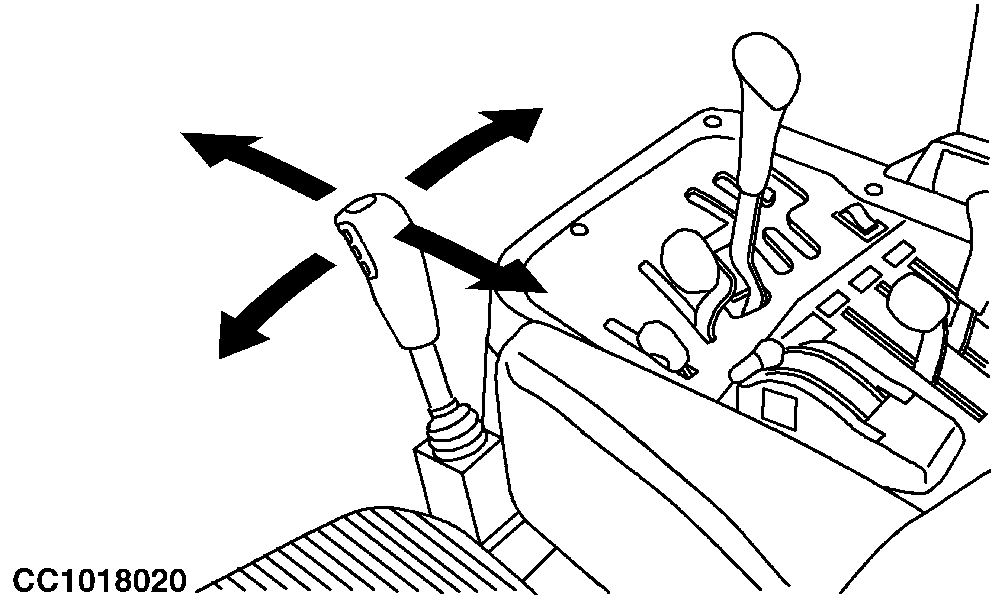
b. Tractors with multi-function lever: Move lever forward and back, side to side. |
|

OUCC006,00009E8 -19-14AUG03-9/12 |
|
c. Tractors operating loader from SCV: Move levers forward and back. 12. Remove key. |
|
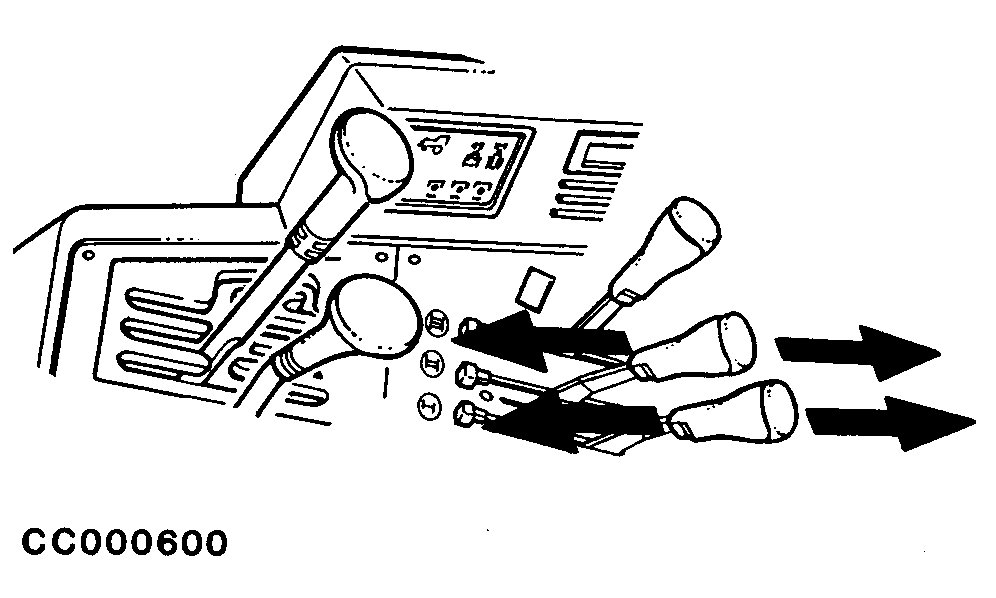
OUCC006,00009E8 -19-14AUG03-10/12 |
|
13.
Disconnect hydraulics and electrics.
a. Loader with individual couplers: Disconnect hydraulic couplers and electrical harness if equipped. Place caps on hose ends and couplers, then store hoses on loader. |
|
OUCC006,00009E8 -19-14AUG03-11/12 |
|
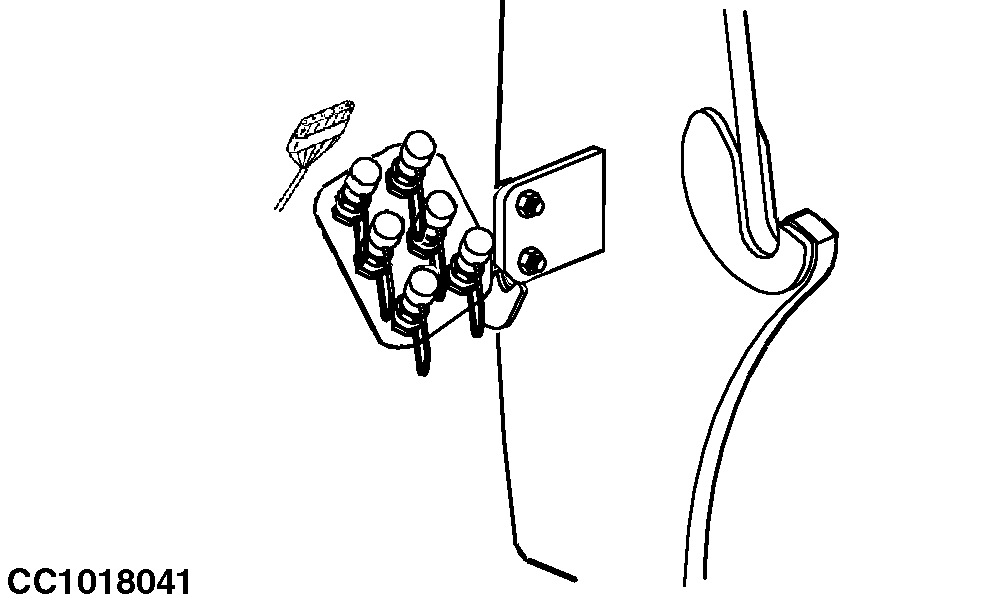
b. Loader with multi-coupler: Push on button (A) and simultaneously pull up lock cam lever (B) so that top case (E) is disconnected from base (C). Store hoses and top case (E) on loader as shown. Close cover (D) to protect base (C). c. Place transmission in reverse and move tractor slowly away from loader. |
|

OUCC006,00009E8 -19-14AUG03-12/12 |