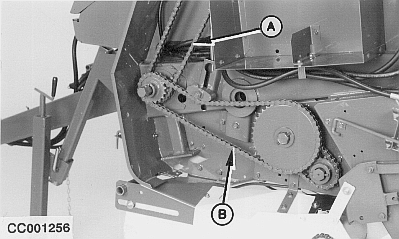
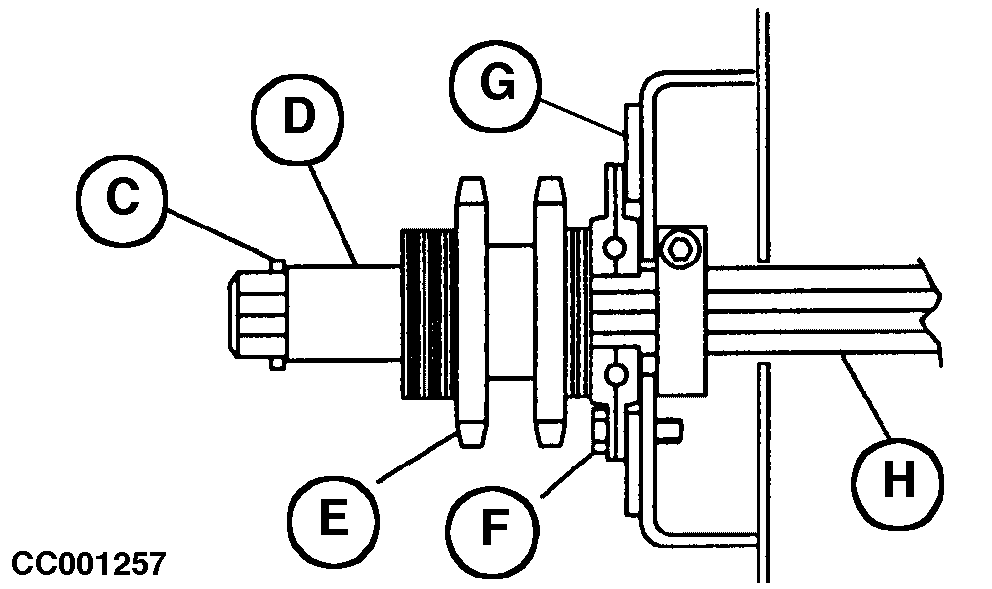
Setting the Baler for 1000 rpm PTO Operation (Baler Without Precutter Device)IMPORTANT: All balers equipped with a slip clutch and with cam-type cut out clutch can be driven at 1000 rpm PTO rated speed after having reversed the main gear case position. Do not set the baler for 1000 rpm operation if it is equipped with shear bolt hook-up. Failure to do so will result in baler damage as the machine will be no longer overload protected. Proceed as follows to switch gear case from 540 rpm to 1000 rpm position: Remove Drive ShaftRemove the tongue shield. Disconnect hook-up from gear case input shaft. Remove connector links from main drive chain (A) and lower drive roll chain (B). Remove cotter pin (C), then bushing (D), washers and sprocket (E). NOTE: Record place and number of washers behind sprocket (E). Remove three cap screws (F) from plate (G) and remove shaft (H). |
|
OUCC006,0000C82 -19-15NOV04-1/6 |
|
Reverse Gear Case
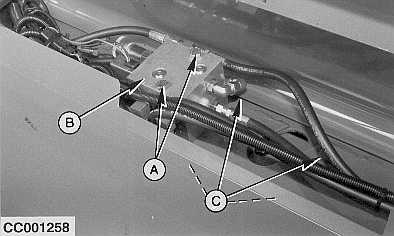
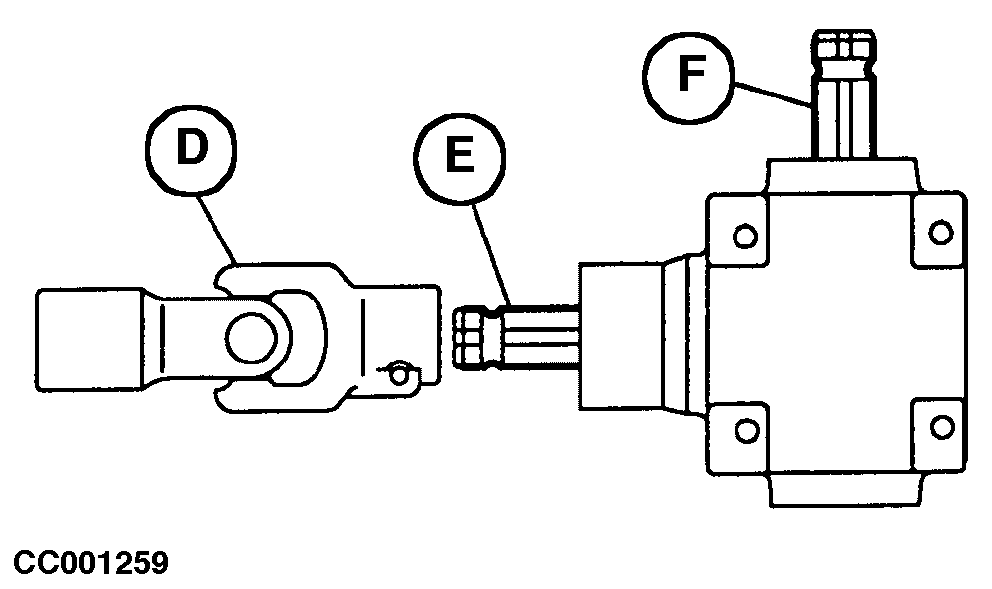
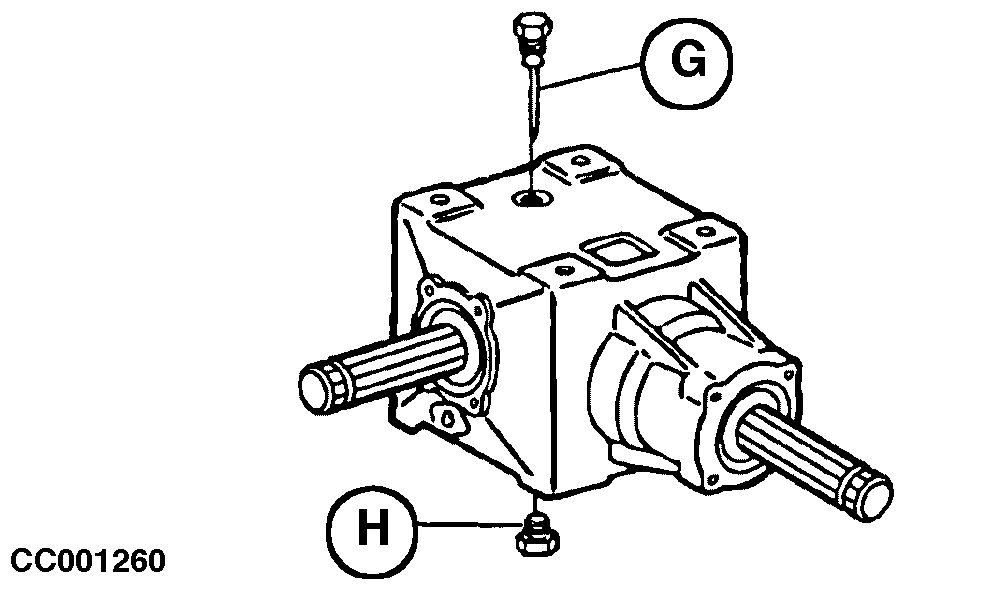
Remove two cap screws (A) from density valve (B). Rotate density valve and remove four cap screws (C) securing gear case, then remove gear case. Remove universal joint (D) from output shaft (E) and install it onto input shaft (F). Remove dipstick (G) and drain plug (H). Invert gear case and insert dipstick (G) into drain plug location and insert drain plug into dipstick location.
|
|
OUCC006,0000C82 -19-15NOV04-2/6 |
|
Reset Stop Clamp Position
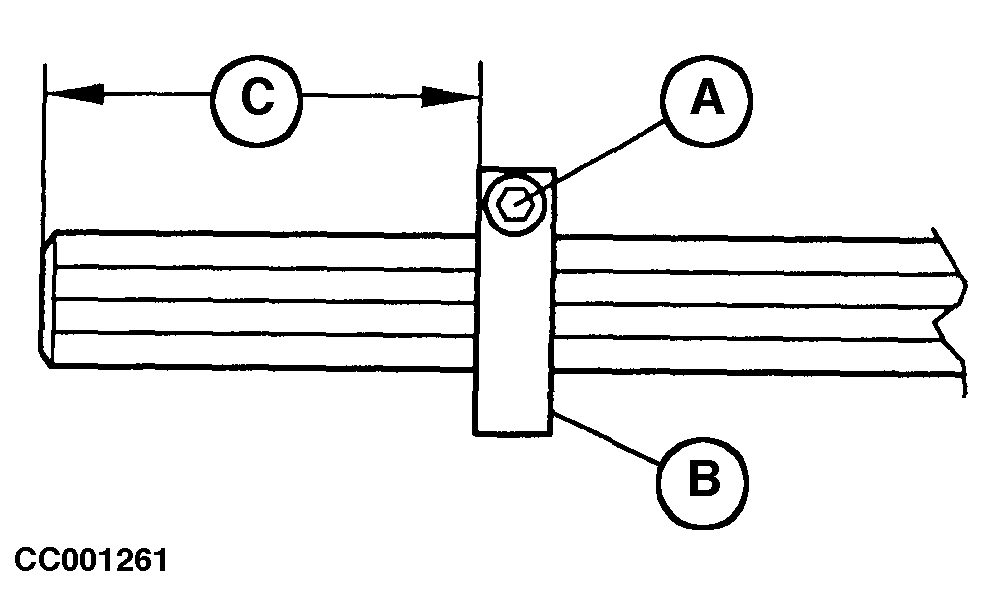
Loosen stop clamp fixing screw (A), then slide stop clamp (B) until specified dimension (C) is achieved. Tighten screw (A). NOTE: If the baler needs to be driven at 540 rpm once again, specified dimension (C) is given as a reminder for 540 rpm clamp position.
|
|
OUCC006,0000C82 -19-15NOV04-3/6 |
|
Install Drive Shaft
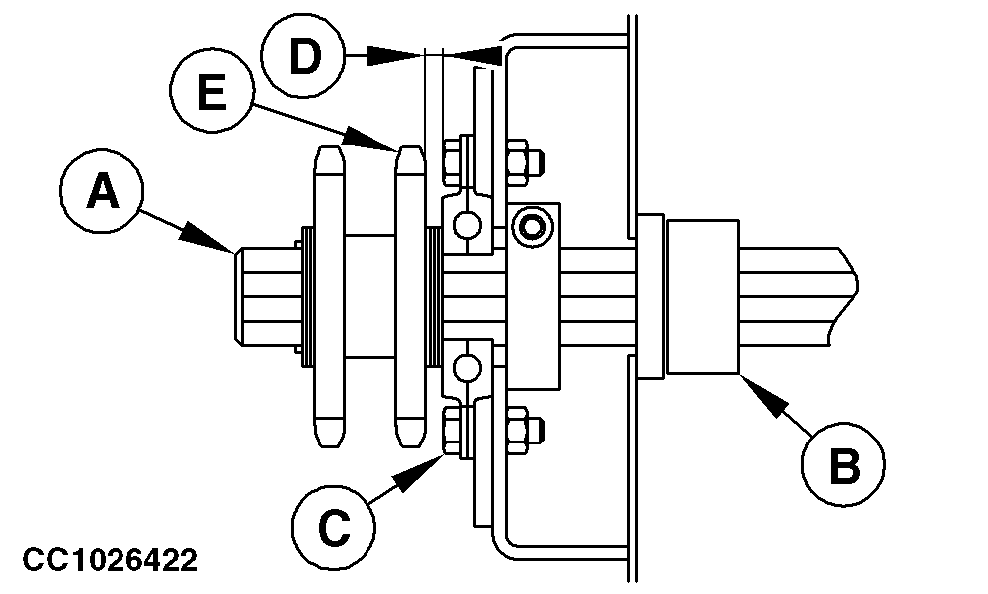
Install plate, washers, sprocket and cotter pin on shaft (A) as shown. Install the not used bushing (B) and washers on the opposite side of the shaft (A). Secure the assembly on baler frame with three cap screws (C). Measure clearance (D) between inner surface of sprocket and head of cap screw (C). Clearance should be within specification. Specification
|
|
OUCC006,0000C82 -19-15NOV04-4/6 |
|
Reinstall Gear Case
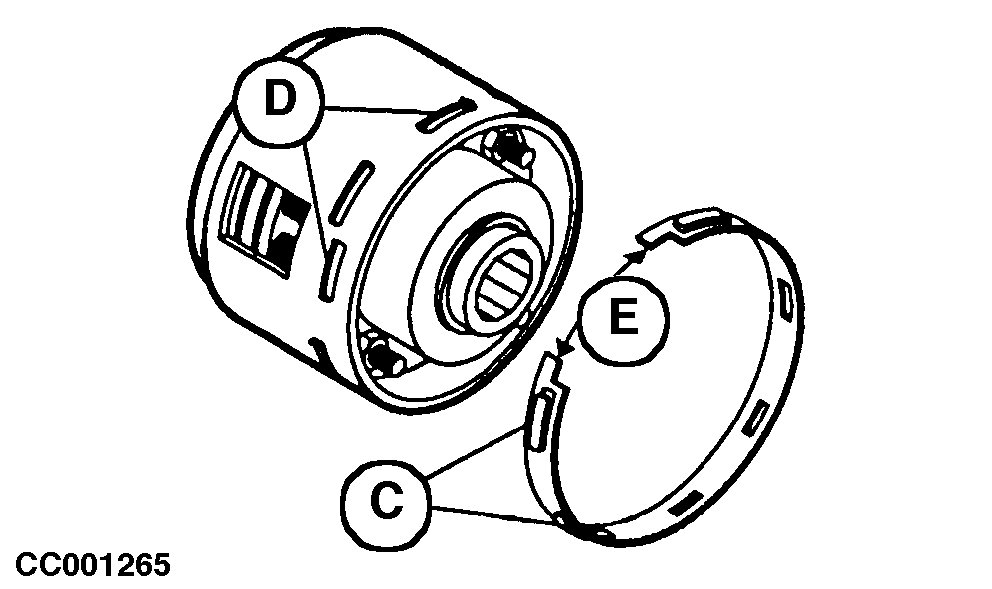
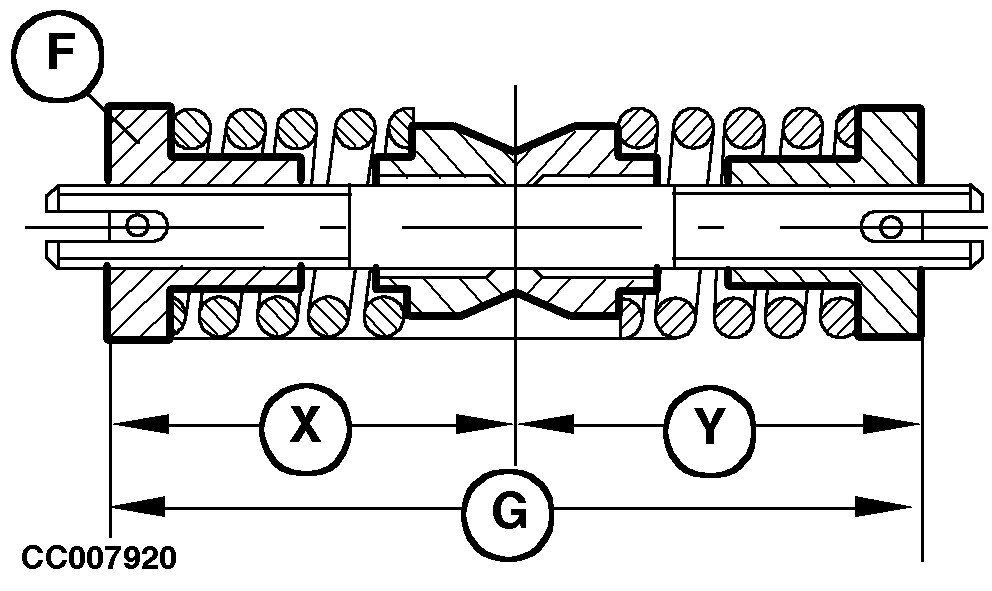
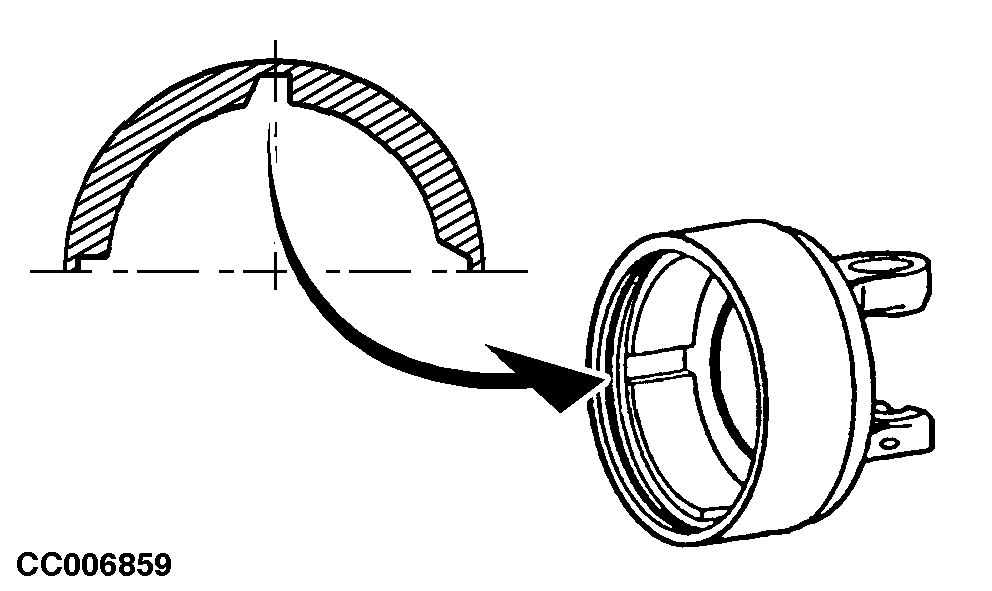
Slide gear case universal joint (A) onto drive shaft (B). Secure gear case with four cap screws. Tighten these screws to 120 N·m (88.5 lb-ft). Secure bale density valve with two cap screws. Check oil level in gear case. Refill with oil specified in "Gear Oil" in "Lubrication and Maintenance" section, if necessary. Reset slip clutch for 1000 rpm operation by inserting lugs (C) in the first row of slots (D), with notches (E) positioned towards outside of slip clutch. Reset cam-type cut out clutch for 1000 rpm operation by adjusting length (G) of shift cam assembly (F) to 135 mm (5.31 in.). IMPORTANT: Take care that distances (X) and (Y) remain equal after adjustment has been performed. Initial length (G) adjustment for 540 rpm is 128 mm (5.04 in.). Note direction of clutch rotation when reassembling.
|
|
OUCC006,0000C82 -19-15NOV04-5/6 |
|
Apply 1000 rpm Decal
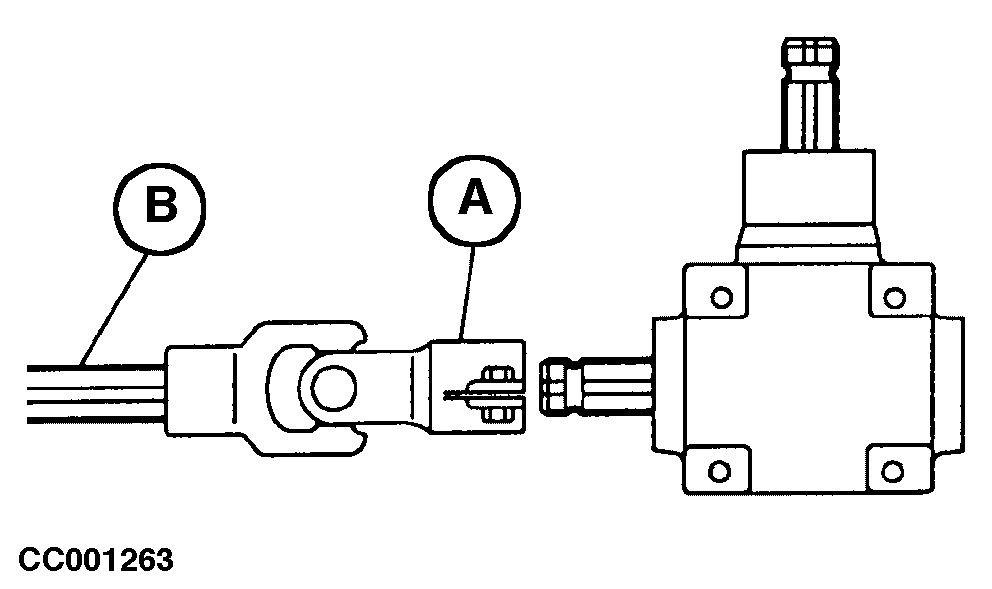
Reinstall hook-up on gear case input shaft. Reinstall tongue shield and apply the new 1000 rpm decals on it as shown. |
|
OUCC006,0000C82 -19-15NOV04-6/6 |