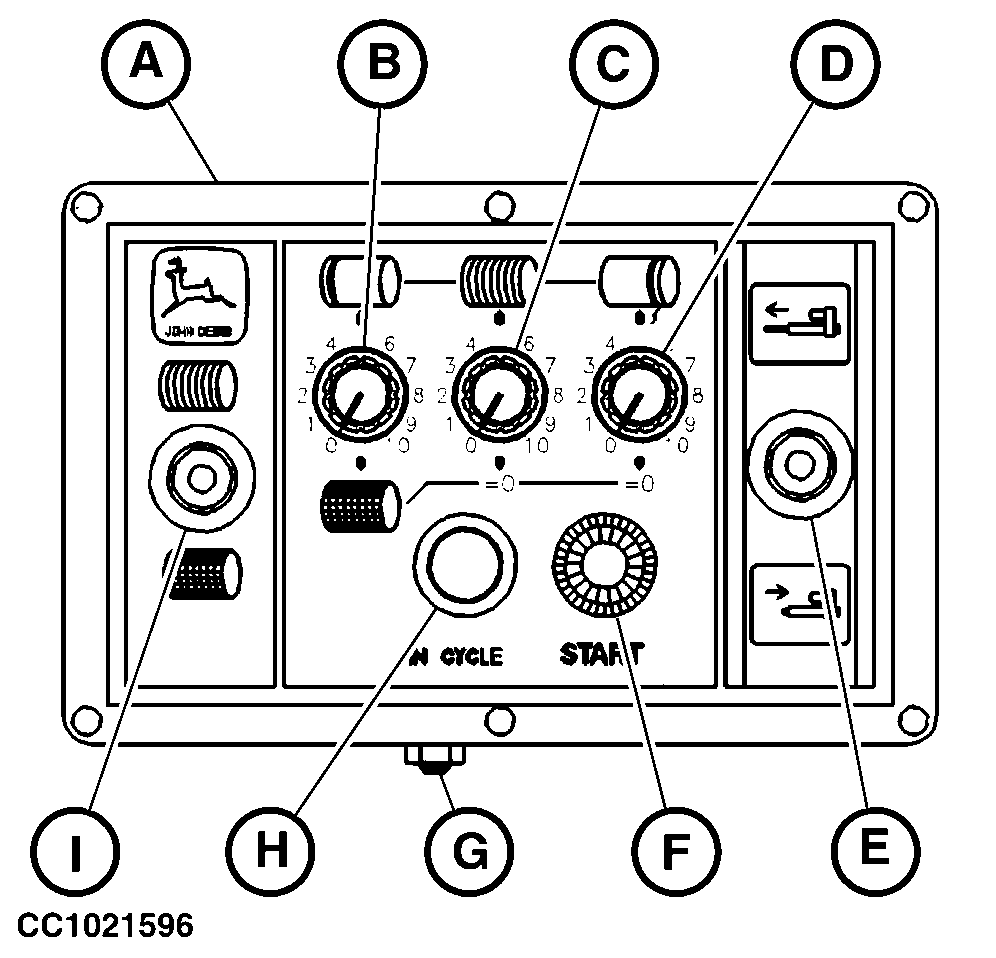
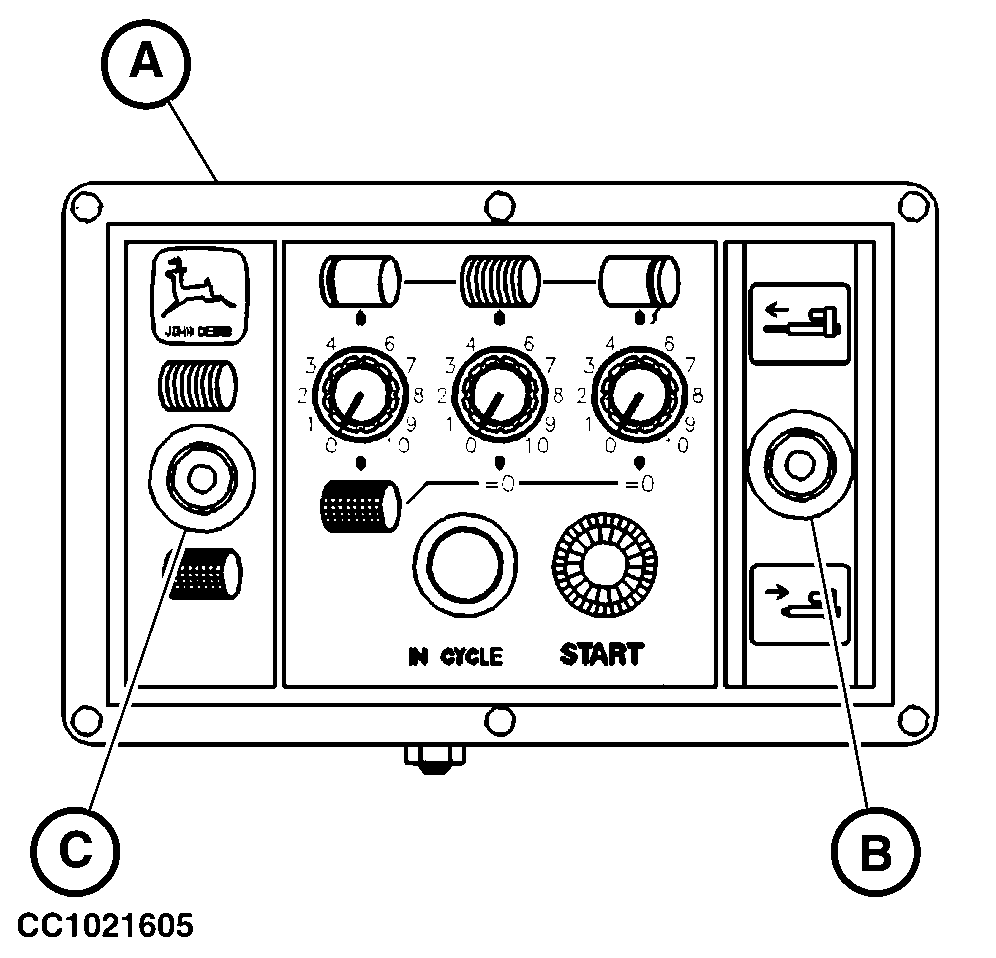
Operating ELC Monitor in Twine Tying ModeMove switch "I" to "Twine" symbol to select twine tying mode. The ELC Plus Monitor allows an automatic or manual twine tying. Automatic Twine Tying1. With single arm In programmed twine tying mode, the twine arm is extended from the home position to the left-hand side and stops. The twine is caught and applied on the left-hand side of bale. The stop time of twine arm at tying start is adjustable with potentiometer (B). Then the twine arm is retracted to the right-hand side and twine is applied across the bale. The tying time across the bale is adjustable with potentiometer (C). The twine arm is retracted up to the re-extension point. The re-extension point is adjustable with the screw (G). At the re-extension point, the twine arm is extended again towards the center of bale then it is completely retracted to cut the twine. The twine arm re-extension time is adjustable with potentiometer (D).
|
|
OUCC006,0000721 -19-17JUL02-1/5 |
|
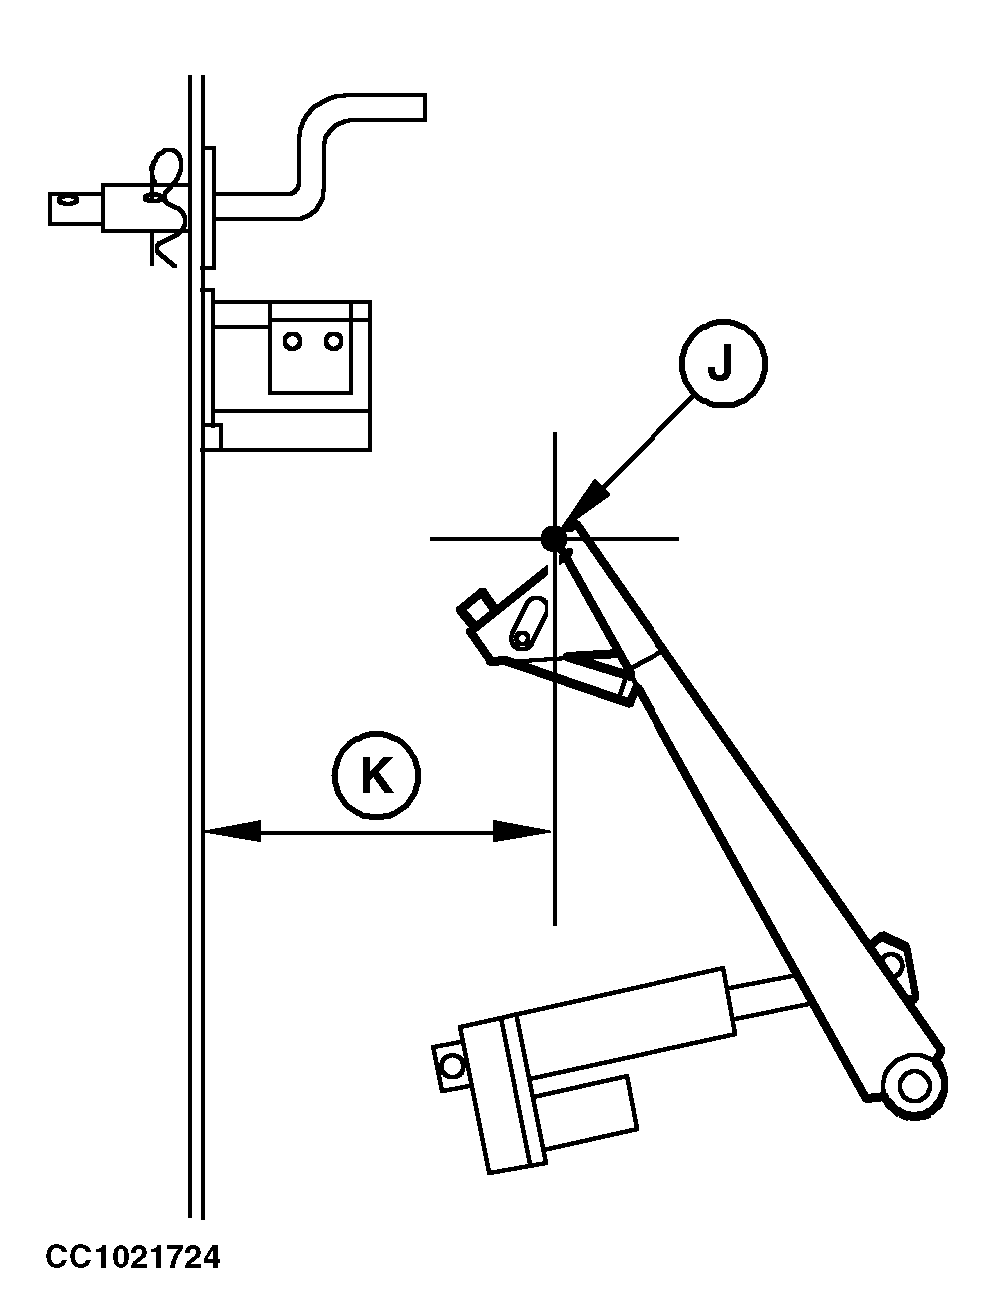
Proceed as follows to program the twine tying cycle: a. Determine the twine arm re-extension point (J) using adjusting screw (G). Turn screw (G) clockwise to decrease distance (K) or counterclockwise to increase distance (K) of re-extension point (J) from the side of the bale chamber. NOTE: The re-extension allows to apply more twine coils at the end of bale tying and help to avoid twine unrolling. As a basic adjustment, re-extension point should be located 120 mm (4.72 in.) from the side of the bale chamber. Adjust twine guide or twine clamper when adjusting re-extension point. See "Adjusting Twine Guide (Single Arm Tying)" in "Operating the Baler - General Purposes" Section.
|
|
OUCC006,0000721 -19-17JUL02-2/5 |
|
b. Select tying time sequence by potentiometers (B)-(C)-(D) to determine the twine distribution across the bale. Turn potentiometer (B) clockwise to adjust the stop time of twine arm at tying start from 0.1 to 10 seconds. Turn potentiometer (C) clockwise to adjust the tying time across the bale during twine arm retraction from 8 to 70 seconds. Turn potentiometer (D) clockwise to adjust the twine arm re-extension time from 0 to 5 seconds. Setting of potentiometer (D) to the position "0" will result in no re-extension of the twine arm. In automatic twine tying mode, the tying cycle starts automatically when the adjusted bale diameter is reached. NOTE: "START" button (F) allows to start the automatic tying when the bale has not reached the desired bale diameter. See "Starting Manually an Automatic Tying" in this section. Manual Control switch (E) can be used to interrupt the programmed mode at any time. The manual mode is then ready to be used. See "Tying a Bale Manually" in this section. |
|
OUCC006,0000721 -19-17JUL02-3/5 |
2.
With double arm
NOTE: "START" button (F) allows to start the automatic tying when the bale has not reached the desired bale diameter. See "Starting Manually an Automatic Tying" in this section. Manual Control switch (E) can be used to interrupt the programmed mode at any time. The manual mode is then ready to be used. See "Tying a Bale Manually" in this section. |
|
OUCC006,0000721 -19-17JUL02-4/5 |
|
Manual Twine Tying
Use the manual control switch (B) to distribute the twine across the bale. See "Tying a Bale Manually" in this section. IMPORTANT: Monitor is protected by a circuit breaker. If control switch (B) is actuated with the twine arm actuator fully extended or fully retracted, circuit breaker will trip. In this case, wait a few seconds for the breaker to cool down and then reset by switching monitor OFF and ON again.
|
|
OUCC006,0000721 -19-17JUL02-5/5 |