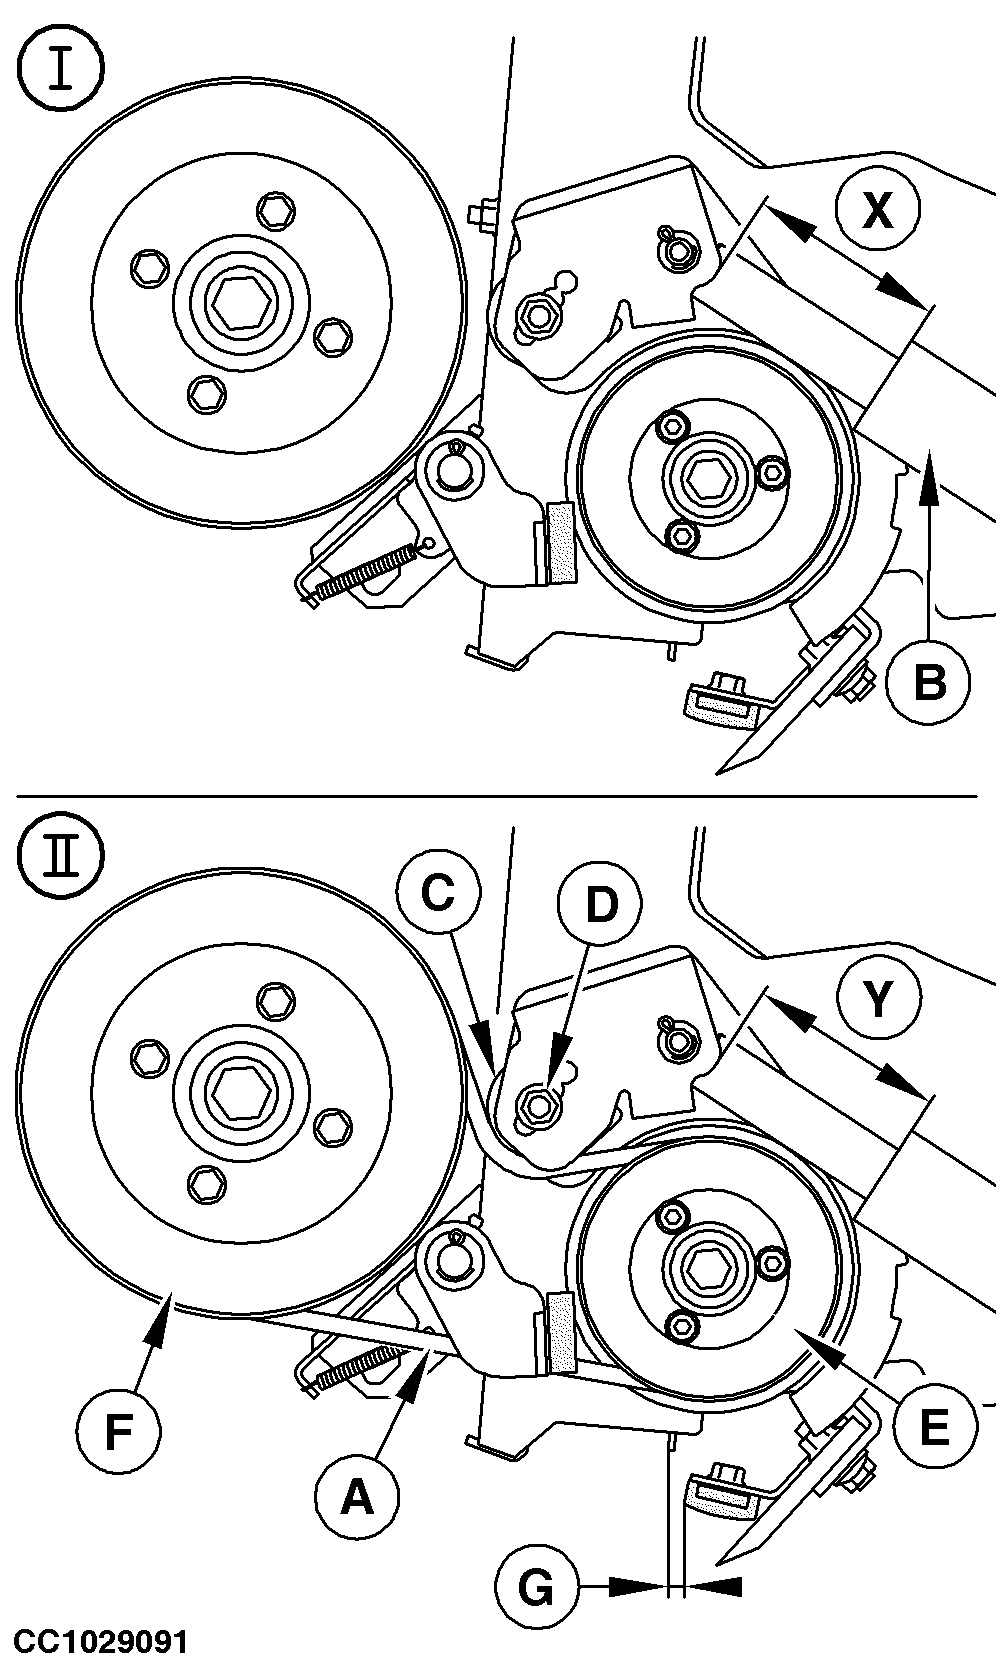
Adjusting Net Tying Drive Belt Tension (Baler with CoverEdge Net Tying Device)IMPORTANT: Before adjusting drive belt tension, be sure that net actuator position is correctly adjusted. See "Adjusting Net Actuator Position" in this section. 1. Check net actuator (B) stroke:a. Remove belt (A). See "Removing and Installing Rubber Roll Drive Belt" in this section. b. Fully extend net actuator (B) using monitor. c. Measure and record distance (X). d. Retract net actuator (B) and reinstall belt (A). e. Fully extend net actuator (B). f. Measure and record distance (Y). g. Calculate (X) - (Y).
2. Adjust roller (C): a. Retract net actuator (B). b. Remove fixing screw (D). c. Move roller (C) toward left. d. Reinstall and tighten fixing screw (D). e. Fully extend net actuator (B). f. Check net actuator stroke again; go to step 1. 3. Check net actuator (B) position: a. Check that there is no contact between roller (C) and main drive sheave (F). b. Check that there is no contact between net actuator (B) and rubber roll drive sheave (E). |
|
OUCC006,0001234 -19-31JAN07-1/2 |
|
4.
Check that gap (G) is within specification:
Specification
If necessary, adjust roller (C) as follow: a. Retract net actuator (B). b. Remove fixing screw (D). c. Move roller (C) toward right. d. Reinstall and tighten fixing screw (D). e. Fully extend net actuator (B). f. Check net actuator stroke again, go to step 1. |
OUCC006,0001234 -19-31JAN07-2/2 |