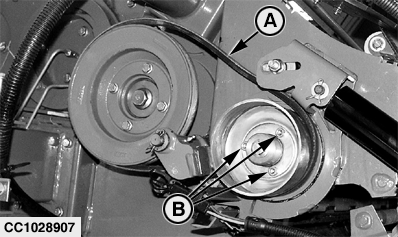
Adjusting Net Tying Stretch (Baler with CoverEdge™ Net Tying Device)To adjust net tying stretch, proceed as follows: 1. Remove belt (A) and loosen cap screws (B).
|
|
|
CoverEdge is a trademark of Deere & Company | OUCC006,00012F7 -19-26SEP07-1/4 |
|
2.
Release net feed roll brake.
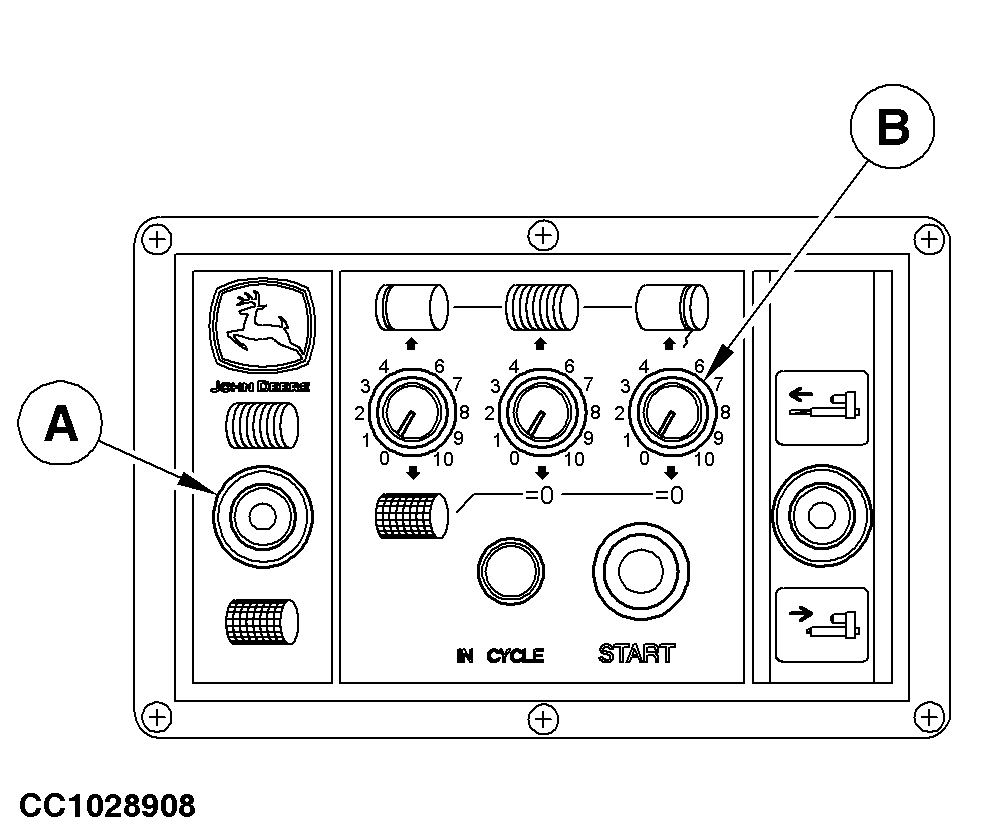
a. With BaleTrak ™ monitor: Extend the net actuator in middle position. Turn off monitor. b. With ELC Plus monitor: Move switch (A) in Net tying position. Turn actuator positioning potentiometer (B) on 10 and press start button to place automatically the net actuator in middle position. Move switch (A) to OFF position.
|
|
|
BaleTrak is a trademark of Deere & Company | OUCC006,00012F7 -19-26SEP07-2/4 |
|
3.
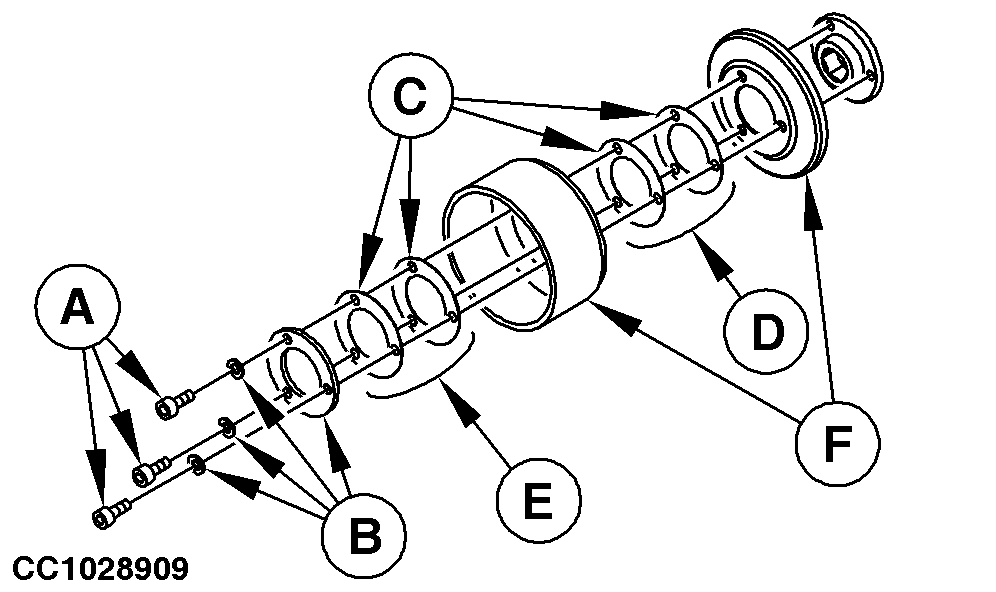
Remove cap screws (A) and washers (B).
4. Remove shims (C) and sheave (F). NOTE: During removal, record number and location of shims (C). 5. Net tying stretch depends on number of shims (C) in position (D). To increase net tying stretch, transfer shims (C) from position (D) to position (E). To decrease net tying stretch, transfer shims (C) from position (E) to position (D). NOTE: Factory setting for net tying stretch is two shims (C) in position (D). Net tying stretch depends on net roll specifications and crop pressed. Once the stretch is adjusted: a. Reinstall sheave (F) with shims (C). b. Reinstall cap screws (A) and washers (B). c. Screw in cap screws (A) so that there is no gap in the assembly. |
|
OUCC006,00012F7 -19-26SEP07-3/4 |
|
6.
Retract net actuator.
7. Tighten cap screws (B). 8. Reinstall belt (A).
|
|
OUCC006,00012F7 -19-26SEP07-4/4 |