Loading Net Roll (Baler with CoverEdge™ Net Tying Device)
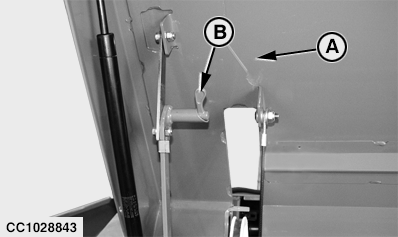
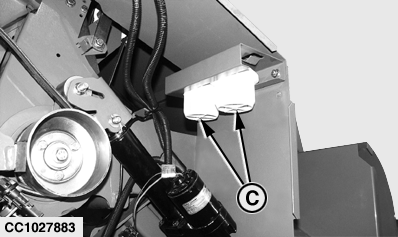
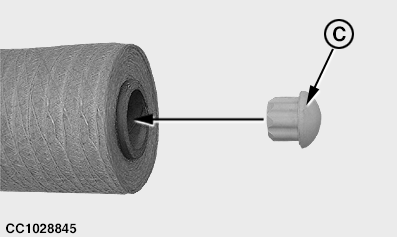
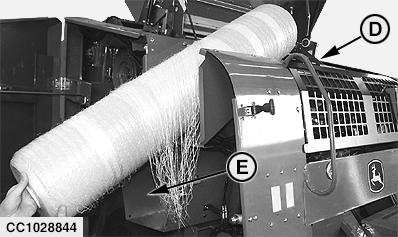
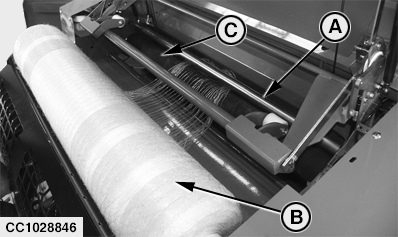
a. Fully open right door. b. Open net tying cover (A). Place safety device (B) in lock position as shown. c. Remove all package material (staples, tape, etc.) from net roll before installing. d. For standard net roll only: Remove stops (C) from their bracket and install them on each side of the net roll. NOTE: CoverEdge ™ net roll does not need stops (C). e. Slide net roll through the net compartment (D) as shown, making sure that net will be pulled from the bottom of the roll. NOTE: John Deere nets have two large colored stripes which must be toward the right-hand side of the machine. Two net rolls can be stored in the net compartment (D). Twine box compartment (E) can also be used to store a spare net roll.
|
|
 CAUTION:
Before installing net roll, disengage PTO, engage parking brake, shut off tractor engine and remove key. Wait for all moving parts to come to a standstill.
CAUTION:
Before installing net roll, disengage PTO, engage parking brake, shut off tractor engine and remove key. Wait for all moving parts to come to a standstill.
|
CoverEdge is a trademark of Deere & Company | OUCC006,0001302 -19-03OCT07-1/3 |
|
2.
Route net through feed rolls.
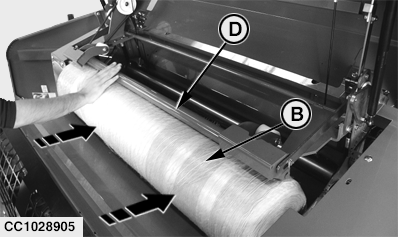
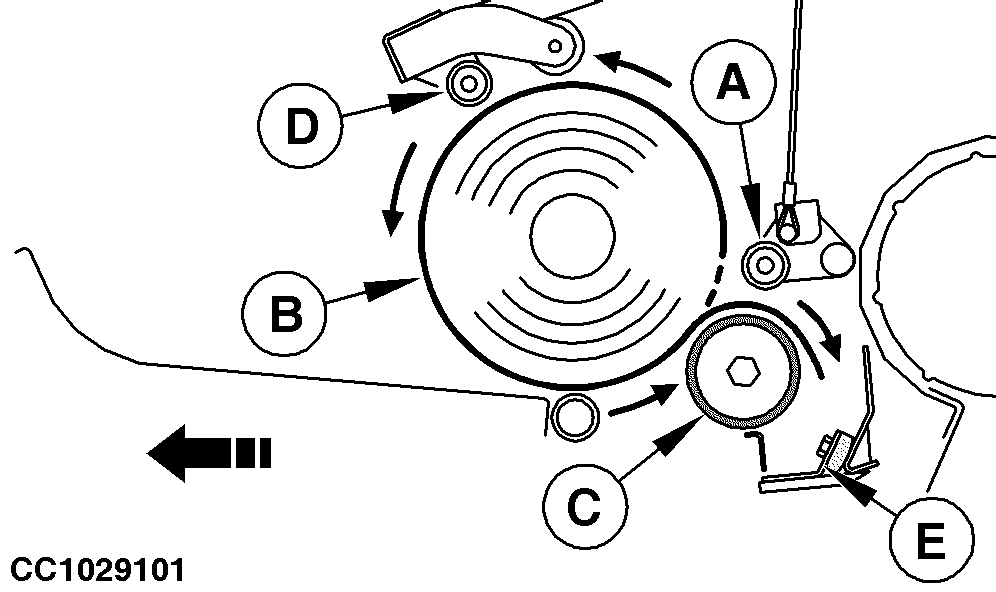
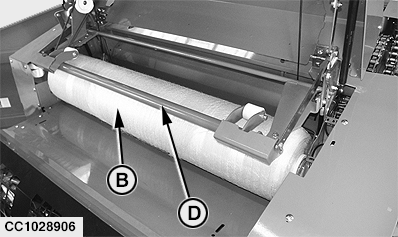
NOTE: Galvanized roll (A) is lifted all the way up when opening the net tying cover. a. Unroll net and gather the loose ends on a width of 30 to 40 cm (1 ft to 1 ft 4 in.). b. Route the net between rubber roll (C) and galvanized roll (A). IMPORTANT: Do not thread more than 20 cm (8 in.) of net between galvanized roll (A) and rubber roll (C). Never position the net material on rubber pad bracket (E). c. Push net roll (B) under press roll (D) as shown, so that it touches rubber roll (C). d. Check that press roll (D) is correctly centered on net roll (B). Check again that net is correctly positioned between galvanized roll (A) and rubber roll (C). IMPORTANT: It is advisable to take net material off feed rolls at the end of each day! This will prevent net material from incrusting in rubber roll (C), thus avoiding start-up problems. Take net material off rubber roll each time baler is used for twine tying mode.
|
|
OUCC006,0001302 -19-03OCT07-2/3 |
|
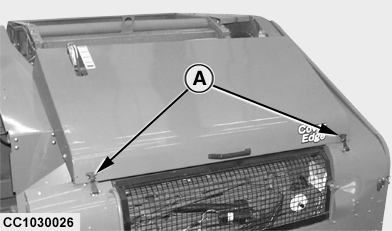
e. Place the cover safety device in unlock position. f. Close right door and net tying cover. g. Place latches (A) in lock position as shown.
|
|
OUCC006,0001302 -19-03OCT07-3/3 |