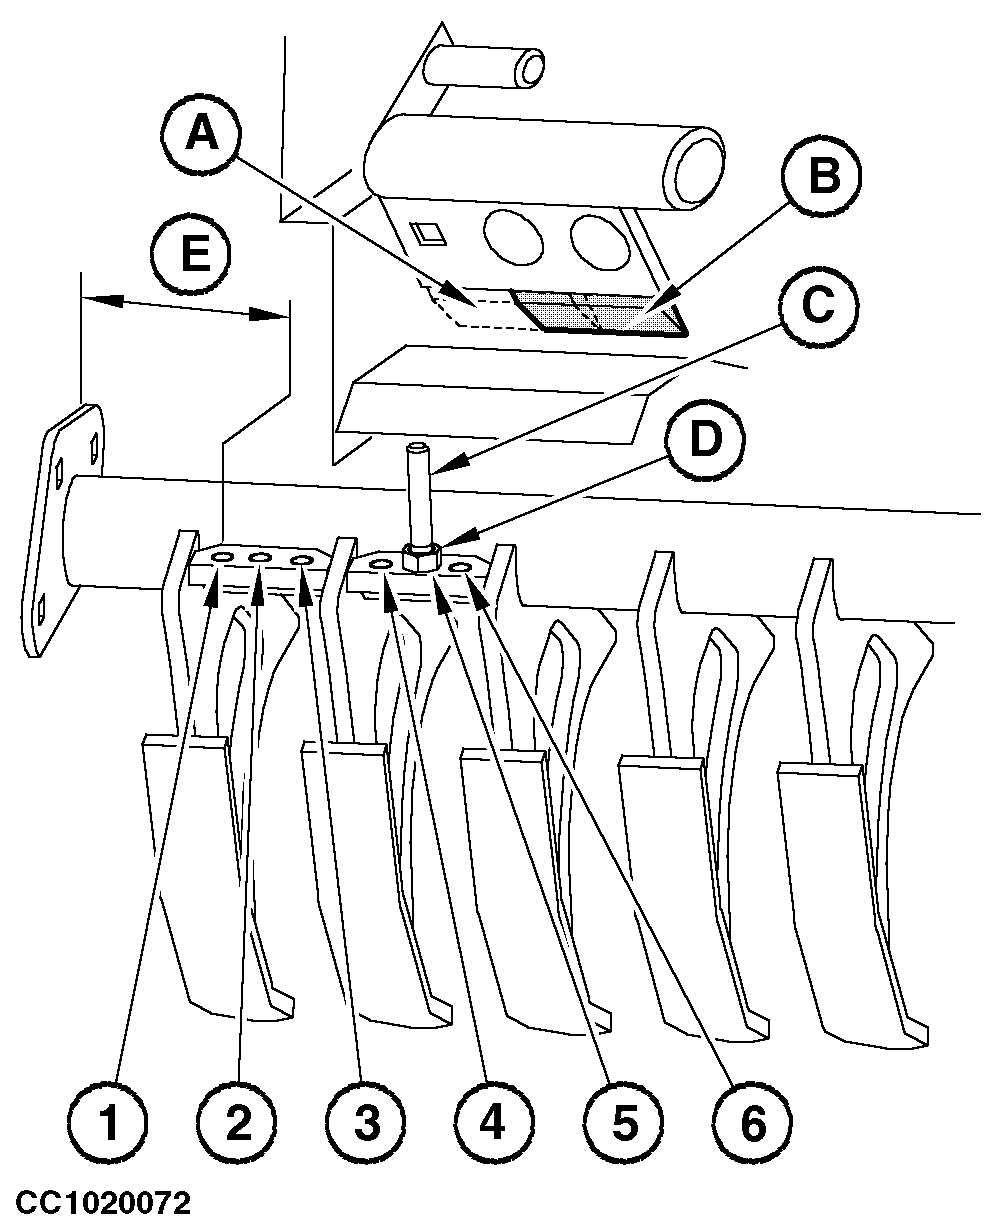
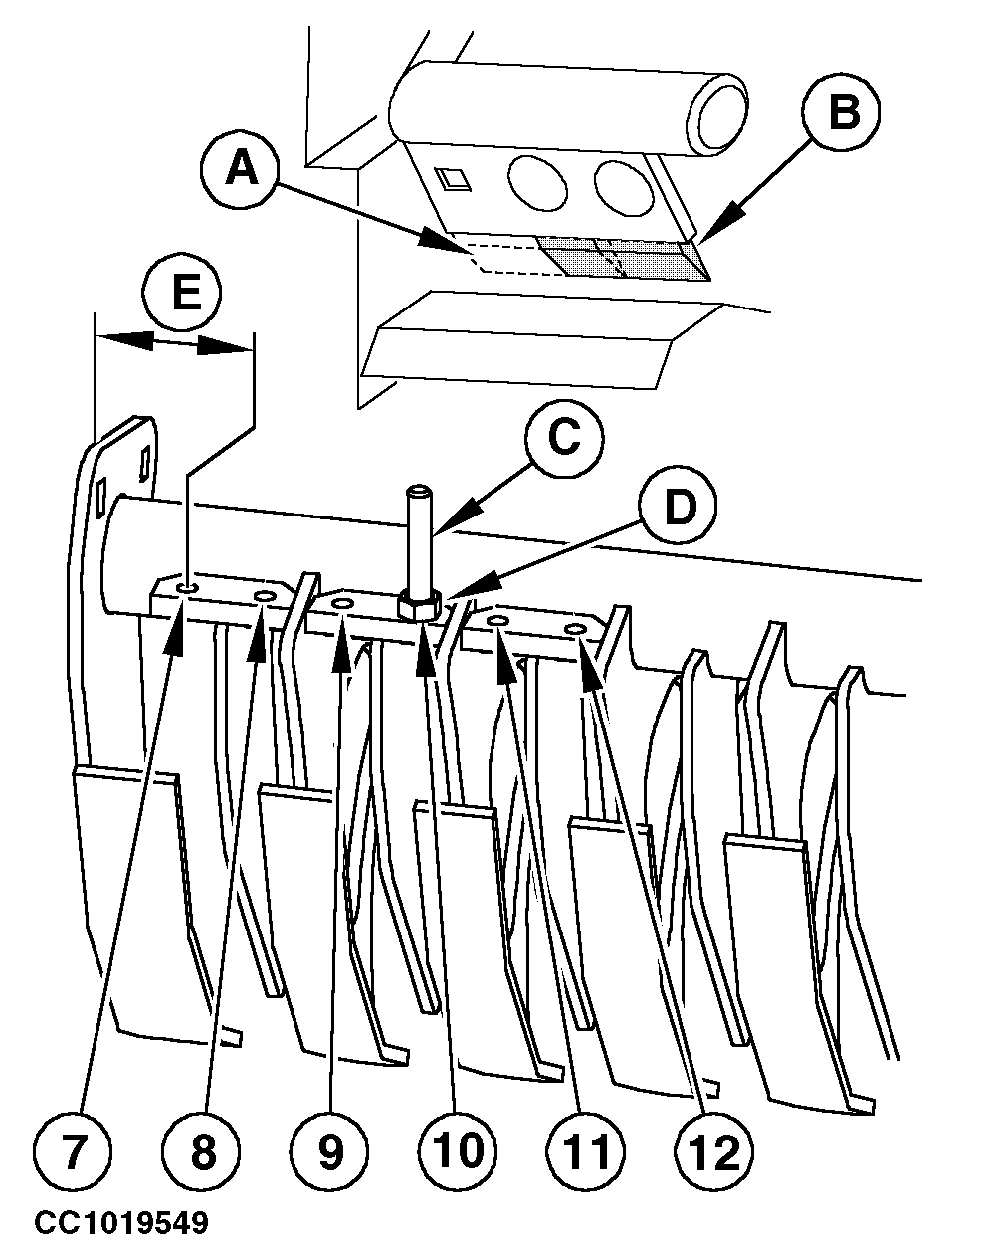
Adjusting Twine Guide (Baler with Rotary Feeder Pickup)The twine guide (C) allows the operator to adjust the distance (E) of the twine from the left end of the bale from 90 to 200 mm (3.54 to 7.87 in.) or 50 to 220 mm (1.89 to 8.66 in.) depending on pickup type. IMPORTANT: Check that the twine guide position matches the BaleTrak Control Monitor setting. See "Setting Twine Tying" in "Operating BaleTrak Monitor" section. Loosen lock nut (D). Remove twine guide (C). Install twine guide (C) in one of holes (1-2-3-4-5-6 or 7-8-9-10-11-12) and tighten lock nut (D). NOTE: When using the baler for dry, slick crops such as straw or flax, use one of holes (4-5-6 or 10-11-12). In this case, twine knife must be relocated in position (B) as shown. When using the baler in normal operating conditions, use one of holes (1-2-3 or 7-8-9) and the position (A) for twine knife.
|
|
OUCC006,0001171 -19-26SEP06-1/1 |

