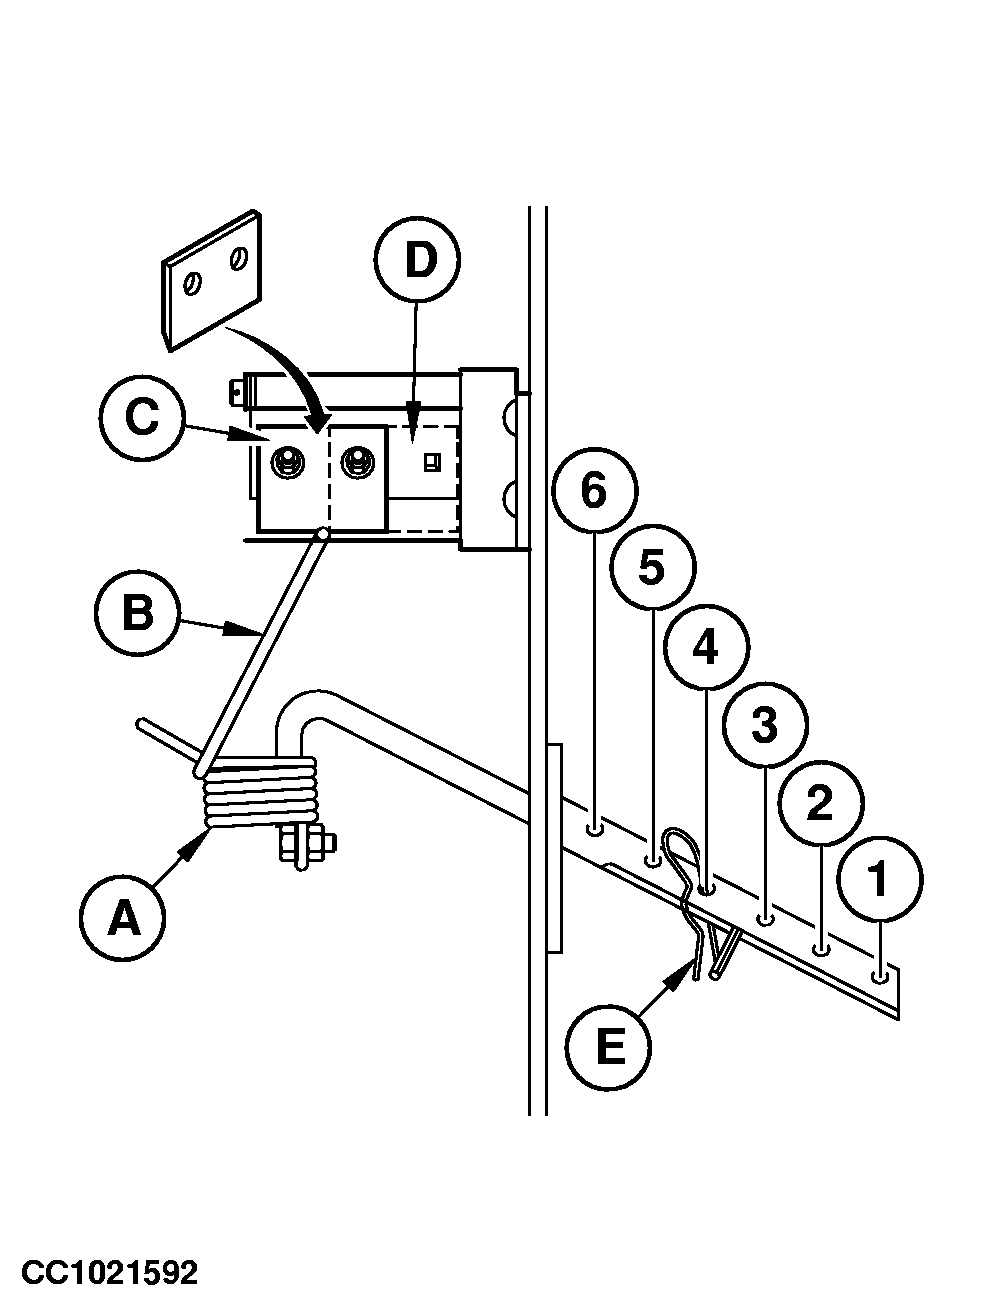
Adjusting Twine Clamper (Baler without Rotary Feeder Pickup)
The twine clamper (A) increases twine tension at the end of tying cycle.
Adjust twine clamper as follows:
-
Make a bale.
-
Stop tying cycle when the twine arm is at end tying position.
 CAUTION:
Disengage PTO, engage parking brake and/or place transmission in "PARK", shut off tractor engine and remove key. Wait for all moving parts to come to a standstill. CAUTION:
Disengage PTO, engage parking brake and/or place transmission in "PARK", shut off tractor engine and remove key. Wait for all moving parts to come to a standstill.
-
Remove spring-locking pin (E).
-
Slide twine clamper (A) and select one of the positioning holes (1 to 6) so that the twine is caught by the highest coil of the twine clamper (A) as shown.
-
Install spring-locking pin (E).
Adjust knife position as follows:
-
When using the positioning holes (1), (2) or (3), install the knife in position (D).
-
When using the positioning holes (4), (5) or (6), install the knife in position (C).
NOTE:
Material accumulation in twine clamper coils may reduce twine clamper effectiveness. For this reason, it is needed to clean twine clamper coils daily or more often. See "Daily - Clean Twine Clamper" in "Lubrication and Maintenance" section.
|
A-Twine clamper
B-Twine
C-Knife position for holes 4, 5 and 6
D-Knife position for holes 1, 2 and 3
E-Spring-locking pin
|
 CAUTION:
Disengage PTO, engage parking brake and/or place transmission in "PARK", shut off tractor engine and remove key. Wait for all moving parts to come to a standstill.
