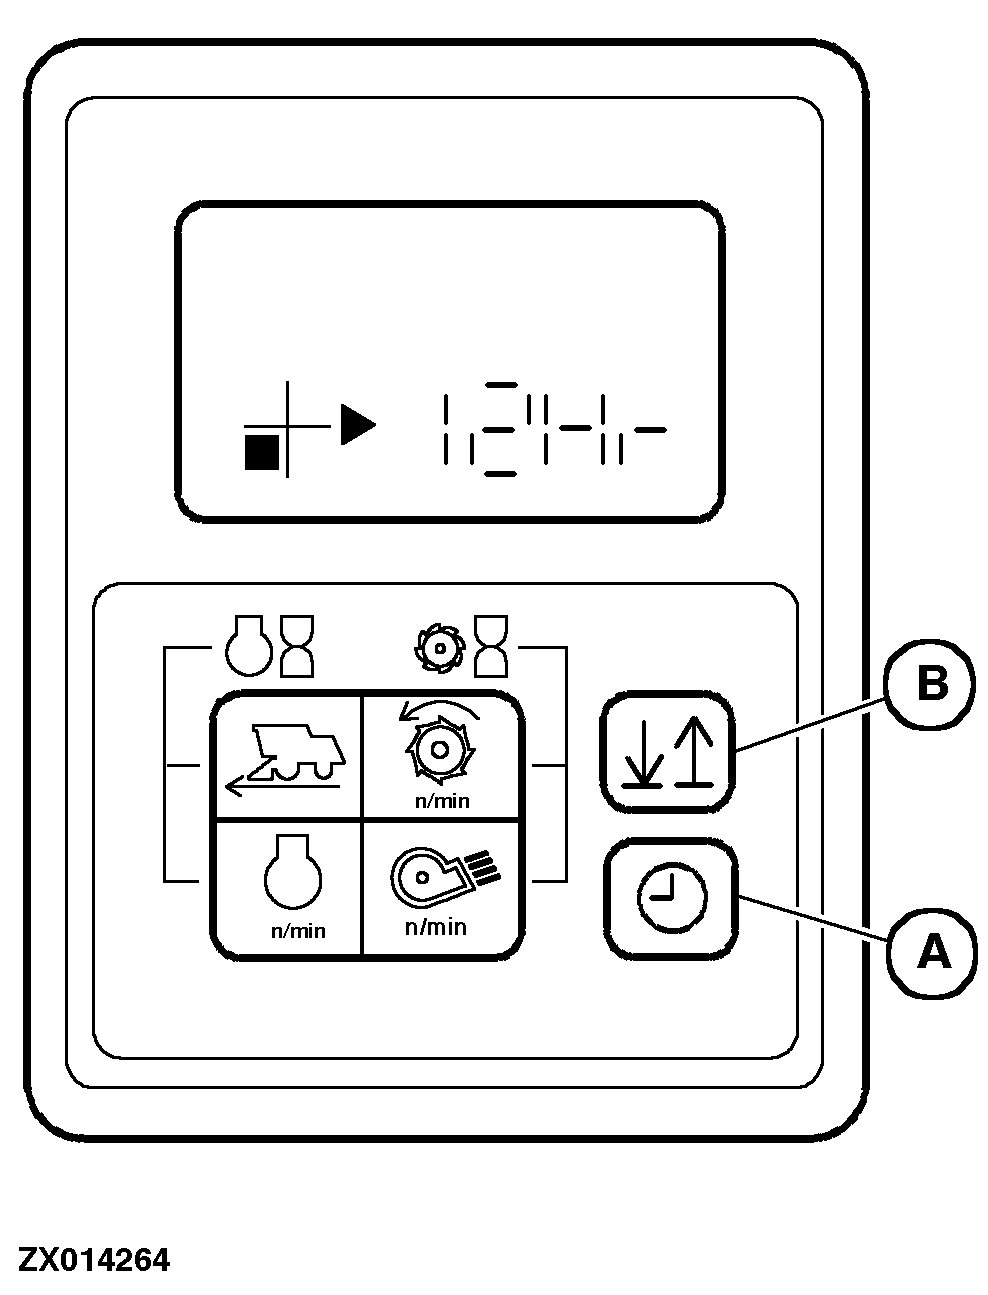
Setting and Displaying TimeMake sure the starter key is in the "OFF" position. Hold down key (A) and, while holding it, turn the starter key to Position (I). On the display "12H"will initially appear. If the key is maintained held down the display will switch between "12H" and "24H" every 3 seconds. This allows you to select either a 12 hour format or a 24 hour format. Release the key when the desired format is displayed. The clock should now be showing "12". Depress key (B) to set the hour. The longer you hold the key down, the faster the hours will advance. NOTE: You can only increase (not decrease) the hours displayed. If you go past the hour you want to display, you will have to go full circle and try to catch it on the next pass. When you get close to the desired hour, release the key and press it again so that it increments at a slower rate. Once you have the hour correctly displayed, depress and release key (A) and the display should show the minutes along with the hours. Again, as described above, depress key (B) to increase the minutes. Set the correct minutes in exactly the same way implemented for the hours. When the correct minute is displayed, depress key (A) one last time and then the clock is set. NOTE: Clock must be readjusted whenever battery has been disconnected or the battery switch has been in the "Off "position. |
|
AG,CO03622,1440 -19-26SEP03-1/1 |