Adjusting Spacing between Fertilizer Furrow Openers—Planters with More than 18 Rows
NOTE: This procedure is performed on Dual Flex Planters mounted with a Type A hitch (serial number up to 089999).
CQ202631-UN-02DEC04
CQ225361-UN-02DEC04
CQ225391-UN-02DEC04
-
Place support strut in park position.
NOTE: To facilitate this process all seeds and fertilizer must be removed from the planter. Check the contents of the seed and fertilizer boxes and, if necessary, empty them.
-
Lower the planter until the disk or hoe-type furrow openers are close to ground level.
NOTE: The disk or hoe-type furrow openers must not touch the ground.
-
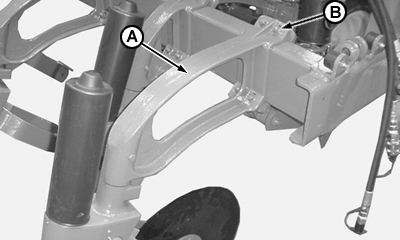
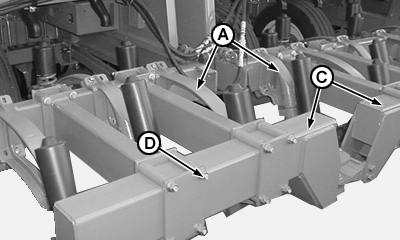
Loosen the furrow opener (A) attaching bolts (B).
NOTE: The attaching bolts of the two furrow openers (A) closest to the center of the planter do not need to be loosened.
-
Shift the furrow openers to the required spacing in the following manner:
-
Place the two furrow openers at the center of the planter, one on either chassis, in the required position by adjusting the coupling crossbeams (C).
NOTE: Position the central furrow openers by loosening all attaching bolts (D).
-
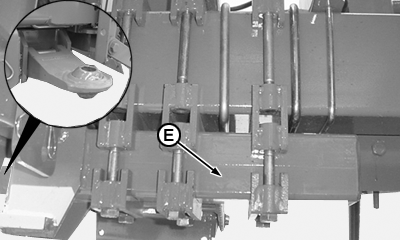
Rear coupling must be carried out in accordance with the required spacing. Adjust crossbeams by loosening all bolts that attach coupling crossbeam (E).
-
Then shift all other furrow openers to required spacing.
-
-
Retighten the furrow opener attaching bolts after adjustment. Ensure that the fertilizer tubes are aligned with the furrow openers, rearrange if necessary.
IMPORTANT: Depending on required spacing it might be necessary to remove some furrow openers. Additionally, the feed cups that are not going to be used inside the fertilizer box must be closed off, to prevent fertilizer loss.
|
ML70882,000047F-19-20090402 |