Inspection and Service of Vacuum Meter
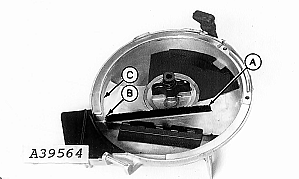
A39564-UN-02APR96
Periodically inspect the vacuum meter, checking for excessive wear and the deposit of chemical applied to the seeds.
-
Check brush (A) for gaps. If the gaps are large enough to allow one seed to pass through, replace brush.
NOTE: When replacing brush insert the narrow end into the slot (B). Push the brush until it touches the meter case (C).
-
Check seed disks for wear in following areas. Replace disks, if necessary.
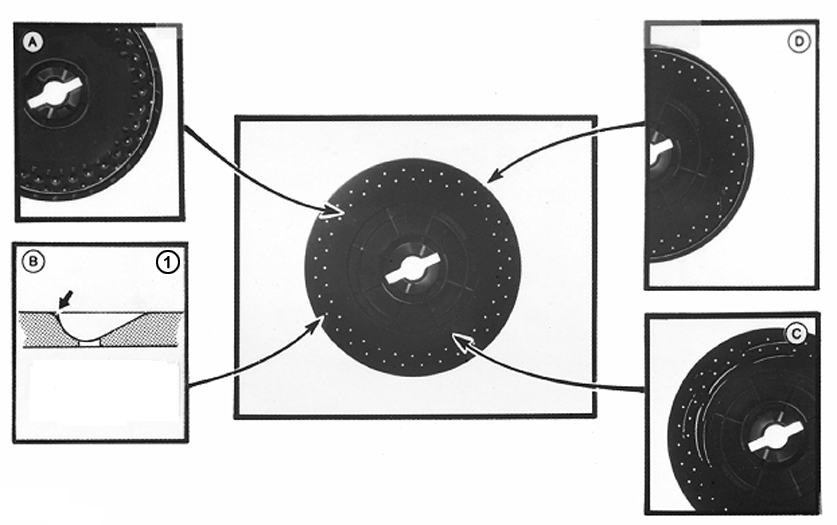
CQ191431-UN-29NOV041 - Side View of Seed Cell
A - A small amount of wear around the edge of the disk caused by the seal is acceptable. If there is wear, check if seeds can escape through the gap between the disk and seal.
The escape of seeds can be eliminated by adjusting the meter hub. (See “Meter Hub Adjustment” for more information).
B - Inspect the seed cells. Abrasion from the seed can cause wear to the rims of cells, which may cause the cell size to increase. This may result in a seed population much greater than that required when planting small sized seeds or even a seed population much lower than required when planting large seeds. replace the seed disk if the cell size has been significantly increased and field tests indicate a reduction in planting precision.
C - Small furrows or scratches are acceptable on vacuum side of seed disk (C).
D - Wear around perimeter of disk caused by the seal is acceptable up to an approximate depth of 1 mm.
NOTE: Before replacing a seed disk, check the seed population in the field to determine if the vacuum meter is precisely metering seeds. (See “Checking Seed Population” section). If the performance is satisfactory then the disk need not be replaced.
-
Replace seals (A) if the seed disks are replaced or when parts are broken or too worn down.
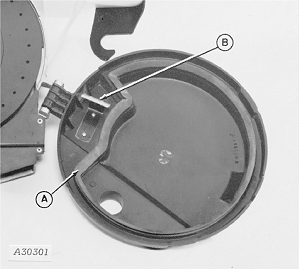
A30301-UN-13OCT88NOTE: Spray “Slip Plate” TY6431 onto the seed disks when the seals are replaced.
NOTE: New seed disks are lubricated in the factory.
-
Replace seed disk scraper (B) if rim is grooved or excessively worn.
-
Annual cleaning of the vacuum meter and seed disks is recommended. Use neutral soap and a soft bristle brush to clean.
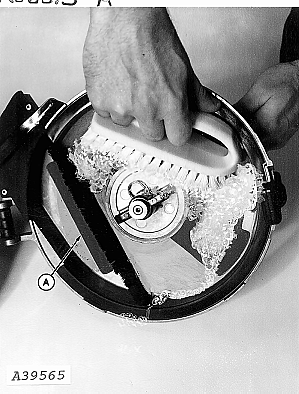
A39565-UN-02APR96NOTE: Thoroughly clean the cell area on the seed disk and remove all traces of seed treatment chemicals, which usually accumulate in the area behind the plastic insert (A) of the vacuum meter case.
IMPORTANT: Follow chemical manufacturers' instructions when handling parts that have come into contact with chemically treated seeds. Use appropriate personal protective equipment.
-
Replace the dome of the vacuum meter (A) if it is not mounted correctly (when mounted it must remain tight to meter), or if it is cracked of worn by use.
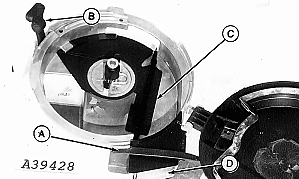
A39428-UN-29MAR96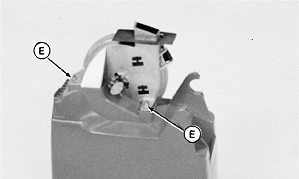
H44347-UN-14APR92A - Meter Dome
B - Rubber Clamp
C - Plastic Insert
D - Chute Cover
E - Nut
-
Inspect the rubber clamp (B). Replace if cracked or split.
-
Inspect plastic insert (C) and chute cover (D), and replace if worn.
-
Inspect flexible axle, checking that it rotates freely. Dismount and lubricate with grease if it does not rotate freely.
-
Install vacuum meter in seed box and fix in place with nuts (E).
|
ML70882,0000534-19-20050504 |