Adjusting Automatic Cutting Height Control and / or Header Lateral Tilt SystemIMPORTANT: Each time there is a change in the adjustment of the header's cutterbar inclination shoes it will be necessary to adjust the automatic height control sensor. To ensure adequate operation of the automatic cutting height control and the lateral tilt system it is necessary to adjust their components accordingly. Follow procedures below in the same sequence for adjusting. |
AG,GG05155,153 -19-05APR06-1/13 |
|
Mechanical Part Totally raise header and clean out sliding plates completely, especially in the safety coupling area of the stainless steel plates, as shown in figure. |
|
AG,GG05155,153 -19-05APR06-2/13 |
|
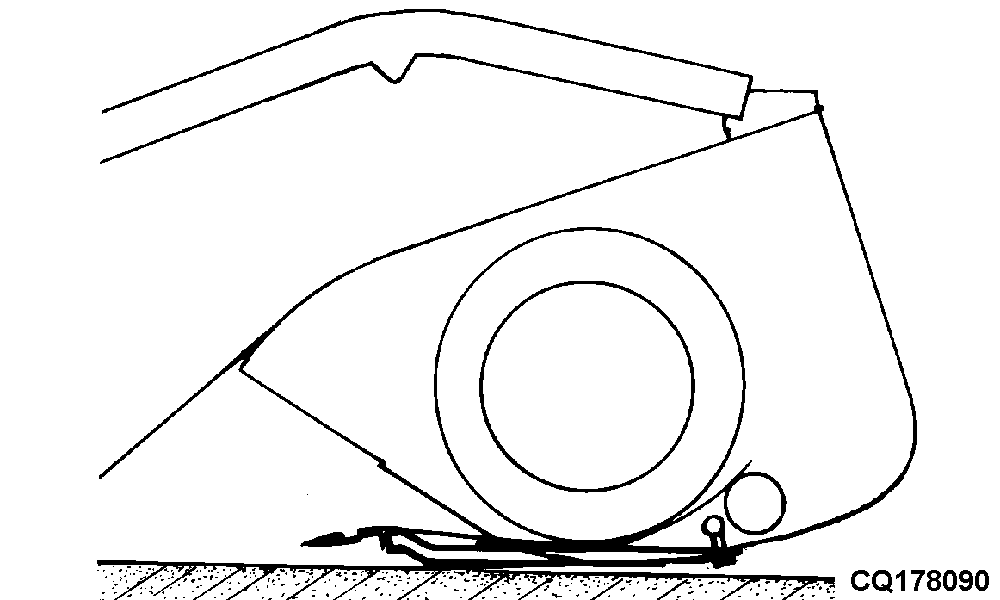
Lower header until it "touches" ground. Adjust the angle of positioning of end shoes so that they are parallel to the ground. |
|
AG,GG05155,153 -19-05APR06-3/13 |
|
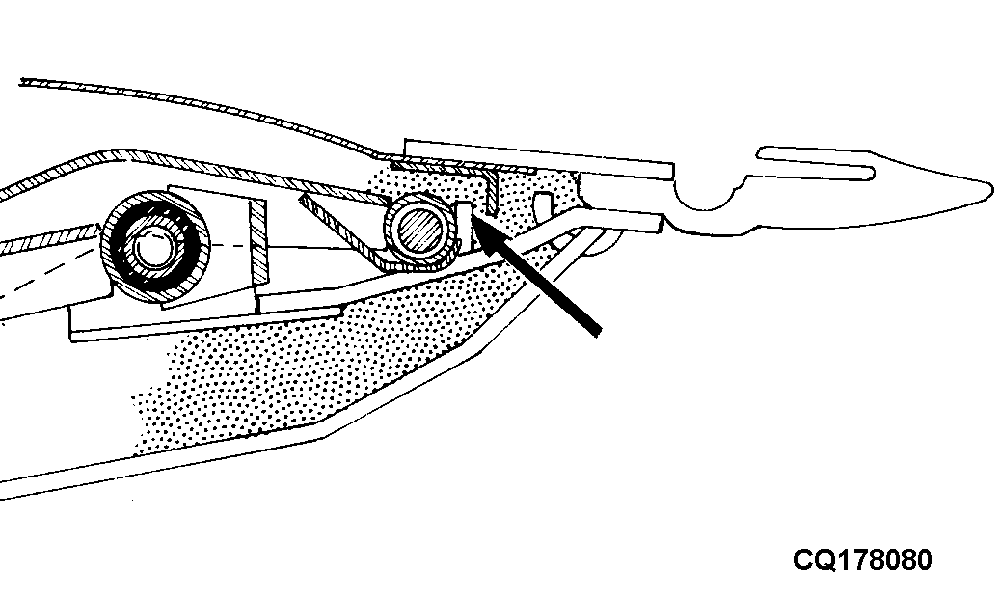
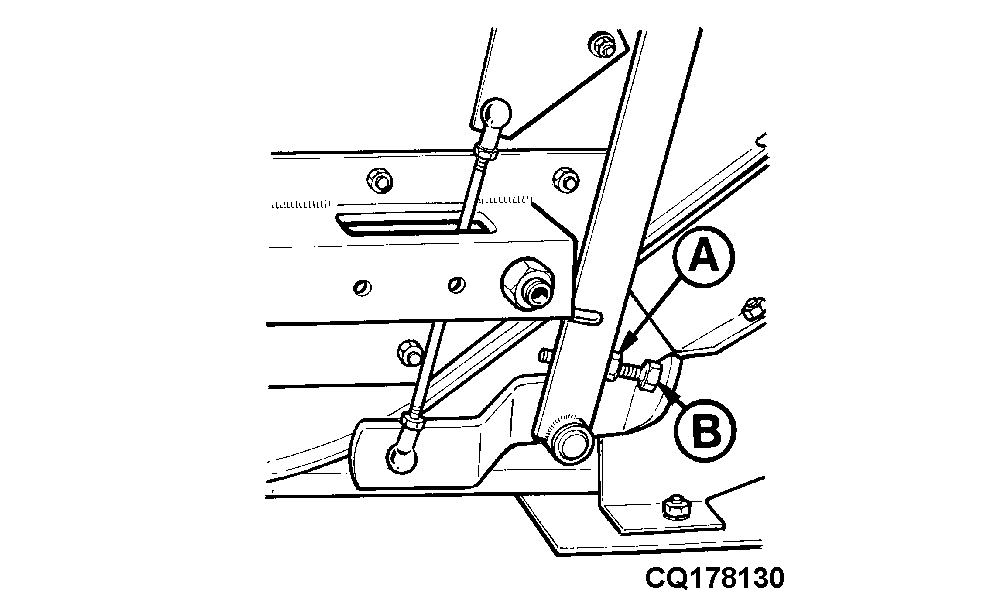
Now adjust the remaining shoes so that the cutterbar is level. Carry out adjustment through bolt (A) and nut (B). NOTE: Each time front tires are replaced by tires with a different size this adjustment must be checked again.
|
|
AG,GG05155,153 -19-05APR06-4/13 |
|
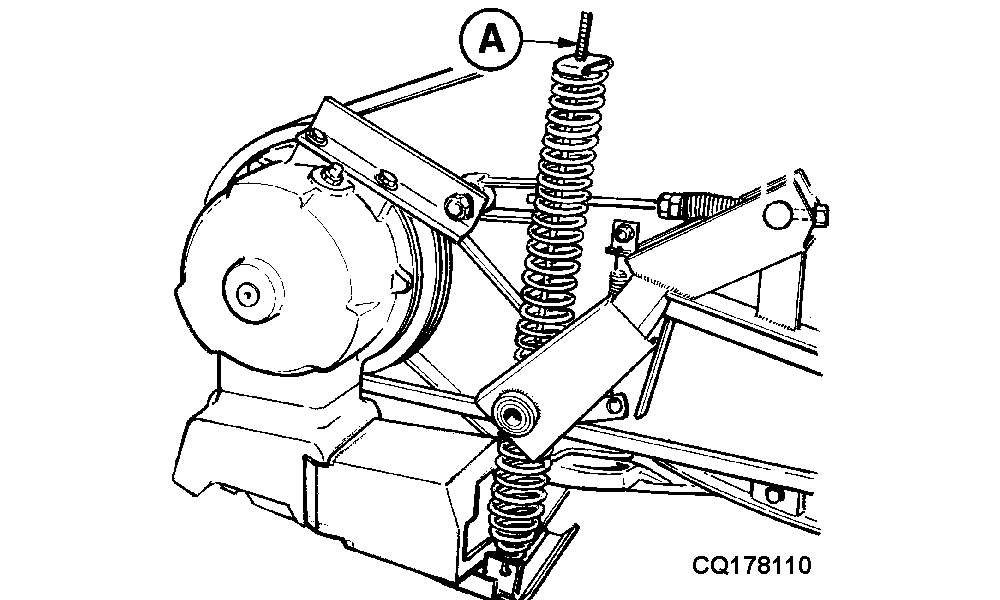
Adjust spring (A) at left-hand side of header next to the cutting mechanism drive housing so that the flexible drive is "light". |
|
AG,GG05155,153 -19-05APR06-5/13 |
|
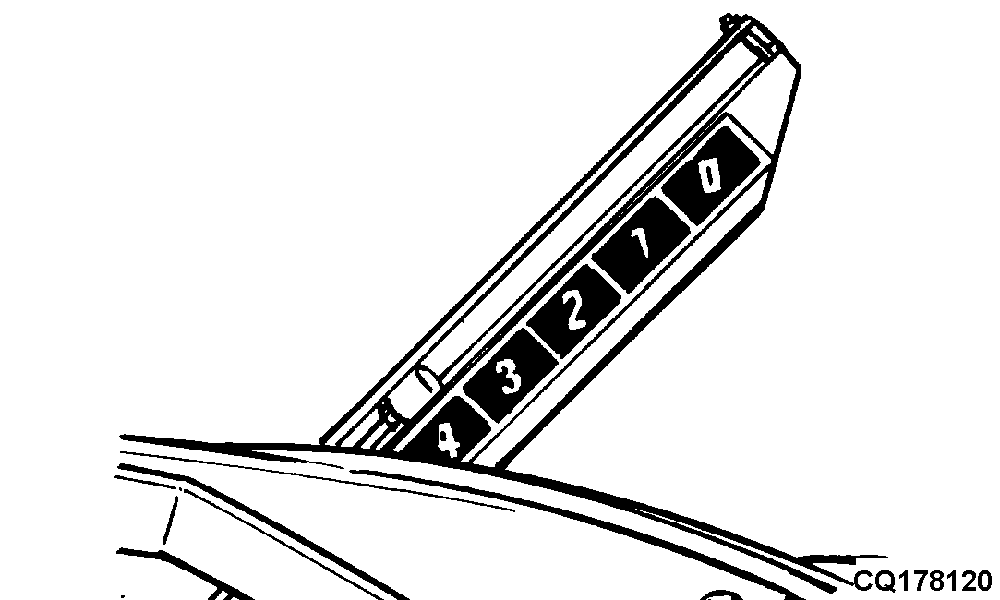
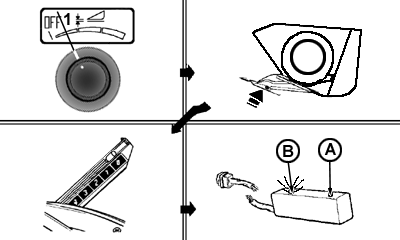
With the header raised adjust height indicator so that it shows "4". |
|
AG,GG05155,153 -19-05APR06-6/13 |
|
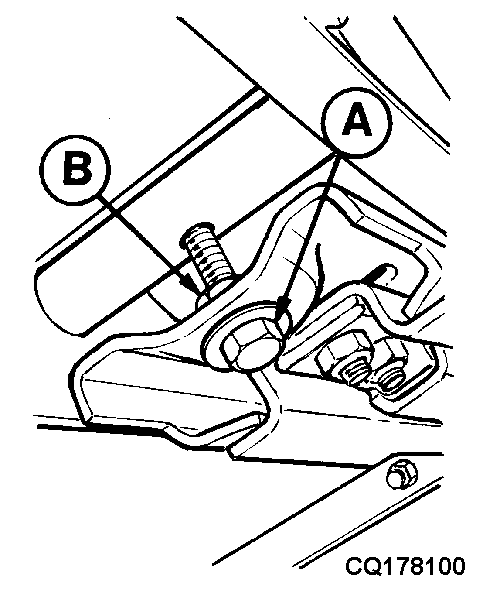
Perform this adjustment using bolt (B) and nut (A). |
|
AG,GG05155,153 -19-05APR06-7/13 |
|
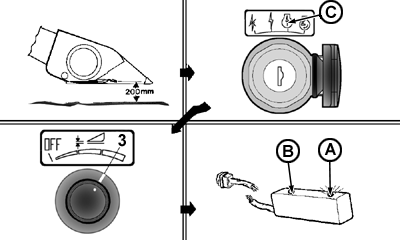
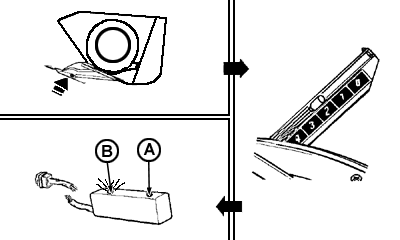
Electrical Part - Automatic Cutting Height Control Automatic cutting height control should have sufficient sensitivity. Proceed as follows to obtain this: - With header suspended at approx. 200 mm (20 cm) above ground, turn ignition key to position (C). Turn engage switch to postion 3. Front LED (A) of sensor should light up. |
|
AG,GG05155,153 -19-05APR06-8/13 |
|
- Suspend right-hand sensing shoe slightly by hand until the height indicator shows "3". Both sensor sides should remain switched off. |
|
AG,GG05155,153 -19-05APR06-9/13 |
|
- Suspend right-hand sensing shoe a bit more until the height indicator indicates "2". Rear LED (B) of sensor should light up. |
|
AG,GG05155,153 -19-05APR06-10/13 |
|
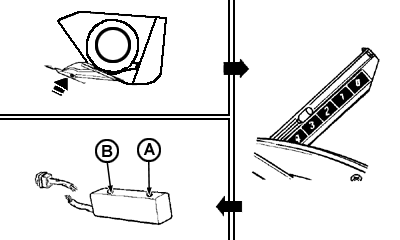
- Turn ACHC selector switch to position "1" and suspend right-hand sensing shoe of header completely (height indicator at "0"). Rear LED (B) should light up. |
|
AG,GG05155,153 -19-05APR06-11/13 |
|
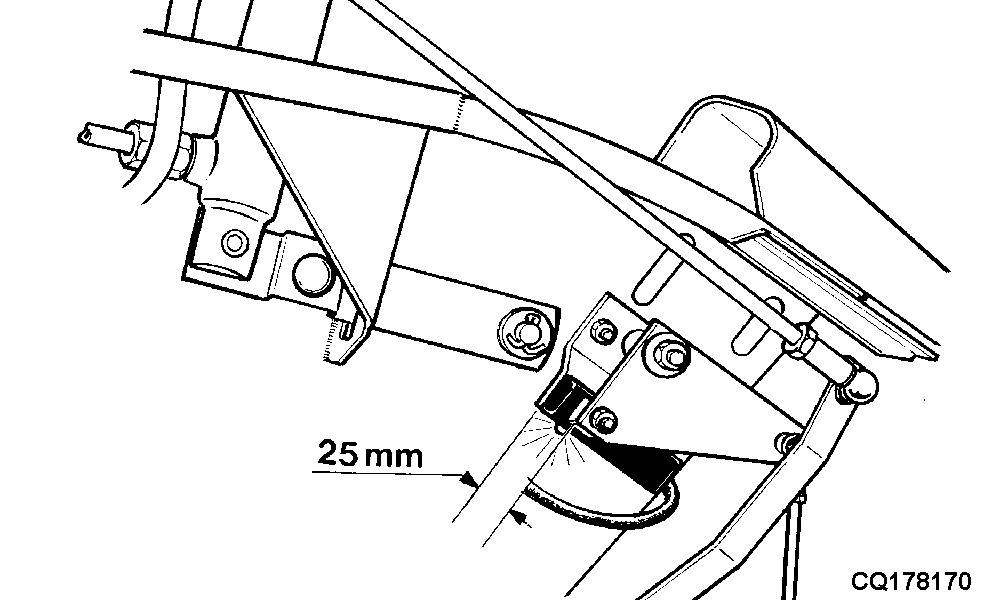
Electrical Part - Lateral Tilt System - With header suspended at approx. 200 mm above ground and engine turned off, switch on main key. Lateral tilt system sensor LEDs (one at each side of header) should be ON. If LEDs do not come on, adjust sensor position so that the magnet is at approximately 25 mm from the sensor end. |
|
AG,GG05155,153 -19-05APR06-12/13 |
|
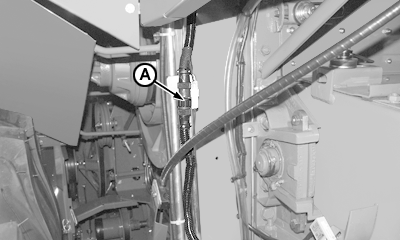
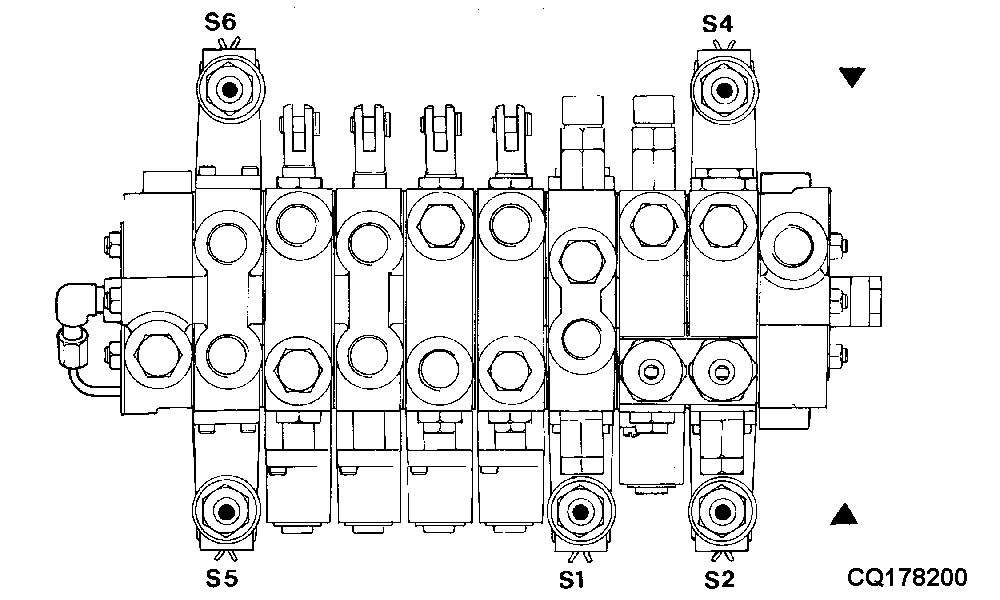
Hydraulic Part - Adjusting Automatic Cutting Height Control and Header Lateral Tilt System Disconnect header wiring harness (A) next to feeder house. Start engine and accelerate completely (working position). Actuate hydraulic valve block solenoids manually based on figure below: Automatic cutting height control: Actuate S4 to lower header. Actuate S2 to raise header. Lateral tilt system: Actuate S1 + S5 simultaneously for header inlcination to the left . Actuate S1 + S6 simultaneously for header inlcination to the right . NOTE: If lateral tilt system is not operating satisfactorily after performing this adjustment contact your John Deere dealer for service. |
|
AG,GG05155,153 -19-05APR06-13/13 |