PowerCast Tailboard (Optional) Rear Shrouds—Removing and Installing
NOTE:
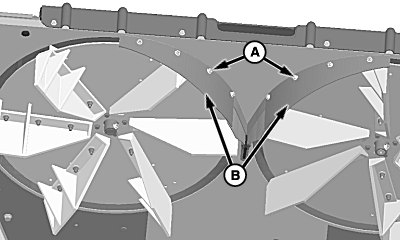
H87339-UN-01FEB07
A - Nuts (8 Used)
B - Rear Shrouds
In tough, heavy straw conditions, rear shrouds can be removed to spread more material towards center of machine.Removing Rear Shrouds
Remove nuts (A) and rear shrouds (B) from tailboard and reinstall nuts.
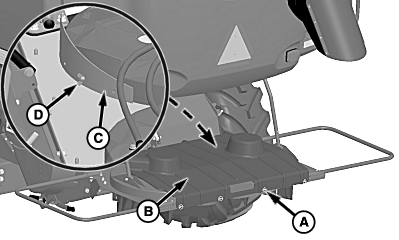
H87341-UN-01FEB07
A - Quick-Lock Pins
B - Shield
C - Rear Shrouds
D - Wing Nut
Remove and retain quick-lock pins (A) and shield (B).Install previously removed rear shrouds (C) to weld stud as shown and retain with wing nut (D).
Install previously removed shield and quick-lock pins.
NOTE:

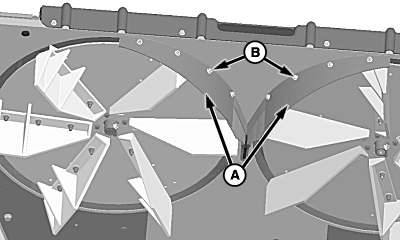
H87342-UN-01FEB07
A - Quick-Lock Pins
B - Shield
C - Wing Nut
D - Rear Shrouds
When harvesting corn, front and rear shrouds should always be installed to provide optimal material distribution.Remove and retain quick-lock pins (A) and shield (B).
Remove and retain wing nut (C) and rear shrouds (D).
Reinstall wing nut for future use and install previously removed shield and quick-lock pins.
H87340-UN-01FEB07
A - Rear Shrouds
B - Nuts (8 Used)
Installing Rear ShroudsRemove nuts from weld strap and install rear shrouds (A) behind welded strap as shown.
Reinstall nuts (A).
|
OUO6075,0000A9C-19-20080625 |