Preliminary Header Calibration Procedures
|
IMPORTANT: Make sure that header and sensor operating position are parallel to ground before starting calibration procedure. Header angle adjustment depends on installed tire size and is described in section "Feeder House". Header height sensors are calibrated by HCU (Header Control Unit) during header calibration procedure. All other components of the automatic header control system are calibrated in the combine calibration procedure. The header calibration procedure must only be performed when a header is initially installed or when header height sensors are replaced. |
Header type selection: Available header types are: 1 - Flex Header 2 - Rigid Header 3 - Corn Header 4 - Belt Pickup |
AS60558,00011E8 -19-21JAN09-1/2 |
|
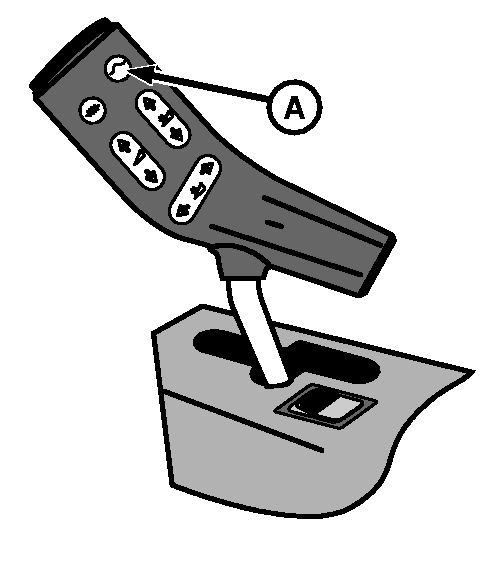
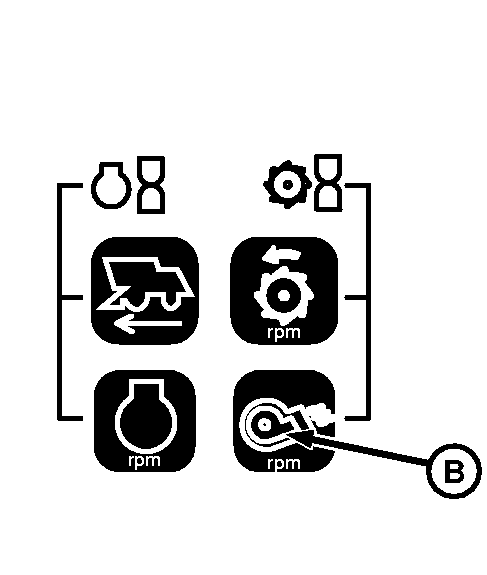
To change the header type stored in memory, perform the following: 1. Go to Infotrak address 32. Current header type will be displayed.2. With ignition key in position II and road safety switch activated, press return-to-cut button (A) on multi-function control handle. System will scroll through available header types. Release the return-to-cut button when desired header type is displayed. 3. Press "Fan Speed" key (B) on INFOTRAK monitor to store new header type. NOTE: The following table is a step by step procedure for header calibration, indicating operator actions and system response. "r" and "l" on the display mean: "r = right-hand" and "l = left-hand" or "r = raise " and "l = lower". |
|
AS60558,00011E8 -19-21JAN09-2/2 |