Change Hydraulic Filters
T8T317-UN-01MAY14
T8130003034-UN-02DEC13
T8130003035-UN-02DEC13
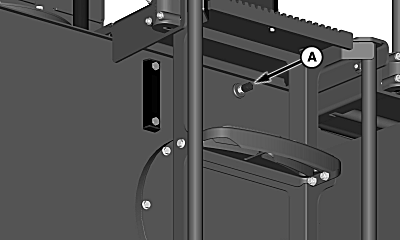
A - Vent Cap
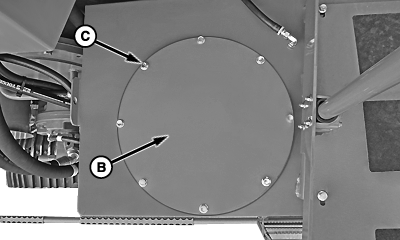
B - Filter Cover
C - Cap Screws (8 used)
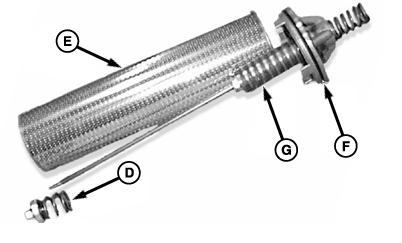
D - Nut, Retainer, and Spring
E - Filter
F - Rod Assembly
G - Magnet
-
Release pressure in hydraulic reservoir by removing vent cap (A) on side of tank.
-
Clean filter cover (B) and area around it.
-
IMPORTANT: Be careful not to damage or lose O-ring when removing filter cover.
Remove and retain cap screws (C) and slowly lift filter cover. Make sure no trash blows into tank while cover is removed.
-
Remove filter assemblies.
-
Replace cover on tank to keep out trash.
-
Remove and retain nut, retainer, and spring (D) on lower end of insert assembly. Slide filter (E) from rod assembly (F).
-
Clean magnet (G) and inspect filter seals.
-
IMPORTANT: If hydraulic filters that do not meet factory specifications are used, the warranty of hydraulic components will be voided.
Install new filter on rod assembly. Replace spring, retainer, and nut. Tighten nut only until it stops, no further.
-
Remove filter cover and install filter assemblies into hydraulic reservoir.
-
Install previously removed O-ring and filter cover on reservoir and tighten cap screws to specification.
Item Measurement Specification Filter Cover Cap Screws Torque 49 N·m (36 lb.-ft.) -
Install previously removed vent cap.
|
WM05597,0000F6A-19-20150205 |