Baling Cornstalks
Do not attempt to feed crop or twine into baler or unplug feed area while baler is running. The baler feeds material faster than you can release it. Disengage PTO and shut off engine. 1. Cut or rake stalks prior to baling to improve pickup tooth life. 2. Do not rake more than six rows together or plugging may occur at the pickup area. Higher productivity can be obtained by baling smaller windrows at faster ground speeds. Avoid crowding the edges of the windrow and avoid windrows wider than the baler chamber to reduce plugging at the crop dividers.
3. Be sure to maintain rated PTO speed 4. Increase feed opening by:
|
|
 CAUTION:
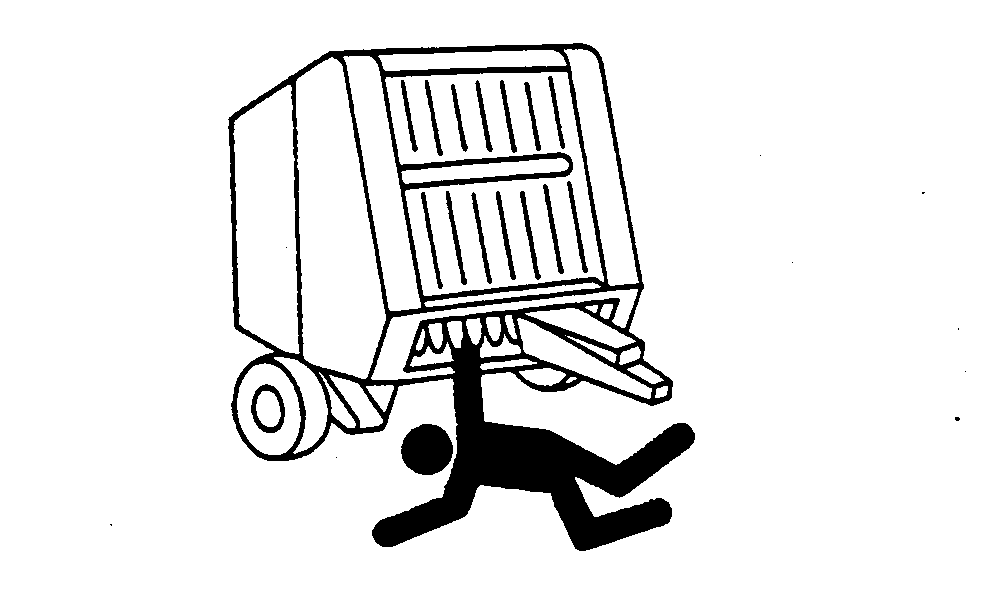
DON'T TAKE CHANCES! To avoid injury or death by being pulled into the machine:
CAUTION:
DON'T TAKE CHANCES! To avoid injury or death by being pulled into the machine:
OUMX005,0000034 -19-27SEP00-1/3 |
Install hydraulic pickup lift kit. (See Attachments section.) Check for missing or broken teeth. Replace if necessary. Regular Pickup; Check pickup belt tension and condition. (See ADJUSTING PICKUP BELT IDLER in Service-Baler section.) MEGATOOTH or MegaWide Pickup; Check pickup slip clutch. (See CHECKING PICKUP SLIP CLUTCH TORQUE in Service-Baler section.) Remove compressor rack if cornstalks build up on top of rods. (See REMOVING COMPRESSOR RACK ASSEMBLY in this section.) Add extra compressor rods if cornstalks push up between existing rods and cause plugging. Remove outside rods. If material still accumulates, remove compressor rack assembly. Always replace compressor rack under normal conditions. (See REMOVING or INSTALLING COMPRESSOR RACK ASSEMBLY in this section.) NOTE: Two wraps are suitable for most crops, but three or more wraps are needed for:
If machine RPM is less than rated PTO speed, use the following chart as a guideline for desired wraps. |
|
OUMX005,0000034 -19-27SEP00-2/3 |
|
|
||||||||||||||||||||||||||||||
OUMX005,0000034 -19-27SEP00-3/3 |