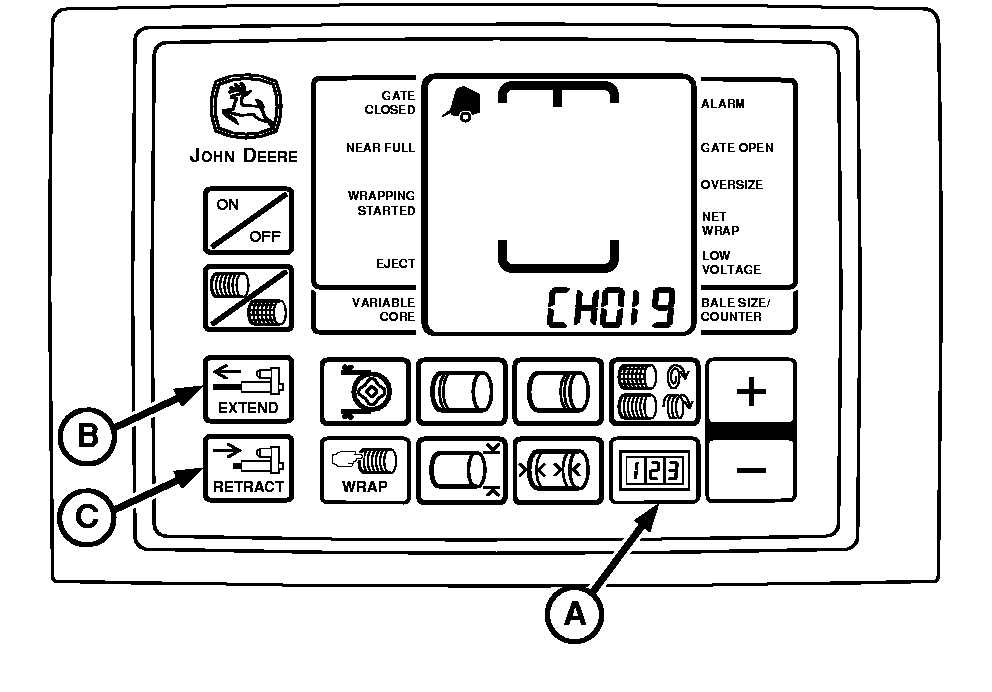
Removing and Installing Net Wrap Cutoff KnifeIMPORTANT: Current overload protection to net actuator is bypassed when using channel 14. Extended use of channel 14 may cause actuator damage. 1. Turn tractor key to ON position. Press and hold COUNTER key (A) while selecting NET mode. "CH 01" will appear in the digital display. 2. Continue to hold COUNTER key and press PLUS key to advance to "CH 014". Release COUNTER key. 3. Press and hold EXTEND key (B) to move angle to the up position. 4. Turn tractor key to OFF position and remove key. Turn monitor-controller OFF. 5. Open net wrap cover.
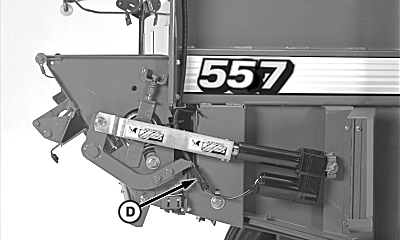
6. Disconnect net actuator wiring harness (D). |
|
 CAUTION:
To avoid personal injury from unexpected knife movement, disconnect net actuator wiring connector.
CAUTION:
To avoid personal injury from unexpected knife movement, disconnect net actuator wiring connector.
OUMX005,0000081 -19-25JUN03-1/4 |
|
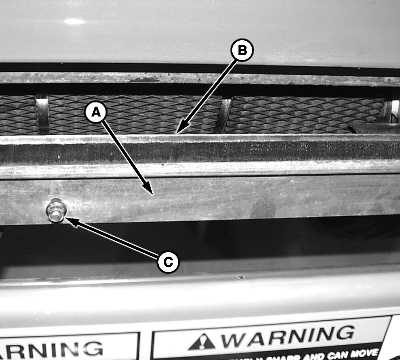
NOTE: Roll removed for illustration only. 7. Remove brush (A) from cutoff knife (B) by removing four round-head bolts and nuts (C).
|
|
OUMX005,0000081 -19-25JUN03-2/4 |
|
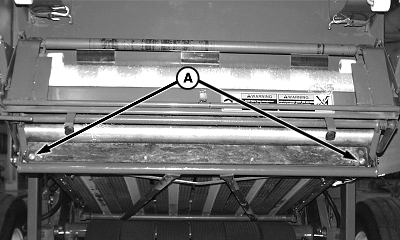
8. Remove two round-head bolts and nuts (A) on each end of cutoff knife. Remove cutoff knife from knife bracket. 9. Repair or replace if necessary. 10. Install cutoff knife with beveled surface up and facing rear of machine. 11. Install round-head bolts and nuts (A) so the round heads facing front of machine. Tighten to specifications. Specification
12. Install brush to cutoff knife by using four round-head bolts and nuts. Do not tighten at this time. 13. Install brush. Set clearence between steel roll and brush to dimension. Specification
Tighten all nuts to specification. Specification
14. Connect net actuator wiring connector. IMPORTANT: Make sure to move net wrap angle arm fully downward to "home" position. If baler is operated with angle arm at the up position, net will feed continuously during baling. 15. Turn tractor key to ON position. |
|

OUMX005,0000081 -19-25JUN03-3/4 |
|
16.
Press WRAP key on monitor-controller to move angle arm fully downward to the "home" position.
17. Turn tractor key to OFF position. Turn off monitor-controller. 18. Close net wrap cover. |
OUMX005,0000081 -19-25JUN03-4/4 |