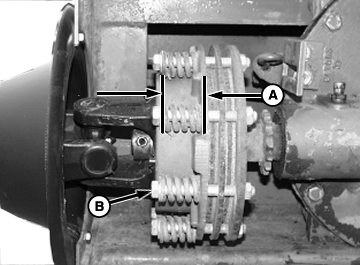
Adjusting Slip ClutchIMPORTANT: Adjust all springs to the same length. The slip clutch is designed to slip under normal operation and furnish protection to the drive train. Overtightening will lessen this protection. 1. As a starting point for adjusting slip clutch, check spring dimension (A). Tighten or loosen spring adjusting nuts (B) to specifications. 328 Baler Spring - Specification
328 Baler Spring338 Baler Spring - Specification
|
|
OUO6038,0000076 -19-25OCT06-1/3 |
|
2.
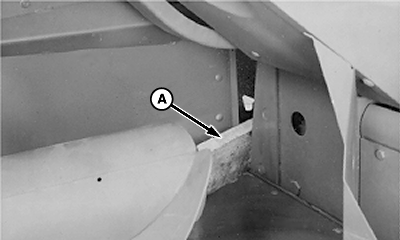
Place a wooden block (A) between frame and plungerhead.
|
|
OUO6038,0000076 -19-25OCT06-2/3 |
|
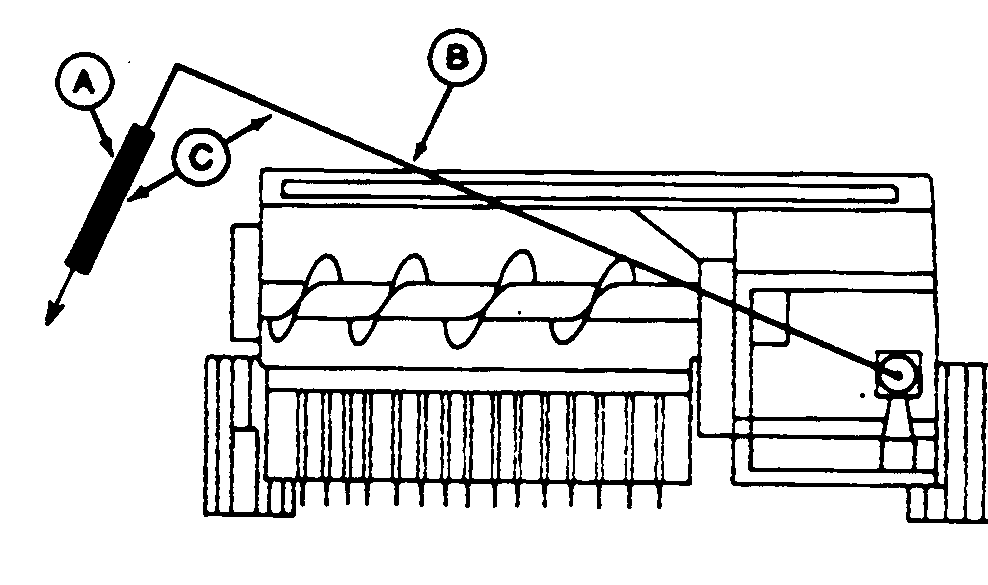
IMPORTANT: Check slip clutch to be sure linings are not bonded to metal plates. NOTE: When checking torque on baler with 3-joint powerline, it may be easier to use a socket wrench on hex powershaft. To check, remove PTO hookup and place socket wrench on front of hex powershaft and position lever on socket wrench. 3. Check clutch slippage using a spring gauge (A) and 3.5 m (10 ft) lever (B) attached to powershaft. Exert force at 90 degree angle (C). 4. For proper force on lever for clutch slippage, see chart.
5. Tighten or loosen clutch spring bolts until clutch slips in its proper range. 6. Remove block of wood. |
|
|||||||||||||
OUO6038,0000076 -19-25OCT06-3/3 |