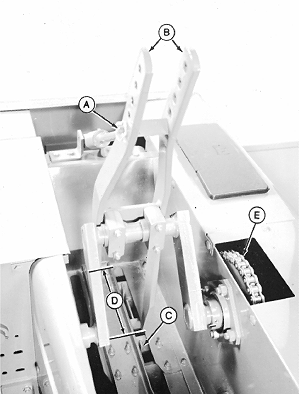
Timing the BalerTiming is controlled by the main drive chain, feeder drive chain, and the knotter drive gears. After servicing, check all timing operations before operating baler. Each of the following checks or adjustments should be made as the baler is turned, by hand, through one complete tying cycle. 1. Put feeder pivot pin (A) in bottom hole of feeder fingers (B).2. Turn flywheel by hand counterclockwise until face of plungerhead (C) (on a compression stroke) is centered in the front feeder slot. Left-hand corner of front feeder finger should measure 24.1-29.2 cm (9-1/2-11-1/2 in.) (D) from left-hand end of front feeder slot. If the feeder finger does not fall within this range, disconnect feeder drive chain (E) and set the finger 26.7 cm (10-1/2 in.) (measured horizontally) from left-hand edge of feeder slot. A block may be used to hold the fingers in this position. IMPORTANT: Using the main drive chain for timing will also affect the timing of the plungerhead to the needles. The needles may require retiming as described in Step 6. 3. Connect the feeder drive chain. Turn flywheel clockwise as necessary to install chain with drive side tight. Tighten idler against chain with thumb pressure. 4. After connecting chain, relocate plungerhead face in center of slot. If feeder dimension does not measure within range (D), retime feeder using the main drive chain instead of the feeder drive chain-for a finer adjustment. 5. With feeder pivot pin in any position, move plungerhead through complete tying cycle to ensure feeder fingers (B) and plungerhead will clear. |
|
OUO6038,0000088 -19-01NOV06-1/3 |
|
6.
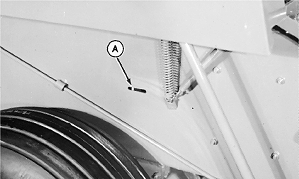
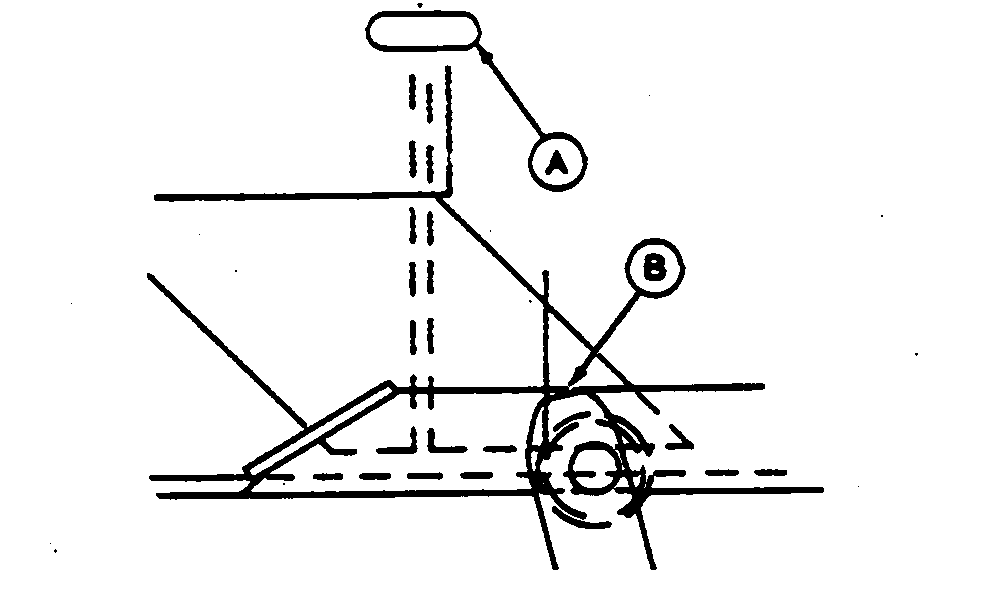
With the needles in "home" position, trip bale measuring arm. Turn flywheel counterclockwise until tip of highest needle is flush with top edge of bale groover.
7. Plungerhead face (C) should be in slot (A) on side of bale case and tip of needles (B) flush with top edge of bale groover. If is preferable to adjust the plungerhead closer to front of slot than to rear of slot.
|
|

OUO6038,0000088 -19-01NOV06-2/3 |
|
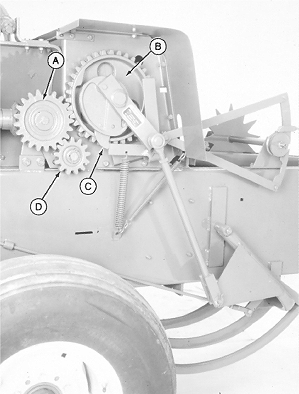
8.
If plungerhead does not appear in slot when needles are positioned as shown in Step 7, remove cluster gear (A).
9. Position needles (by hand) with tip of highest needle flush with top edge of bale groover. 10. Turn flywheel to position plungerhead in slot on compression stroke. (See Step 6.) 11. Rotate clutch ring (B) (counterclockwise) until clutch ring contacts trip dog roller (C). IMPORTANT: Cluster gear should be rotated to find the position where the bevel gear teeth and spur gear teeth match mating gears. If not, the machine will be out of time. The auger drive gear (D) need not be timed and may be rotated to match cluster gear. 12. Install cluster gear on shaft. 13. To check timing, back plungerhead up and pull needles out of bale case (by hand). Move flywheel forward slowly until tip of highest needle is flush with top edge of bale case groover. Check plungerhead position in slot. 14. If needles are still out of time, repeat Steps 8-12. |
|
OUO6038,0000088 -19-01NOV06-3/3 |