Sharpening Cutterhead Knives1. Remove remaining crop material from cutterhead, auger, and fan by operating harvester at rated PTO a few seconds. |
OUO6059,0001409 -19-07SEP01-1/8 |
|
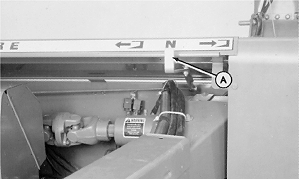
2. Put harvesting unit and feed roll drive in neutral (center) position (A).
3. Disengage PTO and stop tractor engine. 4. After all components have stopped turning, open left-hand pedestal shield. Disconnect driveline by pulling back on collar. Support driveline and slide off harvester shaft. |
|
 CAUTION:
Disengage harvesting unit and feed rolls to avoid bodily injury.
OUO6059,0001409 -19-07SEP01-2/8 |
|
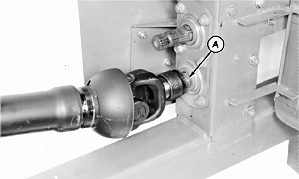
5. Install driveline on reverse knife grinding shaft (A). Be sure collar is seated and yoke is locked on shaft. 6. Close left-hand pedestal shield.
|
|
OUO6059,0001409 -19-07SEP01-3/8 |
|
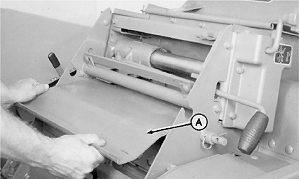
7. Open auger door and cutterhead door. (See OPENING CUTTERHEAD DOOR AND AUGER COVER in this section.) 8. Turn knife sharpener crank counterclockwise a few turns to release sharpener access panel held by sharpening stone. Carefully remove access panel (A).
|
|
OUO6059,0001409 -19-07SEP01-4/8 |
|
9.
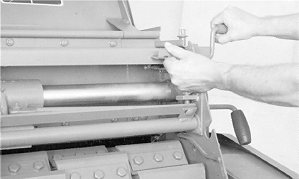
Using left hand, depress sharpener crank interlock. Turn sharpener crank clockwise to lower stone to approximately 1.6 to 3.2 mm (1/16 to 1/8 in.) from cutterhead knives.
10. Slide sharpener to both sides to check clearance to cutterhead knives. (If not uniform, see REPLACING OR ADJUSTING CUTTERHEAD KNIVES in Service section). 11. Close cutterhead door and tighten door knobs. Close and latch rear auger cover. |
|
OUO6059,0001409 -19-07SEP01-5/8 |
|
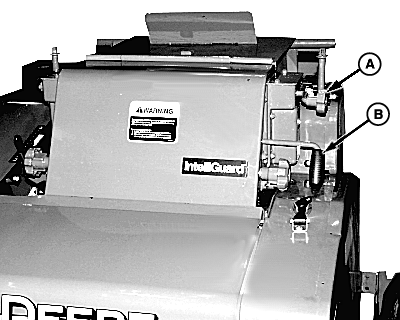
IMPORTANT: High engine speed during sharpening results in severe impact between stone and knife, causing excess vibration and poor sharpening. 12. Start tractor engine. With engine idling, slowly engage PTO clutch. Increase engine speed to 1/2 rated PTO speed . IMPORTANT: Lower stone only at the end of each stroke. 13. Lower stone to cutterhead by turning crank (A) clockwise until light contact is made. Slide stone (B) slowly and uniformly across width of cutterhead. 14. Advance crank 1/4- to 1/2-turn at each end of the sliding stroke. Take approximately 15 seconds per stroke across the cutterhead. Pause four to five seconds at each end of stroke to sharpen outside knives evenly. NOTE: The amount of time required to sharpen knives will vary greatly, depending on the condition of the knives. Under normal conditions, only a few minutes is required to sharpen knives completely. 15. After sharpening is complete, stop advancing stone. Slide stone from side-to-side a few times; then reverse crank (turn counterclockwise) to stop sharpening. 16. Disengage tractor PTO and stop engine. |
|
OUO6059,0001409 -19-07SEP01-6/8 |
|
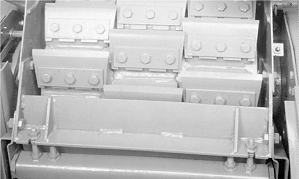
17. Open auger cover and cutterhead door to inspect cutterhead. NOTE: Oversharpening knives results in excessive repair cost. Undersharpening results in wasted fuel for tractor due to higher power requirements, poorly cut forage, and excessive strain on power train and cutterhead components. Knives should be completely sharpened from cutting edge to heel of knife. Entire width of each knife should be completely and brightly polished. (If one or more knives have not been sharpened, see ADJUSTING CUTTERHEAD KNIVES in Service section.) |
|
OUO6059,0001409 -19-07SEP01-7/8 |
|
NOTE: To avoid a poor quality length-of-cut and an increase in power consumption, adjust stationary knife and recutter screen, if used, each time cutterhead knives are sharpened. 18. If knives need additional sharpening, repeat steps 9 through 17. 19. If knives are sharp, turn sharpener crank counterclockwise until sharpener access panel (A) can be reinstalled. 20. Move stone to extreme left-hand side of cutterhead housing. 21. Using left hand, depress knife sharpener interlock, rotate crank clockwise to tighten sharpening stone snugly against access panel. 22. Close cutterhead door and tighten knobs. Close auger cover. 23. Adjust stationary knife. (See ADJUSTING STATIONARY KNIFE in this section.) 24. Adjust recutter screen, if used. (See ADJUSTING RECUTTER SCREEN in this section.) |
|
OUO6059,0001409 -19-07SEP01-8/8 |