Adjusting and Calibrating INTELLIGUARD™ Metal Detector
|
|
|
|
|
|
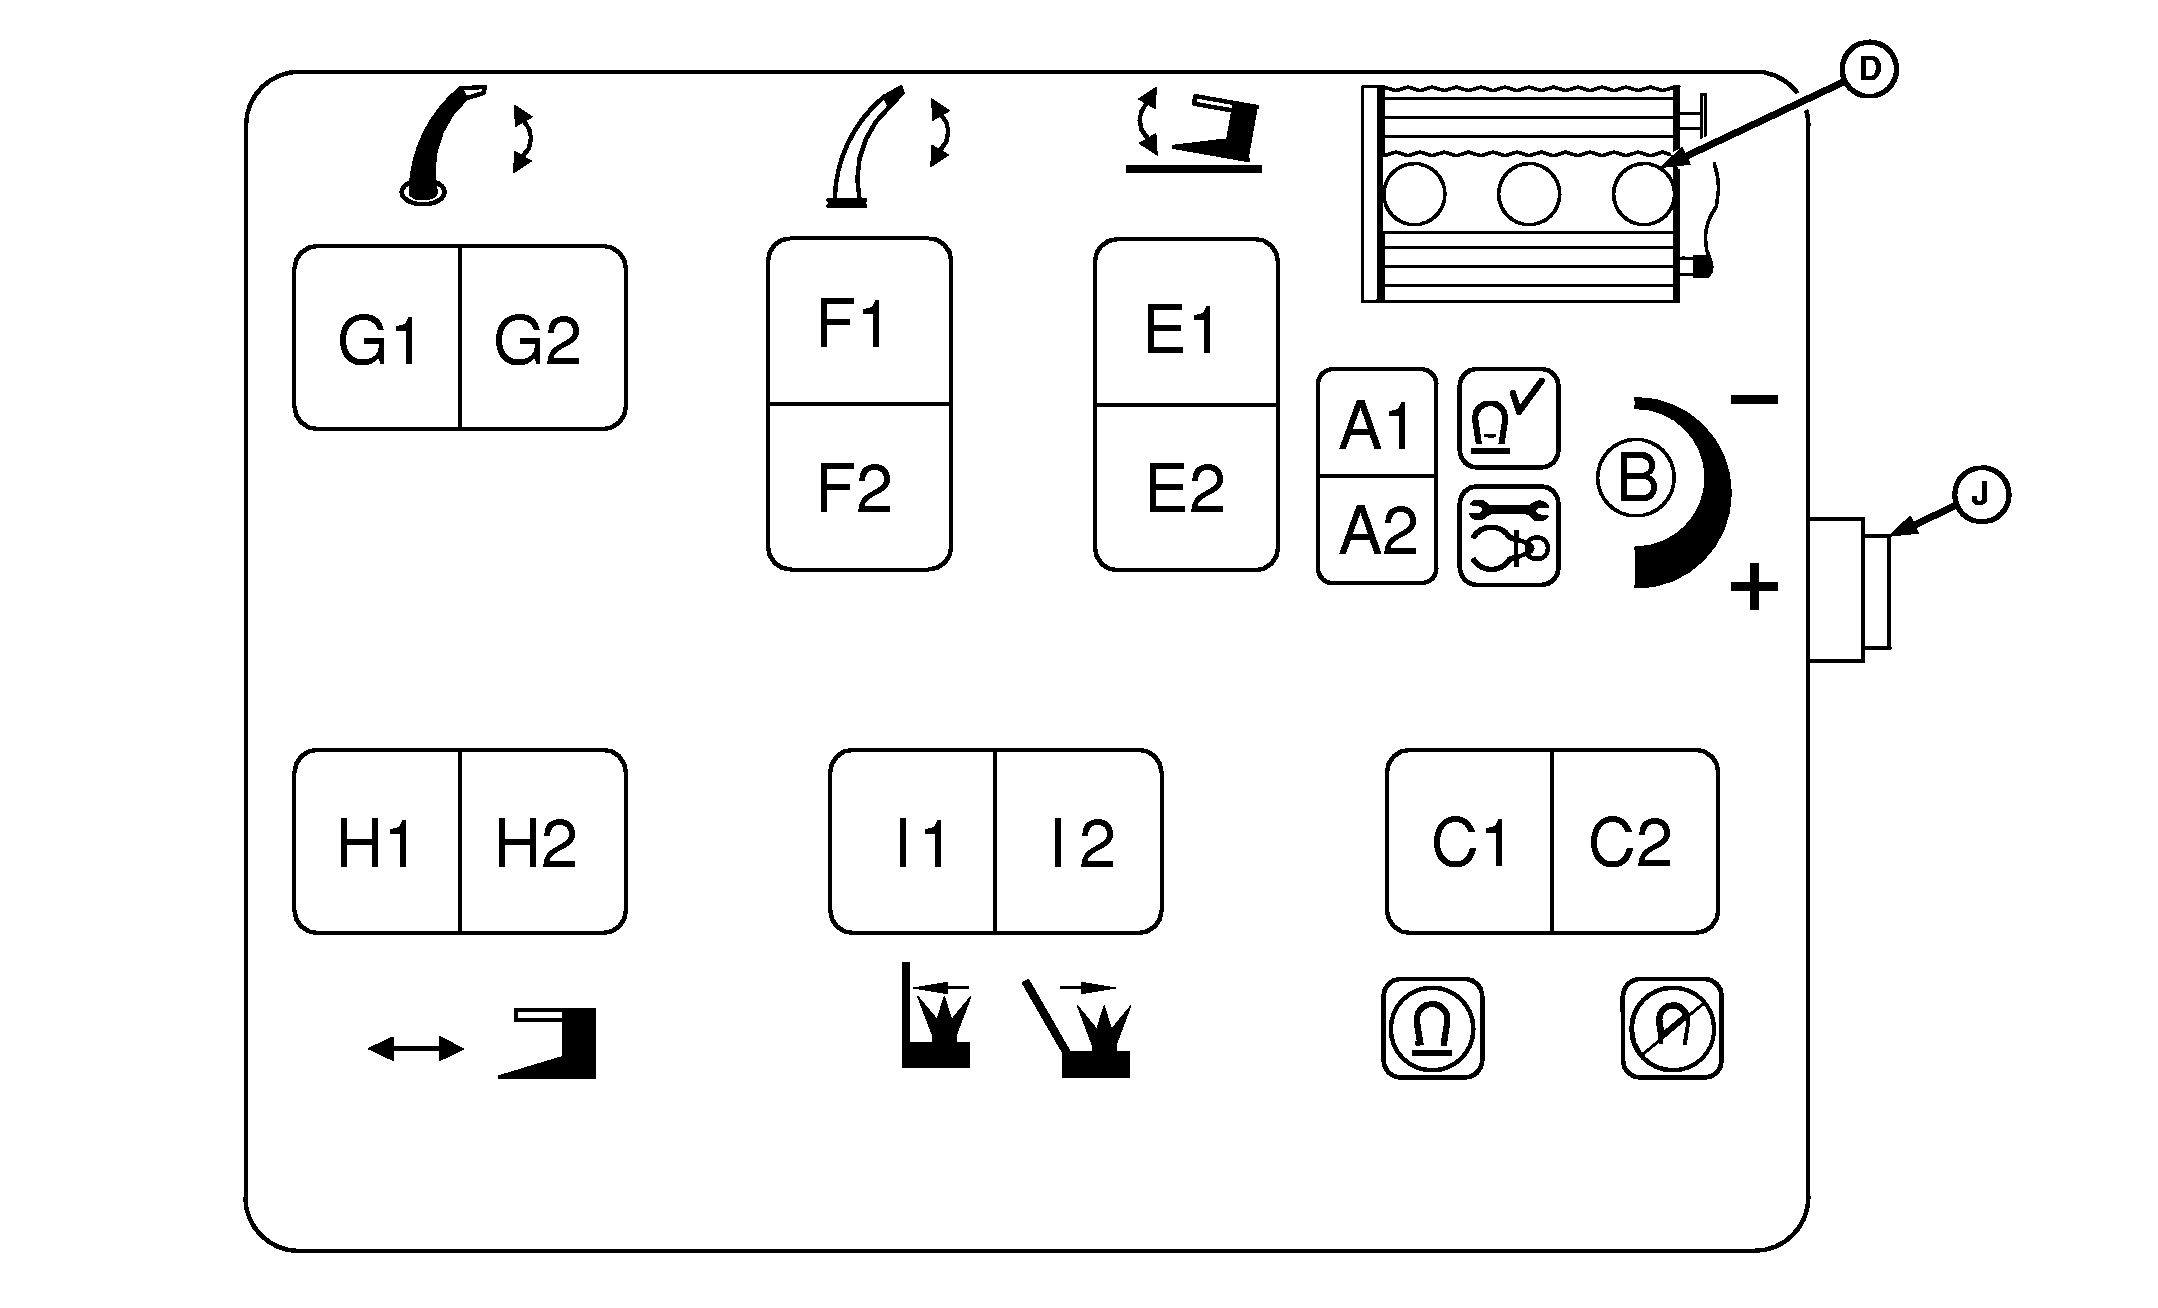
DIGITAL METAL DETECTOR OPERATION FOR PULL-TYPE FORAGE HARVESTERS DIAGNOSTICS 1.
TURNING ON THE METAL DETECTOR: when the metal detector power switch is first turned on, the 3 LED lights (D) will each flash as the sensor is tested. If the sensor is working properly, the LEDs will stop flashing and the metal detector alarm will sound. Reversing feed rolls for a minimum, of 2 seconds will arm the system.
|
and right LEDs will flash until the solenoid lockout mechanism is released.
3. FEED ROLLS NOT TURNING OR SENSOR DISCONNECTED INDICATION: If the metal detector controller is in the armed state without receiving any signal from the sensor for at least 5 seconds, the LEDs will flash. This will occur whenever the feed rolls are not turning and the metal detector is armed. If the feed rolls are turning and this occurs, then check the sensor connections for an open or short circuit. |
|
INTELLIGUARD is a trademark of Deere & Company. | OUO6078,000532F -19-13JUN06-1/2 |
|
4.
METAL DETECTOR TRIPPING: Whenever metal entering the forage harvester trips the metal detector, the solenoid will enter the tripped mode engaging the stop pawls which stop the feed rolls. At the same time, the metal detector alarm sounds and the feed roll gearcase shifts to neutral. One of the 3 LEDs will light to indicate the location of the metal that entered the feed rolls. This LED will stay on until the metal detector is reset.
CALIBRATING AND ADJUSTING 1. METAL DETECTOR CALIBRATION: The metal detect controller has the ability to be calibrated to |
compensate for machine condition. To activate the calibrate routine, turn on the metal detector as described in the start up instructions shown on the decal plate on the control console, then press and hold the test switch (A2) for 5 seconds. All 3 LEDs will light while the calibration is taking place. After 30 seconds the LEDs will turn off and the calibration will be complete. IT IS IMPORTANT TO RECALIBRATE THE METAL DETECTOR WHENEVER CHANGING HARVESTING UNITS. IT IS ALSO IMPORTANT TO RECALIBRATE THE METAL DETECTOR IF THE MACHINE HAS UNDERGONE ANY MECHANICAL WORK, AND THE START OF EACH SEASON.
2. ADJUSTING SENSITIVITY: After calibrating the metal detector, the sensitivity can be adjusted using the Metal Detector Sensitivity Dial (B). Turning the knob clockwise will make the sensor more sensitive. If the metal detector false trips too often it is recommended that the sensor be made less sensitive using this procedure. If this does not correct the problem, then recalibrate the metal detector. |
OUO6078,000532F -19-13JUN06-2/2 |