Adjusting Swath Flaps1. Park windrower on level ground, lower platform, shut off engine, and remove key. |
AG,OUO6038,1099 -19-08OCT99-1/4 |
|
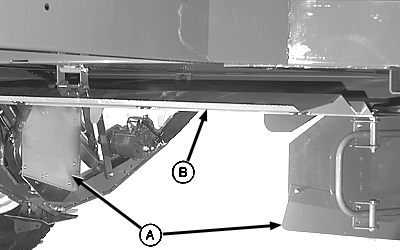
IMPORTANT: Do not set the swath flaps too narrow, preventing the volume of hay being cut to flow through the swath flaps. NOTE: The two side swath flaps are adjusted independently of each other. 2. The two side swath flaps (A) are used to set the width of swaths for less than 1.7 m (66 in.). For swaths wider than 1.7 m (66 in.), use the swath flap on 890 auger platform. (See 890 Auger Platform operator's manual.) 3. The top swath flap (B) is used to form a more rectangular and fluffier swath. |
|
AG,OUO6038,1099 -19-08OCT99-2/4 |
|
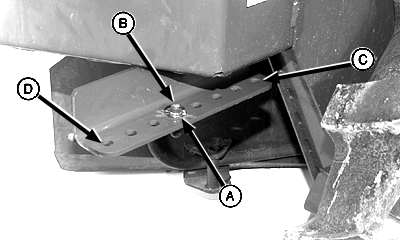
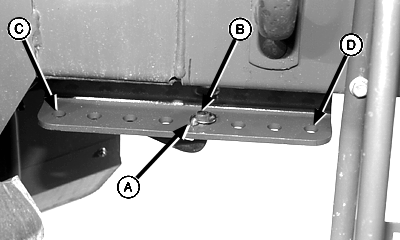
4. Remove latch pin (A).
IMPORTANT: Failure to secure the latch pin in position will allow the linkage to drop out of position, possibly damaging the windrower. 5. Install latch pin. 6. Adjust swath flap on opposite side.
|
|
AG,OUO6038,1099 -19-08OCT99-3/4 |
|
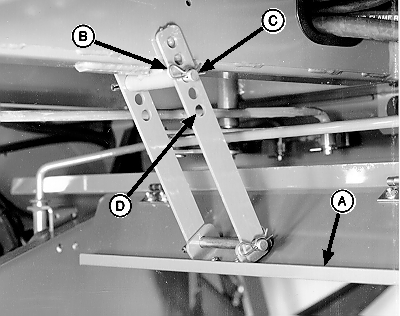
7. Remove spring pin (B).
8. Support swath flap (A), adjusting links (D) and remove pin (C). 9. Move swath flap and adjusting links (D) to desired setting. Install pin (C) and spring pin (B).
|
|
AG,OUO6038,1099 -19-08OCT99-4/4 |


 CAUTION:
Swath flap (A) is heavy. The swath flap and both adjusting links (D) will swing downward when pin (C) is removed.
