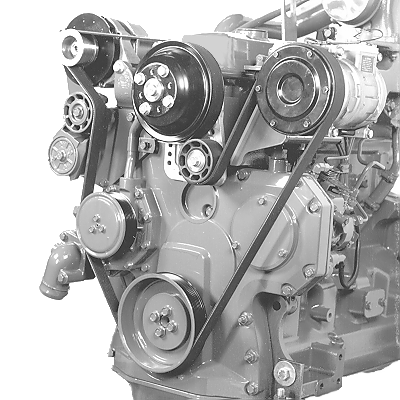
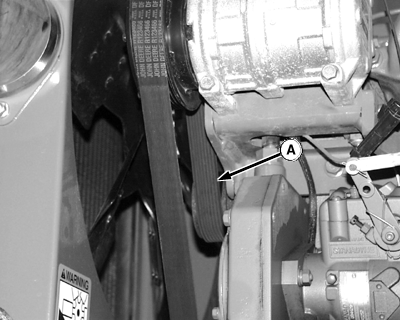
Removing and Installing Serpentine BeltIMPORTANT: To prevent premature belt damage, when handling the belt do not coil the belt, bend it backwards, or double it over. Allow the belt to stay in its relaxed shape. NOTE: The idler sheave and belt tensioner will ride against the non-grooved back of the belt. The sheave side of the belt (A) is grooved to match the ribs in the sheaves and pulleys. Always install the belt with the grooved side next to the drive or driven sheaves and pulleys. The belt is driven by the pulley on the crankshaft and drives the air conditioning compressor, engine fan, alternator and water pump.
|
|
AG,OUO6038,997 -19-05OCT99-1/2 |
|
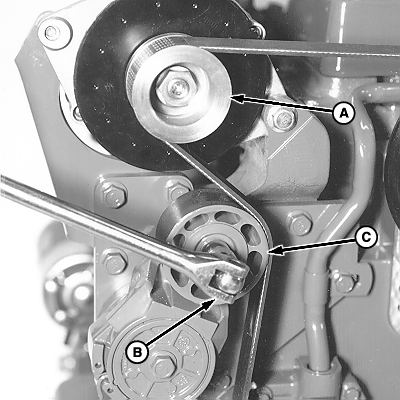
1. Place appropriate socket on breaker bar (B). 2. Position breaker bar on cap screw of belt tensioner (C). NOTE: Belt tensioner is under a heavy spring load and requires a moderate amount of force to move from the belt. 3. Pull down on breaker bar moving belt tensioner (C) outward.
IMPORTANT: Do not allow belt tensioner to snap back to its relaxed position or damage to belt tensioner assembly may result. 4. While holding belt tensioner back, slip belt off alternator sheave (A) and carefully allow belt tensioner to return to rest position. 5. Remove belt from engine. 6. Check belt ribs and edges for cracks or fraying. Replace if necessary. 7. Install belt in reverse order of removal. |
|
AG,OUO6038,997 -19-05OCT99-2/2 |


 CAUTION:
Do not position your fingers between belt and sheave when removing or installing belt. The edges of the sheave are sharp and belt tensioner is under a heavy spring load.
