Hydraulic Center Link / EasyGuide Center Link
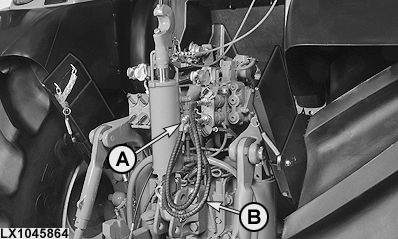
LX1045864-UN-10FEB11
Hydraulic line connections
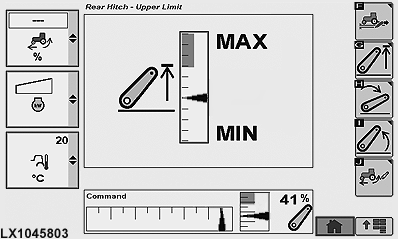
LX1045803-UN-26JAN11
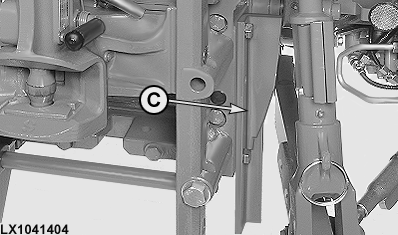
LX1041404-UN-18OCT06
Guide Rails
A - Top Line
B - Bottom Line
C - Guide Rail
IMPORTANT: Before using, make sure that a raised implement does not make contact with the tractor. In this case, pay attention to the settings for center link length and maximum lifting height.
The length of the hydraulic center link can be adjusted from the driver's seat using the 3rd selective control valve. In addition, the center link can be actuated from the remote control switches on the fender.
Attached to the hydraulic center link is a measuring rod which is intended to facilitate adjustment of the center link when in operation. For this purpose, the rod has marks on it to assist in positioning. The rod is not suitable for use as a handhold when in transport or during installation and removal.
Route the hydraulic hoses so that the loops face away from coupling area of the center link. Connect supply line (A) to the top port on SCV 3; connect supply line (B) to the bottom port on SCV 3.
IMPORTANT: Take extreme care when setting the MAX lift limit and make sure there is adequate clearance at all tractor components. Remember that retracting the hydraulic center link brings the implement closer to the tractor.
Use the hitch control to raise the implement fully. Carefully move the lift limit mark towards MAX until the implement reaches its highest possible position.
If severe wear occurs at guide rails (C) on the PTO housing, the rails must be replaced with new ones in order to prevent the center link from coming into contact with the hydraulic block.
IMPORTANT: Retract hydraulic center link when not in use.
When attaching the center link to or removing it from the tractor, remember that the center link is very heavy.
|
OULXA64,00026E3-19-20110217 |