CommandCenter™ - GreenStar™, ISOBUS-Compliant Auxiliary Controls
 CAUTION:
RXA0098156-UN-07NOV08
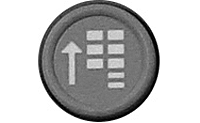
Menu Button
RXA0103919-UN-02AUG10
Display → Advanced Settings → Auxiliary Control
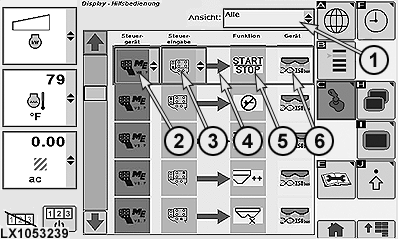
LX1053239-UN-04JUL11
Display Auxiliary Controls Page
1 - View Drop-Down Box
2 - Auxiliary Control
3 - Auxiliary Control Elements
4 - Mapping Status Indicator
5 - Implement Function
6 - Implement
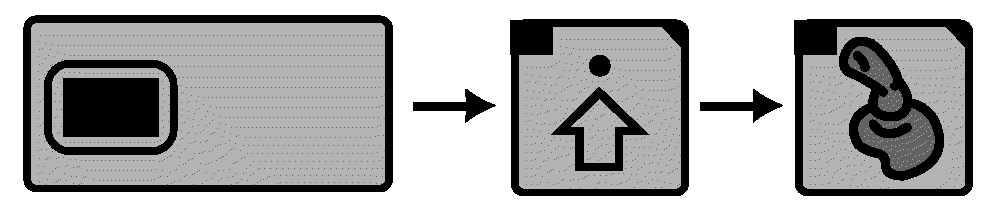
Implement Detected.Improper operation can cause unintended implement movement.
To avoid death or serious injury to a bystander, understand how this display operates the functions of the implement.
Read and understand the implement Operator's Manual.
This message appears in CommandCenter™ when the system detects an ISOBUS-compliant auxiliary control. If necessary, review or change the auxiliary control mappings. Immediately after the message the operator can either decline or accept by using thumb wheel and scrolling to appropriate box. Select appropriate response by pressing the Confirm button.
- If Decline is selected, all auxiliary controls will be disabled.
- If Accept is selected, all auxiliary controls are enabled.
CAUTION: If a different control is installed, Auxiliary Control
will need to be remapped to introduce new control inputs to implement
functions.
Whenever control elements and/or auxiliary controls are changed or registered, the operator is responsible for the following to avoid injury or death to bystanders:
- Before operating, check the auxiliary control settings to make sure that the function is mapped to the relevant control.
- Make sure that the controls and their functions are identified correctly.
- Make sure that all users know which function is mapped to each control.
- Make sure that the implement can be operated safely by the controls.
If Decline is selected, all auxiliary controls will be disabled.
ISOBUS-compliant auxiliary controls may be used to control ISOBUS-compliant implement functions. The implement functions displayed on the auxiliary control page may be mapped to the available controls.
NOTE: The display is only used as an operator interface to map the implement functions to the input controls.
A two-switch ISOBUS compliant auxiliary control device is used, for instance, to control a trailed sprayer equipped with an ISOBUS implement controller. The sprayer has two controlled functions: pump on/off and boom on/off. Using Auxiliary Control feature, each function may be mapped to one of the Auxiliary Control device switches.
Setting auxiliary controls:
-
Press the menu button.
-
Select a display.
-
Select Advanced Settings softkey.
-
Select Auxiliary Control softkey.
NOTE: The auxiliary control page allows the operator to map auxiliary control inputs (3) to different implement functions (5). This process is called Mapping a control to a function. Once this Mapping is completed, a function may be performed by activating the associated input.
The available functions and inputs depend on the ISOBUS-compliant implements (6) that are currently connected.
-
Drop-down box (1) allows filtering of the mapping views. Select desired view and then perform the mapping.
NOTE: An auxiliary control (2) consists of a number of control elements (3). These may be buttons, switches, or dials.
NOTE: Function and Implement will display, along with Auxiliary Control icon, when control is enabled.
Mapping auxiliary control and control elements to implement functions:
-
Select an implement function.
-
The line of the currently selected implement function is highlighted by a colored rectangle.
-
In the currently selected row, select drop-down box (2) of Auxiliary Control.
-
Select an Auxiliary Control from the drop-down list.
-
Another drop-down box will appear in column (3) for Auxiliary Control Elements.
-
Select a control element from the list to map the control to the currently selected Function.
IMPORTANT: The selection list only shows control elements which are compatible to the implement functions.
-
A status indicator (4) appears to show if auxiliary control (2) and control element (3) have been successfully mapped to the implement Function.
- A green status indicator indicates that the mapping is completed successfully.
- A red status indicator indicates that the mapping was not successful. In this case, check the mapping and change as necessary.
|
OULXA64,000274D-19-20120625 |