Install PTO Slip Clutch Alert Sensor and Driveline1. If baler is equipped with regular pickup proceed to Step 14.If baler is equipped with MegaWide™ Plus pickup proceed to Step 2. |
PP98408,000027D -19-19OCT09-1/10 |
|
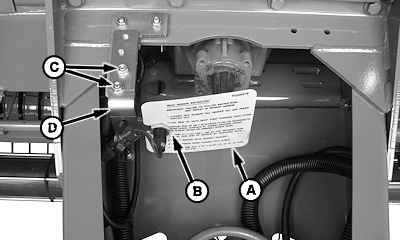
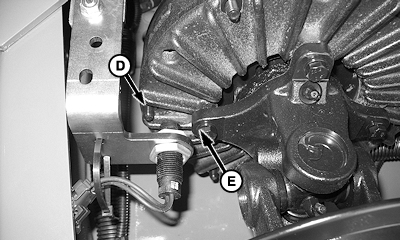
NOTE: Tag provides reference instructions to adjust PTO sensor clearance and tightening procedure. 2. Remove tag (A) by loosening nut (B). 3. Remove and retain hardware (C) and place bracket with sensor (D) inside of tongue.
|
|
PP98408,000027D -19-19OCT09-2/10 |
|
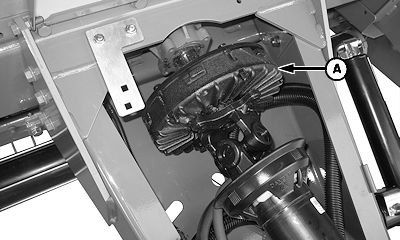
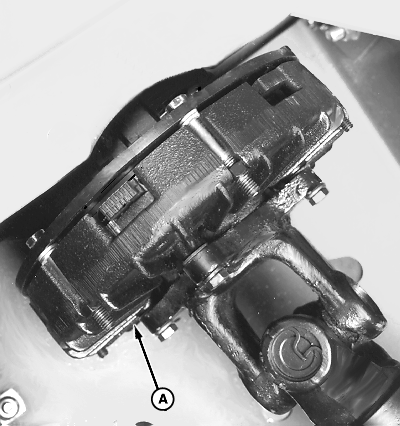
IMPORTANT: Cap screw heads (B) lead as driveline rotates counterclockwise when looking toward rear of baler. 4. Install PTO driveline (A). Fasten with two 1/2 x 2-3/4 in. cap screws and lock nuts (C) (included with driveline).
|
|
PP98408,000027D -19-19OCT09-3/10 |
|
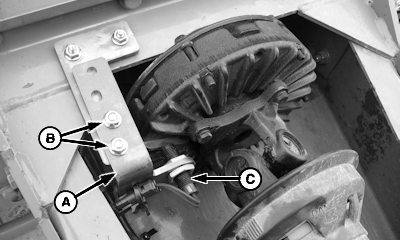
IMPORTANT: Ensure wiring harness to sensor (C) is clear of slip clutch, damage to wiring harness may occur. Retain harness to hoses using tie bands. 5. Install bracket (A) and hardware (B). Position sensor (C) side-to-side to clear clutch bolts (D) and yoke ears (E) by at least 2 mm (0.08 in.). Tighten hardware (B) after sensor is positioned.
|
|
PP98408,000027D -19-19OCT09-4/10 |
|
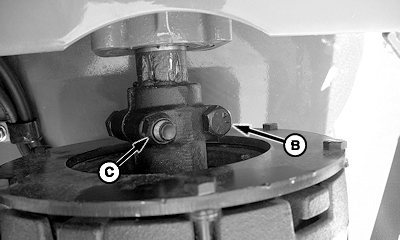
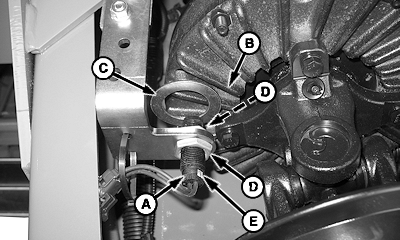
NOTE: Cup sides of sensor nuts (D) must point towards each other. 6. Adjust end of sensor (A) 2 ± 1 mm (0.080 ± 0.040 in.) from fins (B) on PTO clutch. NOTE: End of sensor is a magnet. Washer/gauge may drag on magnet creating false sensor-to-fin reading during checks.
IMPORTANT: Overtightening sensor nuts will damage (crack) sensor housing. 7. To tighten sensor: Hold sensor at location (E) with pliers. Tighten nut (D) 2-3 flats, or 1/3-1/2 turn, or 6 N·m (4.5 lb.-ft.). 8. Verify sensor is not damaged after tightening nuts.
9. Recheck 2 ± 1 mm (0.080 ± 0.040 in.) clearance between clutch fins and sensor while gently prying PTO clutch forward to simulate PTO driveline thrust loads. Hold PTO clutch forward and perform the following:
|
|
PP98408,000027D -19-19OCT09-5/10 |
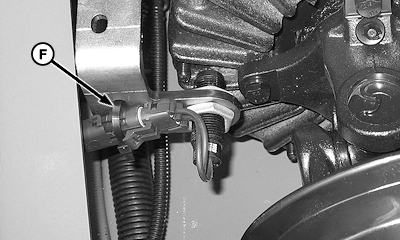
Tighten tie band (F) around wiring harness connector and secure to bracket. |
|
PP98408,000027D -19-19OCT09-6/10 |
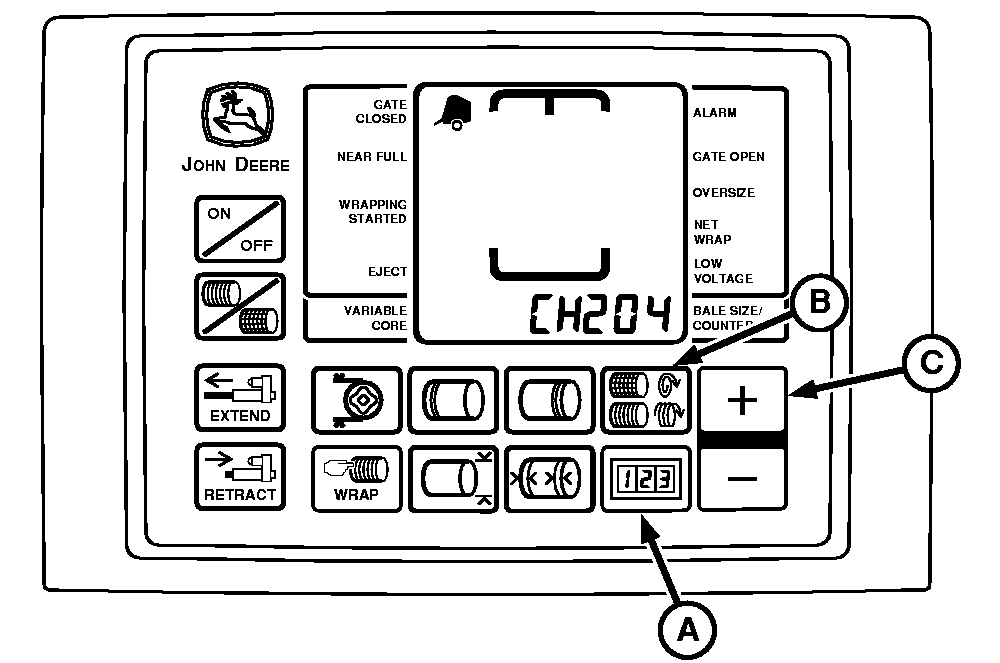
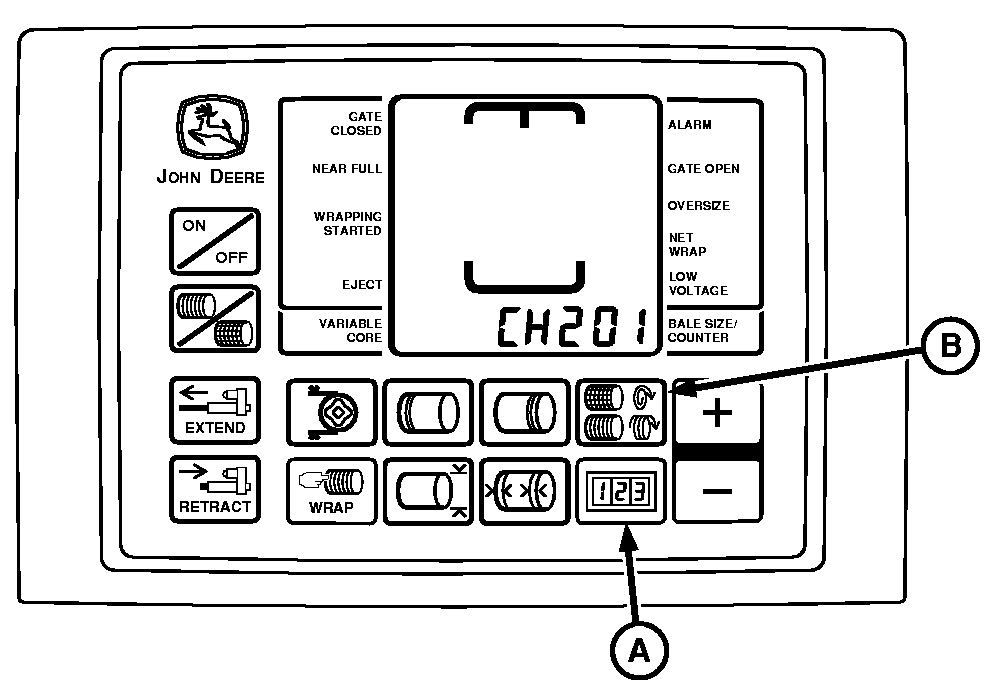
NOTE: PTO and pickup sensor values are set at factory. 11.Verify PTO and pickup sensor values are activated using the following procedure: |
|
PP98408,000027D -19-19OCT09-7/10 |
NOTE: The twine, net wrap, slip clutch alert, and optional variable core features will not operate correctly unless the model number displayed on monitor-controller matches baler model number. 12.Verify correct baler model program using the following procedure: To check sensor output and verify proper operation, use the following procedure: |
|
PP98408,000027D -19-19OCT09-8/10 |
Turning PTO Speed Sensor ON and OFF: Turning Pickup Speed Sensor ON and OFF: |
|
PP98408,000027D -19-19OCT09-9/10 |
|
IMPORTANT: Tie band wiring harness to hoses, as needed, to keep harness away from rotating slip clutch. IMPORTANT: Cap screw heads (B) should lead as driveline rotates counterclockwise when looking toward rear of baler. NOTE: Adjust cap screws evenly. 14.Install slip clutch and driveline (A). Fasten with two 1/2 x 2-3/4 in. cap screws (B) and lock nuts (C) included with driveline.
|
|
PP98408,000027D -19-19OCT09-10/10 |