Slip Main PTO Driveline Slip Clutch
-
 CAUTION:
Make sure that gate is locked. If gate is not locked while performing this procedure, the gate could close suddenly causing injury or death.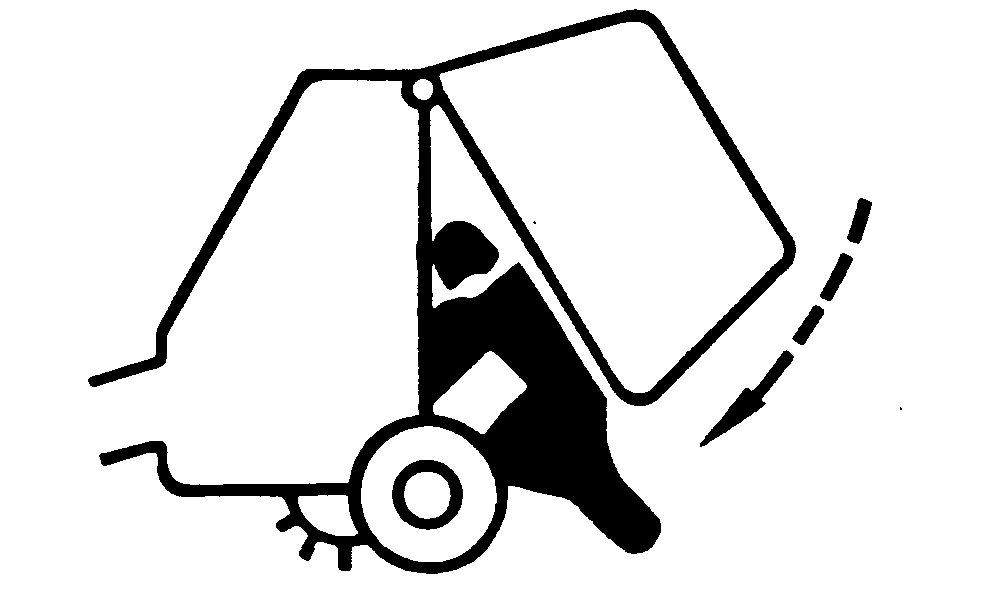
TS698-UN-21SEP89IMPORTANT: Disassemble and clean dirt between pressure plate and disk spring to maintain drive protection. Dirt becomes trapped between pressure plate and disk spring and will not allow disk spring to flatten.
IMPORTANT: At the beginning of each season, verify baler or tractor main drive slip clutch is not seized. Otherwise drive train damage can occur.
Raise gate fully using tractor hydraulics to slack belts.
-
Turn off tractor engine and remove key.
-
Lock gate.
-
Disconnect PTO driveline from tractor.
-
IMPORTANT: Loosen slip clutch bolts evenly. Failure to do so will cause clutch to fail.
If baler is operated with a seized-up clutch, damage to drive train can result.
NOTE: Do not loosen cap screws more than three turns.
E66562-UN-16AUG12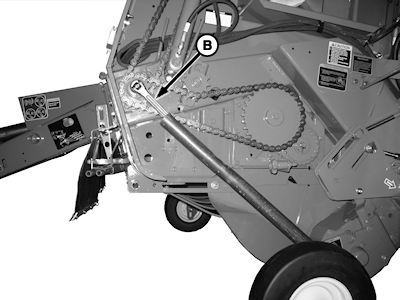
E61198-UN-22MAR12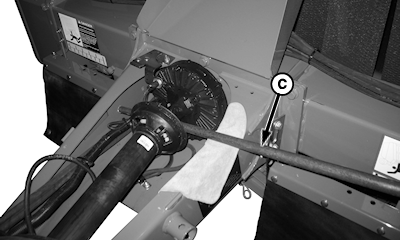
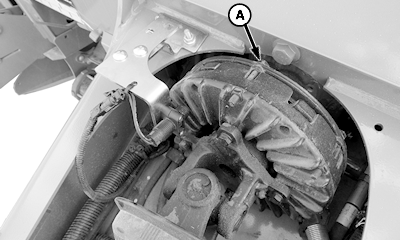
E61199-UN-22MAR12A - Cap Screw (6 used)
B - Socket
C - Bar
Loosen six slip clutch cap screws (A) evenly, 1—2 turns at a time. -
CAUTION: Never use any type of tool or wrench on shaft while
tractor engine is running. Always remove tool from shaft immediately
after use.
Put a 35 mm (1-3/8 in.) socket (B) and wrench with long handle on output shaft of gear case. Extend handle, if necessary, to contact baler axle or ground to keep wrench from rotating as shown.
-
Insert bar (C) between yoke and U-joint as shown.
-
Slip the clutch.
-
Remove socket (B) and bar (C).
-
Adjust slip clutch. (See ADJUST MAIN PTO DRIVELINE SLIP CLUTCH in this section.)
-
Unlock and lower gate.
|
PP98408,00010BB-19-20130211 |