Check and Adjust Clearance Between Cleaning Auger and Staggered
Belt Roll (469S and 569S)
(469 and 569 If Equipped)
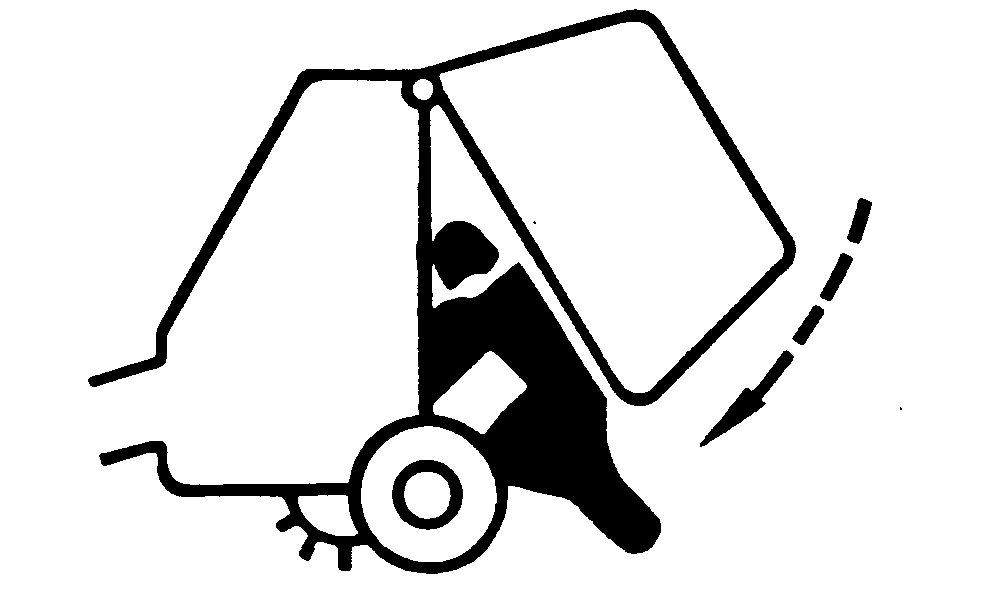
 CAUTION:
TS698-UN-21SEP89
E41086-UN-04OCT96
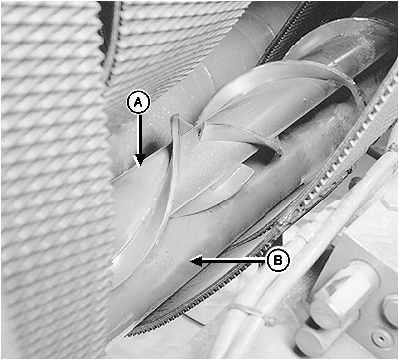
A - Cleaning Auger
B - Staggered Belt Roll
NOTE: Shield removed for illustration purposes.
The cleaning auger (A) must operate close to the staggered belt roll (B) and belts to function correctly.
Clearance between auger flighting and outside diameter of staggered belt roll must be within specifications with gate fully closed and belts tensioned.
| Item | Measurement | Specification |
| Auger Flighting-to-Staggered Belt Roll OD | Clearance | 1—3 mm (1/32—1/8 in.) |
Check Clearance
-
Start tractor engine.
-
Raise gate, shut OFF tractor engine, and remove key.
-
Lock the gate.
-
Disconnect cleaning auger drive chain.
-
Remove any crop or mud buildup on roll.
-
CAUTION: To reduce the risk of fire, verify cleaning auger flighting
moves crop toward center of baler when top of auger rotates forward.
Check clearance with a feeler gauge at both ends and in the middle of the baler. Rotate auger and check for eccentricity.
-
Verify cleaning auger flighting moves crop toward center of baler when top of auger rotates forward.
-
Reconnect cleaning auger chain. (See ADJUST LOWER DRIVE ROLL CHAIN in this section.)
Adjust Clearance
-
E41085-UN-04OCT96Right-Hand Side Shown
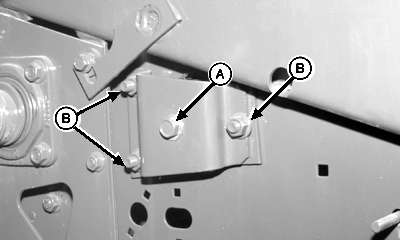
A - Roll Shaft Cap Screw
B - Roll Bracket Nuts
Remove cleaning auger chain. -
Loosen staggered belt roll shaft cap screw (A) and roll bracket nuts (B) on right and left-hand side of baler.
-
At both ends of staggered belt roll, put a 2 mm (0.078 in.) shim between flighting and outside diameter of staggered belt roll.
-
IMPORTANT: When tightening mounting hardware, make sure that roll is free to rotate with a minimum gap of 1 mm (0.039 in.) between roll and hole in sidesheet.
Hold roll firmly against shim and tighten all mounting hardware.
-
Remove shims used in previous step.
-
Start tractor engine. Close gate, shut OFF tractor engine, and remove key.
-
CAUTION: To reduce the risk of fire, verify cleaning auger flighting
moves crop toward center of baler when top of auger rotates forward.
Manually rotate auger. Check clearance between roll and auger flighting near both sidesheets and at a center location. Clearance must be within specifications. If not, reposition roller or check straightness of cleaning auger.
Item Measurement Specification Auger Flighting-to-Staggered Belt Roll OD Clearance 1—3 mm (1/32—1/8 in.) -
CAUTION: To reduce the risk of fire, verify cleaning auger flighting
moves crop toward center of baler when top of auger rotates forward.
Verify cleaning auger flighting moves crop toward center of baler when top of auger rotates forward.
-
Reconnect cleaning auger chain. Adjust chain idler. (See ADJUST LOWER DRIVE ROLL CHAIN in this section.)
|
PP98408,00010C5-19-20130211 |