Yearly Service
Check Tucker Finger Spring
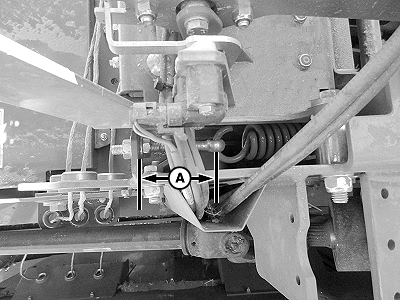
E81737-UN-31OCT16
Every year of operation, check tucker finger spring tension length.
Make sure that the tucker finger spring length (A) is within specification. Adjust as needed.
| Tucker Finger Spring Tension | Length | 50 mm (2 in) |
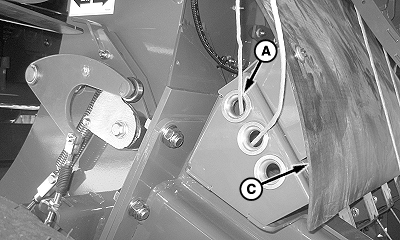
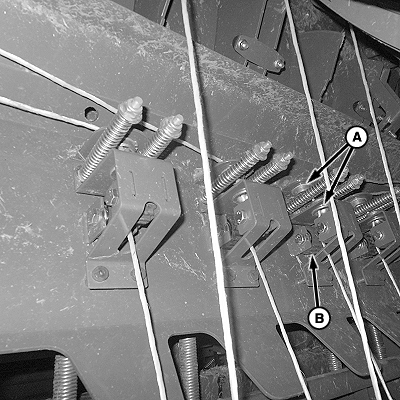
Check Needle to Knotter Clearances

E83167-UN-02JUN17
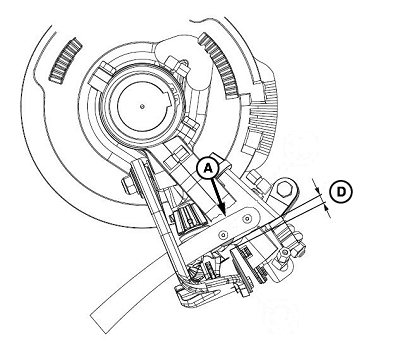
E83170-UN-02JUN17
A - Needle
B - Distance, 0 mm (0 in)
C - Force, 0—20 N (0—2 kg) (0—4.4 lbf)
D - Height, 2—3 mm
Every year of operation, check needle to knotter clearances.
Before checking the clearance, the needle must be in the top dead center position.
Check needle to knotter clearance:
- Trip the tying mechanism.
- To raise the needles to the top dead center position, turn the flywheel by hand to the right.
-
Distance between the side of needle (A) and knotter frame must
be set to the specified distance (B) (slightly touching).
Needle-to-Knotter Frame Distance 0 mm (0 in) -
The force (C) to free needle (A), (move to the left-hand side),
from the knotter frame must be set to specification.
Needle-to-Knotter Frame Force 0—20 N (0—2 kg) (0—4.4 lbf) -
The height (D) between the bottom of the needle and the top
of the twine retainer must be set to specification.
Needle Height 2—3 mm
To adjust the needles position to the knotter frame, force against the knotter frame, and height (see Adjust Needle in Service section).
Check Twine Placement Arm Spring
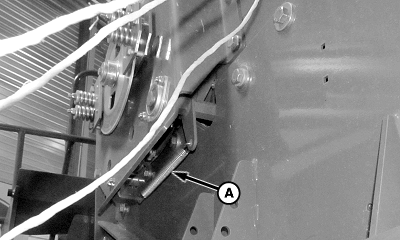
E77849-UN-18DEC14
A - Twine Placement Arm Spring
Every year of operation, check twine placement arm spring.
Check to make sure that twine placement arm spring (A) is attached and check for wear. Replace spring as needed.
Check Twine Path
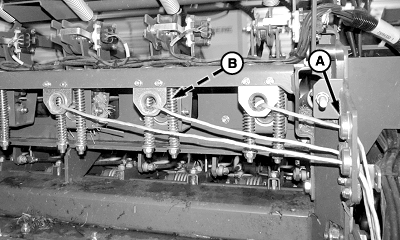
E77850-UN-18DEC14
Upper Twine Path
E80038-UN-01OCT15
Lower Twine Path
E80037-UN-01OCT15
Lower Twine Path
A - Eyelets
B - Tensioners
C - Rubber Shield
Every year of operation, check twine path.
It is necessary to move flexible rubber shield (C) to inspect lower twine tensioners.
Check for any debris or components contacting twine in its normal path. Check eyelets (A) and tensioners (B) for groove wear.
Check Wheel Nut Torque
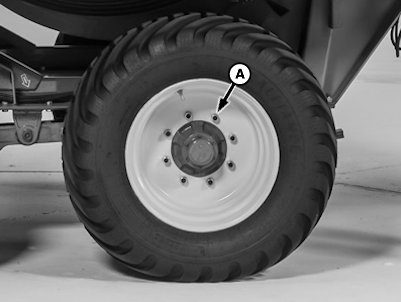
E75698-UN-08MAY14
A - Wheel Nut
Every year of operation, check the wheel nuts torque.
Check wheel nut torque after the first 10 hours and 50 hours of use.
Whenever a wheel has been removed and installed, check torque after 10 hours and 50 hours of operation. Tighten wheel nuts (A) to specification.
| (8) M18 Wheel Nuts | Torque | 270 N·m (200 lb·ft) |
| (10) M22 Wheel Nuts | Torque | 450 N·m (332 lb·ft) |
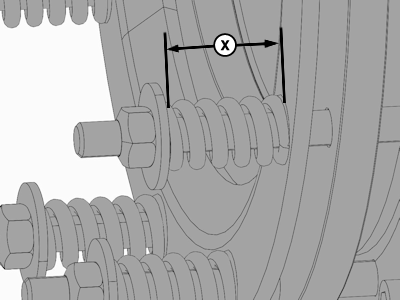
Check Friction Clutch
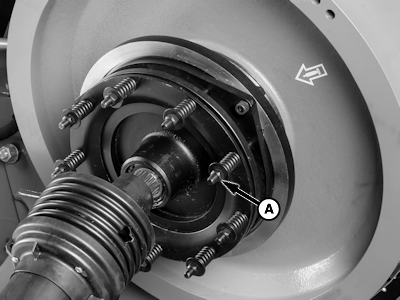
E76550-UN-17JUL14
E76549-UN-17JUL14
A - Nuts
X - 42.8 mm (1.69 in)
Every year of operation, check the friction clutch.
-
Loosen nuts (A).
-
Rotate clutch by hand.
Repair, or replace, clutch when clutch does not rotate freely or is damaged.
-
Adjust slip clutch tightening nuts (A) until specified distance (X) is reached.
Spring Length Distance 42.8 mm (1.69 in)
|
OUO6064,0001E07-19-20170605 |