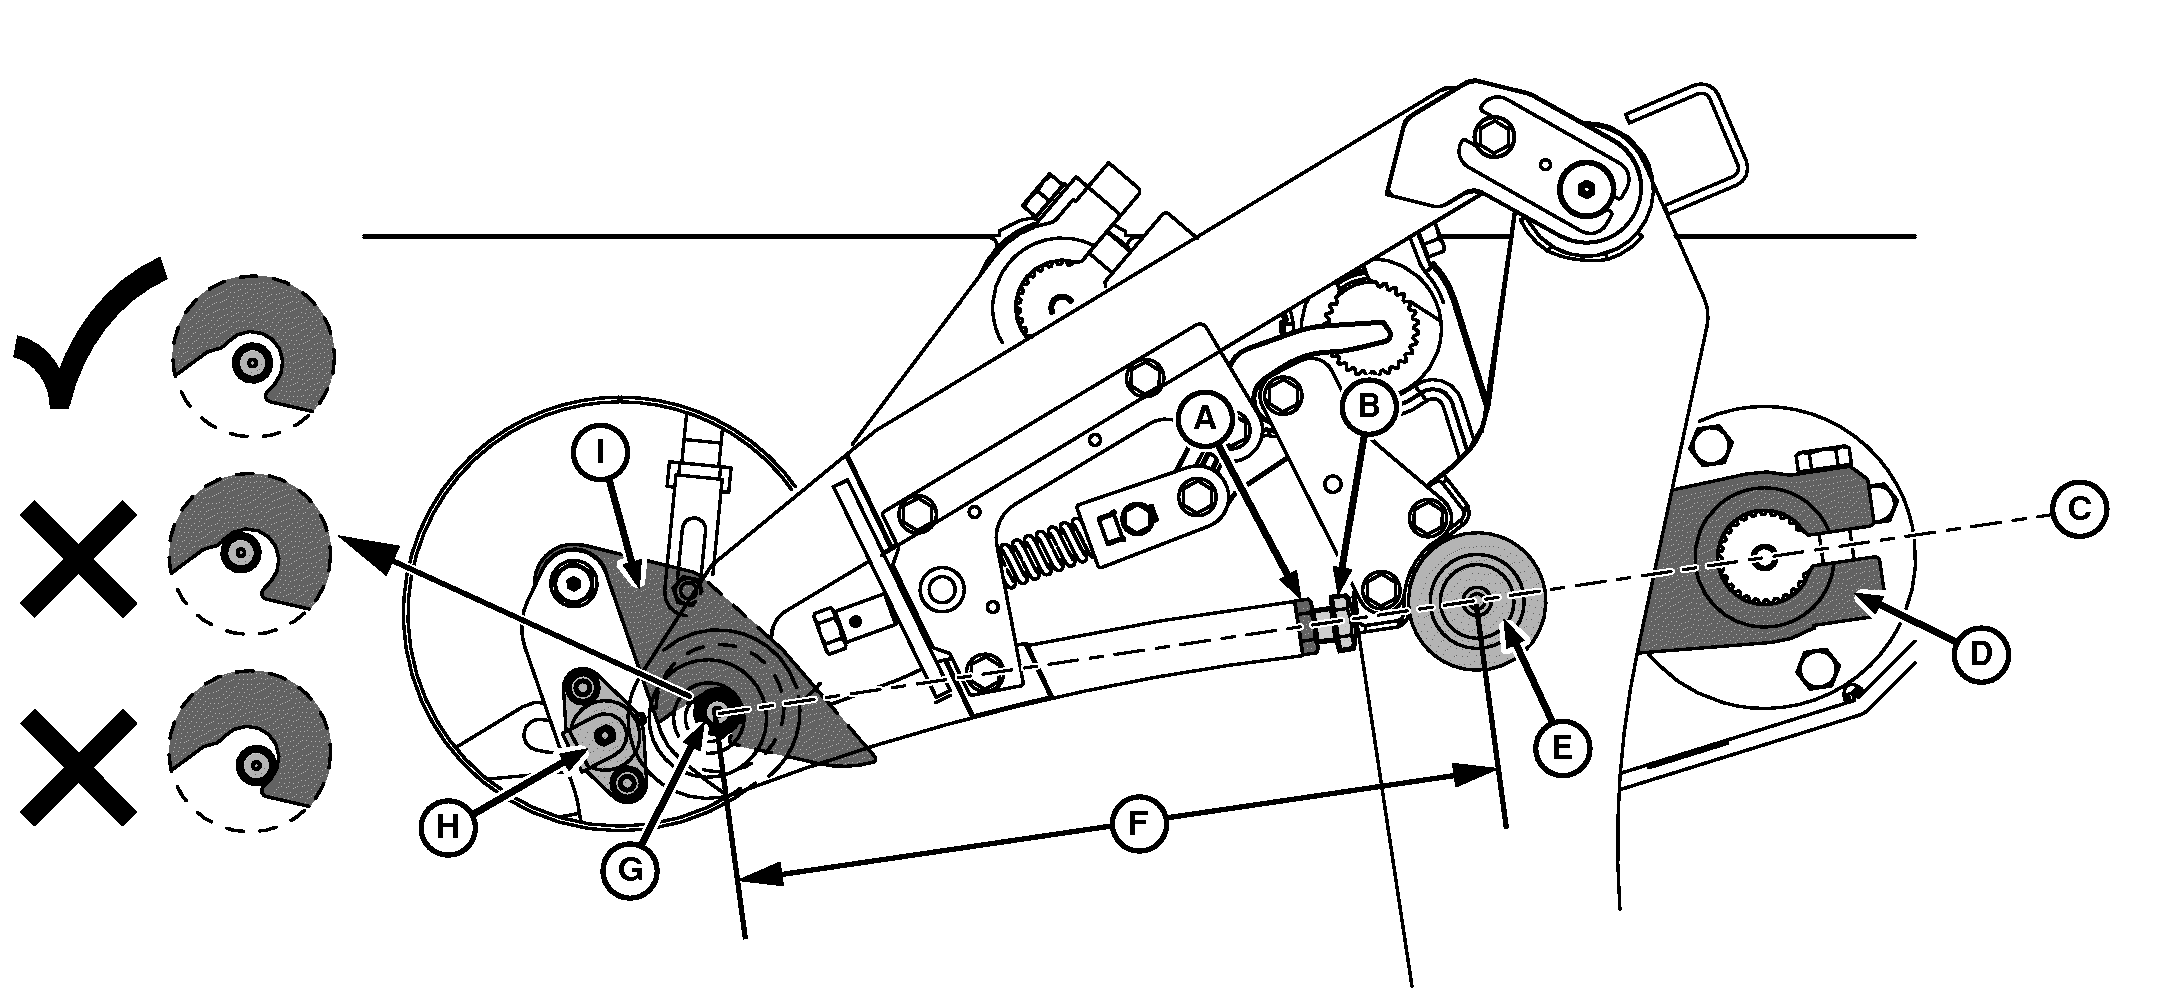
Check and Adjust Hook Synchronization
In order to check distance (F) a fill stroke must be completed by moving 1:1 locking lever (J) forward to initiate a fill stroke.
-
Check hook synchronization only when system is at beginning of filling stroke, and center of crank arm (D), bearing (E), and pin (G) are aligned. See illustration.
E72859-UN-07MAR14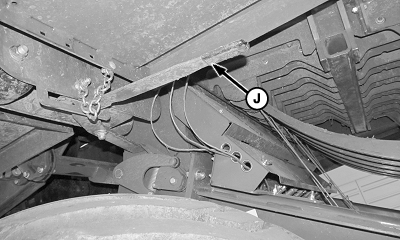
E72597-UN-11NOV14A - Lock Nut
B - Bolt
C - Centerline
D - Arm
E - Bearing
F - Distance
G - Pin
H - Lock Pin
I - Hook
J - 1:1 Locking Lever
Disengage flywheel brake. -
Turn flywheel by hand counterclockwise until center of crank arm (D), bearing (E), and pin (G) are in alignment and hook is down over pin (G).
-
Verify three points are aligned by holding a straight edge through center points.
-
Pin (G) is now fully forward and ready to be checked for alignment with center of hook (I).
-
Significant force is required to overcome spring force of hook.
Use a pry bar to lift hook off of pin (G). Pin must not move forward or backward and hook must lift cleanly off pin.
-
Lower hook back over pin and watch for any movement of pin or catching of hook. Pin must be in middle of slotted hole of hook as shown.
-
If hook does not fall smoothly and completely back over pin when pry bar is released, pin position needs to be adjusted.
Adjust Pin Position
-
Verify center of crank arm (D), bearing (E), and pin (G) are still in alignment with each other.
On right side:
- Loosen lock nut (A) and turn bolt (B) clockwise until it bottoms.
-
On left side:
- Use a pry bar to lift hook off-and-on pin (G) while setting pin-to-hook.
- Loosen lock nut (A).
- Tighten adjustment bolt (B) until you can feel resistance in hook movement due to roller rubbing on rear of hook slot.
- Count adjustment bolt “flats” while loosening bolt until a similar resistance can be felt in hook movement due to roller rubbing front surface of hook slot.
- Divide total number of “flats” in half and tighten adjustment bolt (B) that amount of “flats” to center pin-to-hook slot.
- Tighten lock nut (A).
-
On right-hand side, adjust bolt (B) out until it slightly touches arm then tighten lock nut (A).
-
Run machine for a few minutes and engage 1:1 locking lever several times to verify a smooth, downward movement of hook (I).
|
SF04007,0000A29-19-20160104 |