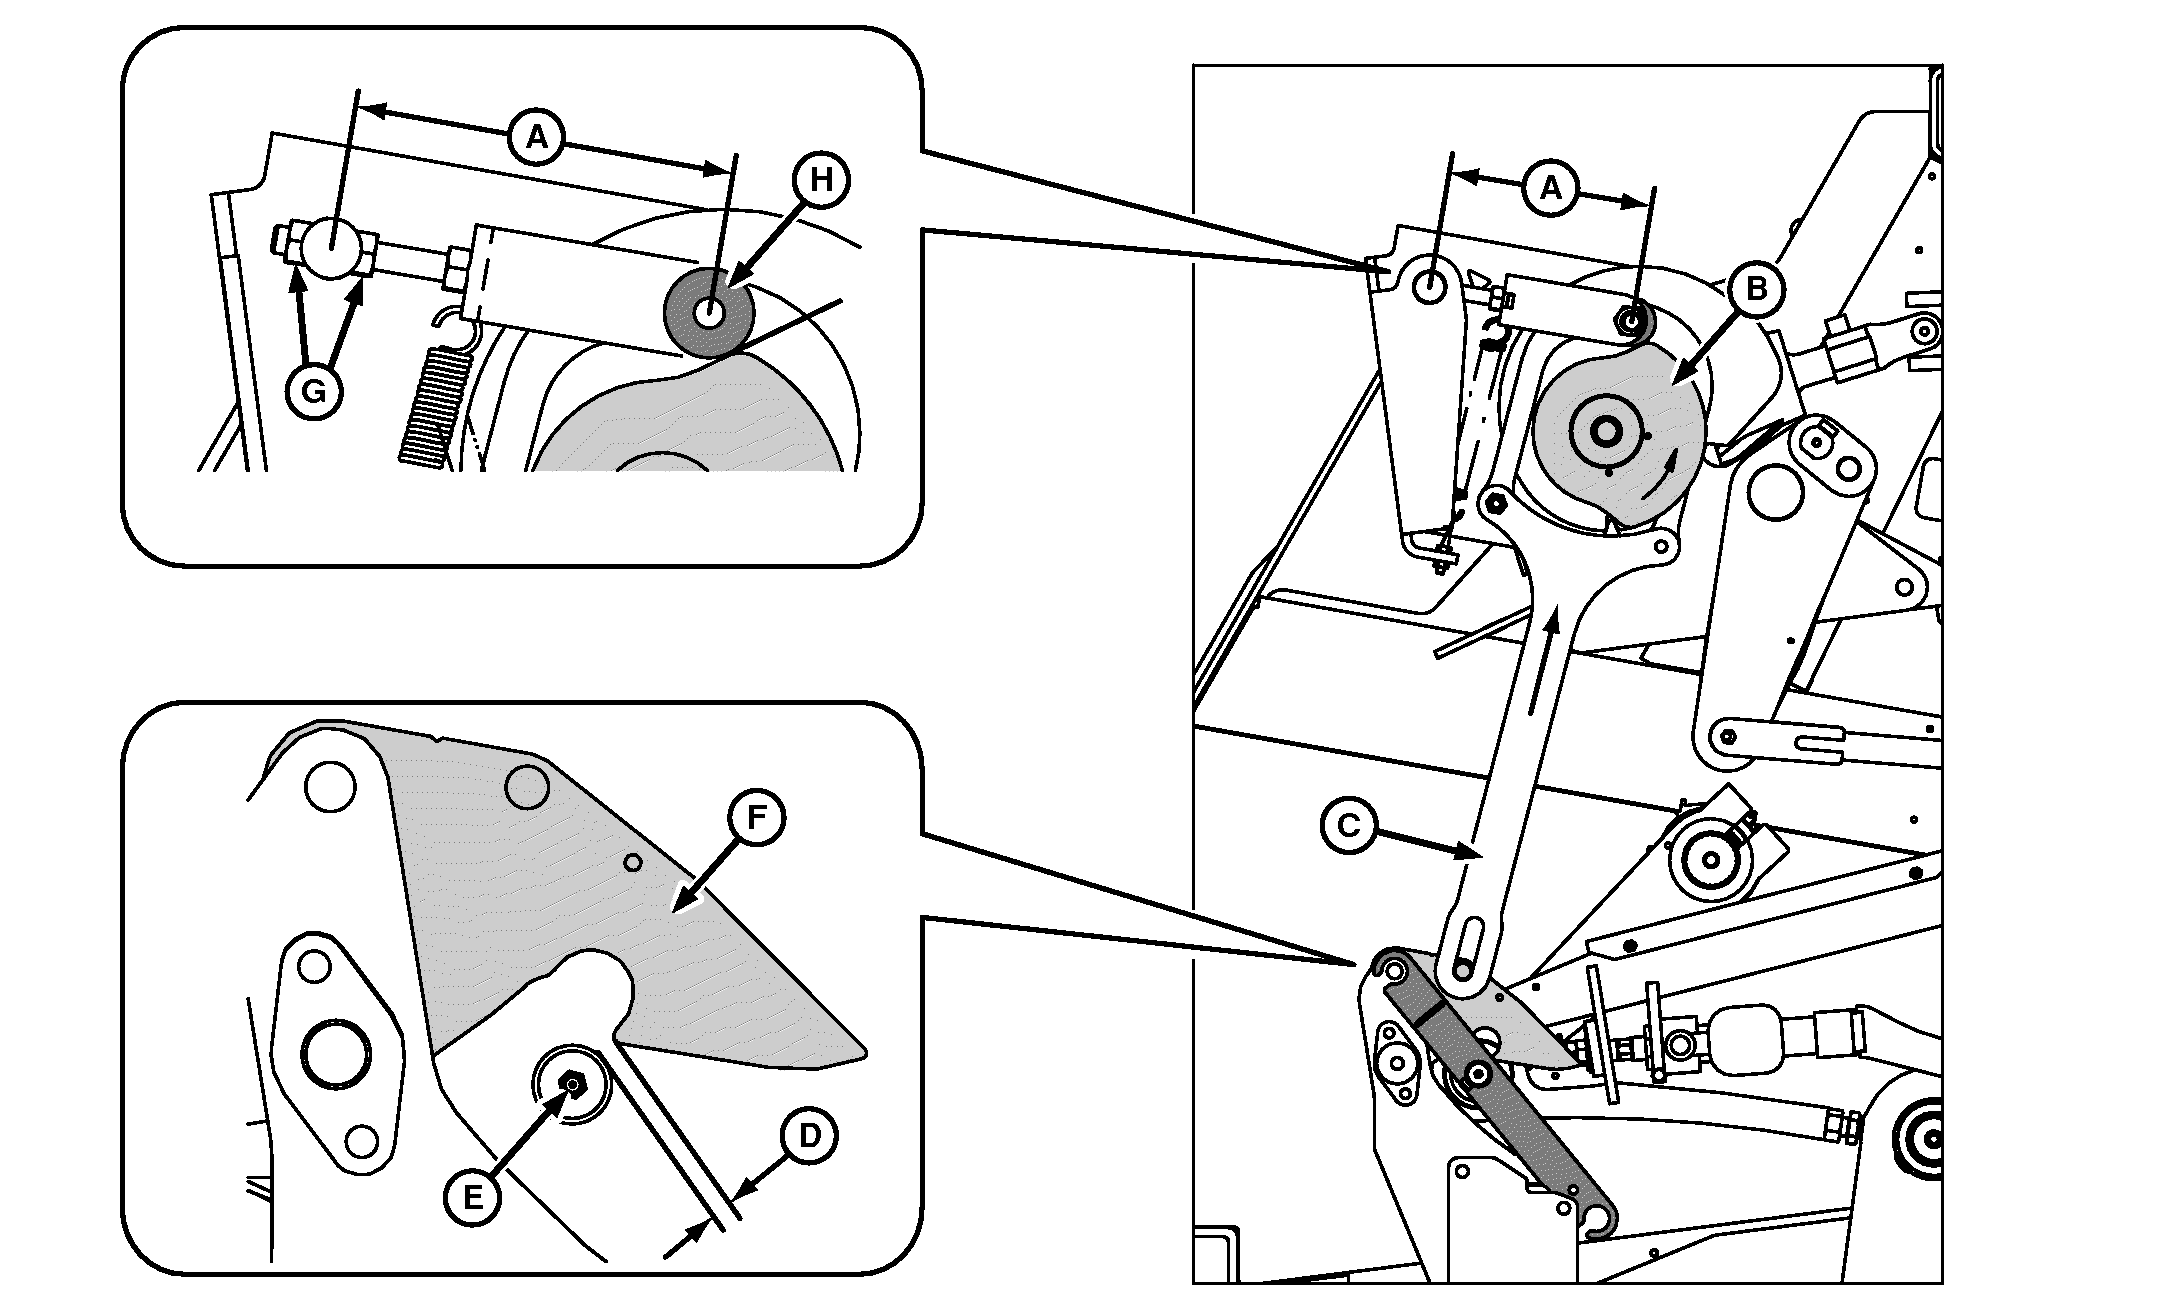
Check and Adjust Hook Lifting Mechanism
Procedure shown using a L1533 baler with adjusting rod facing forward. L1534 baler is the same, but adjusting rod faces rearward.
Serious damage to mechanism can result from improper hook-to-roller distance (D).
Distance (D) should only be checked when roller is riding up leading face of cam as shown in illustration.
E72858-UN-08OCT14
L1533 Baler Shown
A - Roller-to-Lock Nut Distance
B - Cam
C - Plate
D - Hook-to-Roller Distance
E - Roller
F - Hook
G - Lock Nuts (2 used)
H - Cam Roller
-
Turn flywheel by hand until hook (F) begins to lift. Verify cam roller (H) is riding up leading face of cam (B) as shown. Continue turning flywheel until roller (E) is centered under lowest part of hook (F) as shown.
-
If a 4 mm (3/16 in.) plate is not available, a drill bit of the same size can be used as a feeler gauge.
Check that hook (F)-to-roller (E) distance (D) is within specification.
Hook-to-Roller Distance 4 ± 1 mm (0.157 ± 0.04 in.) If distance (D) cannot be achieved with adjustment of distance (A), the hook lifting mechanism may need rebuilt. (See Checking and Repair Hook Lifting Mechanism for Wear in this section.)
Adjust cam roller (H) as follows:
-
Loosen lock nuts (G).
-
Adjust cam roller (H)-to-nut distance (A) until hook (F)-to-roller (E) distance (D) is within specification.
- Moving cam roller (H) rearward will increase distance (D)
- Moving cam roller (H) forward will decrease distance (D)
-
Tighten lock nuts.
-
-
Turn flywheel by hand and complete an entire filling cycle and observe hook (F) for smooth motion.
-
Run baler at a low RPM with feeder fork in 1:1 and automatic mode for several minutes.
-
Disengage PTO, set tractor parking brake, shut off tractor, and remove key.
-
Recheck hook-to-roller (E) distance (D), readjust as necessary.
-
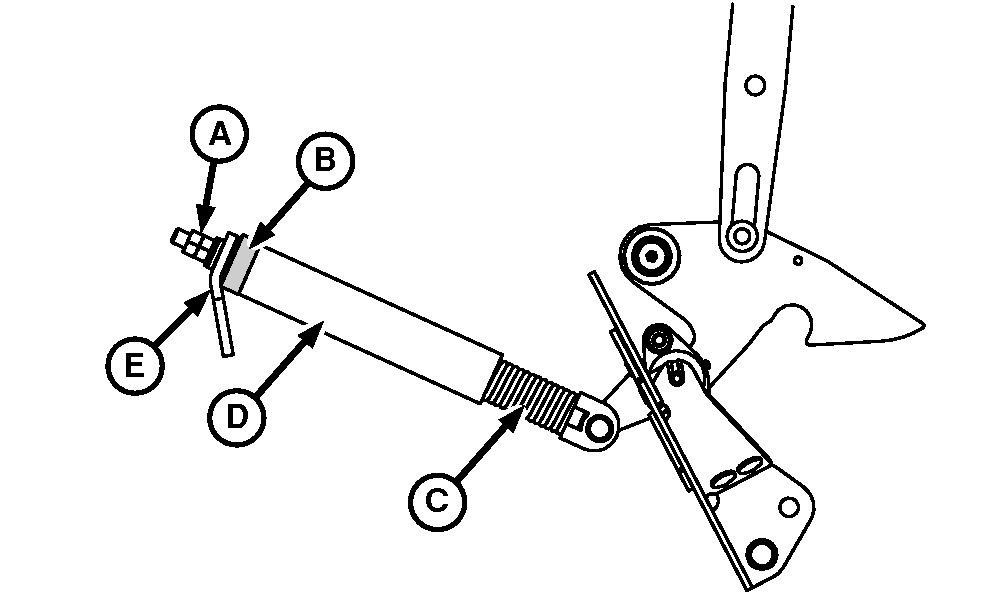
E72595-UN-14FEB14A - Nuts
B - Hose Clamp
C - Spring
D - Cover
E - Plate
Adjust Hook Spring SettingUpper part of spring (C) must be against plate (E). Verify that spring is not rotating while tightening nuts (A).
Complete following steps to set hook spring:
-
Tighten nuts (A).
-
Fit cover (D) tightly over spring (C).
-
Tighten hose clamp (B).
-
-
Check hook synchronization. (See Check and Adjust Hook Synchronization in this section.)
|
SF04007,0000A2A-19-20160104 |