Remove or Install Precutter Knives (23-Knife Precutter)
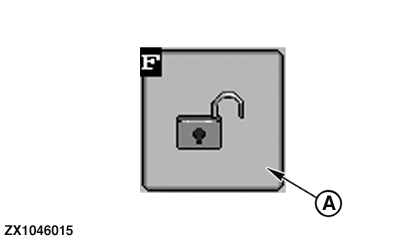
ZX1046015-UN-03JAN12
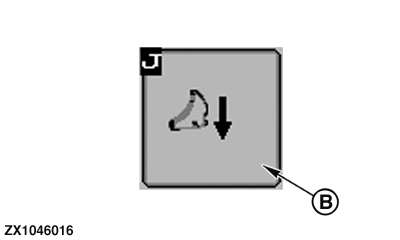
ZX1046016-UN-03JAN12
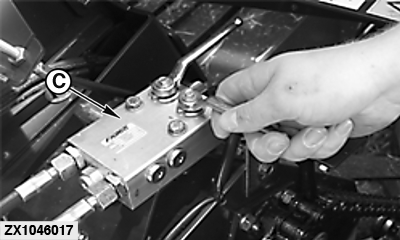
ZX1046017-UN-03JAN12
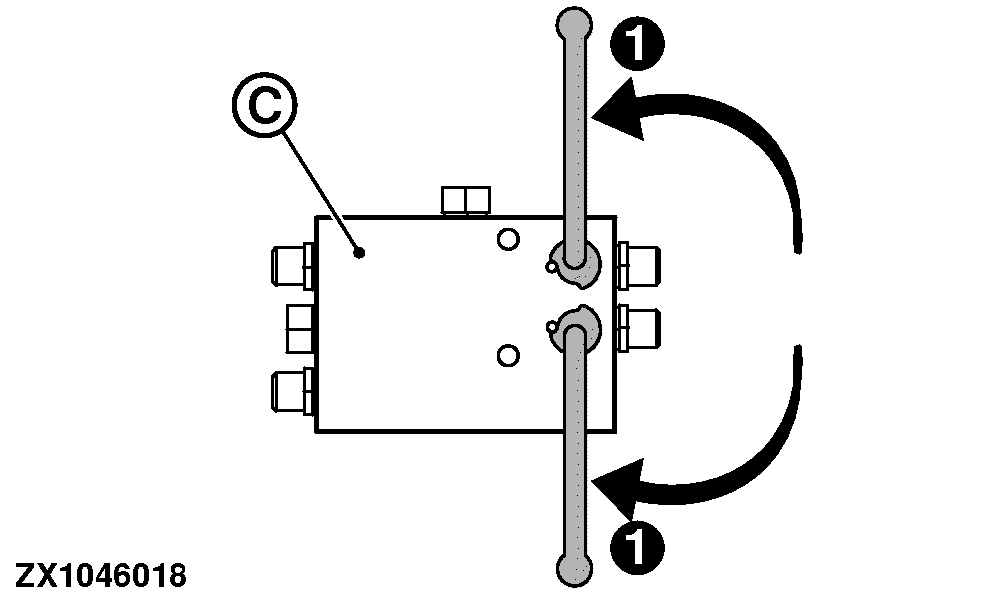
ZX1046018-UN-03JAN12
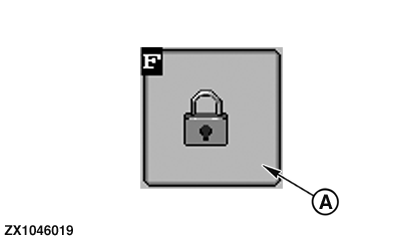
A - Unlock Button
B - Disengage Knives Button
C - Hydraulic Block
1 - Lever (Closed Position)
 Avoid injury or death from knife cut. Always wear gloves
to handle knives.
Avoid injury or death from knife cut. Always wear gloves
to handle knives.
Refer to Operate Baler Application section for control monitor operation.
Knives are removed to change cutting length or for sharpening. Knives are easily removed by sliding out knife cassette to right-hand side of machine.
Remove The Knives:
-
Engage tractor PTO.
-
Press unlock button (A) to switch from basic to operating display (see Operate Baler Application section).
-
Press disengage knives button (B) to move out knives.
-
Wait until knife symbol has disappeared.
-
Close both valves (place lever into position 1) of hydraulic block (C) on left-hand side.
-
ZX1046019-UN-03JAN12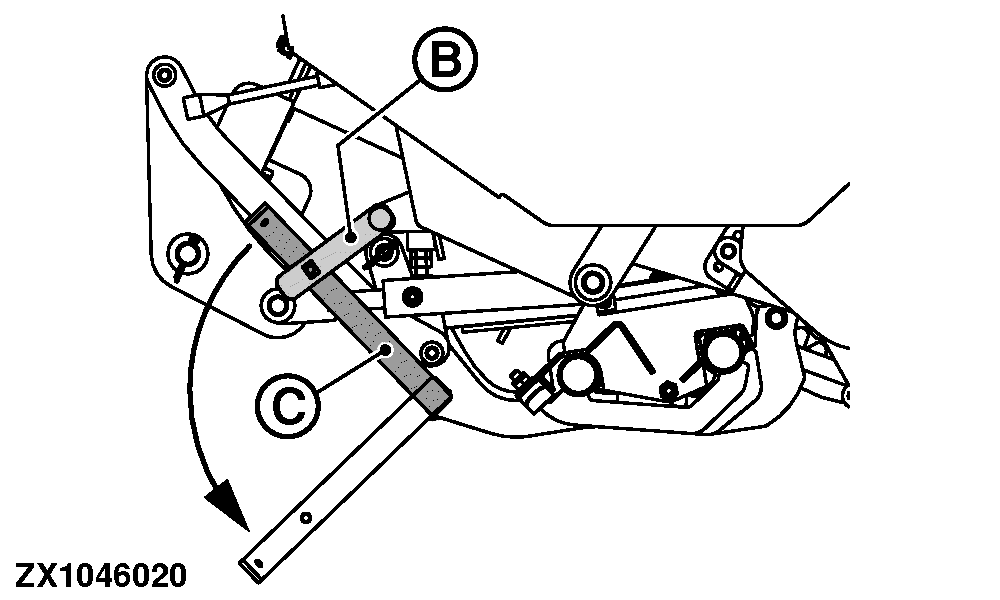
ZX1046020-UN-03JAN12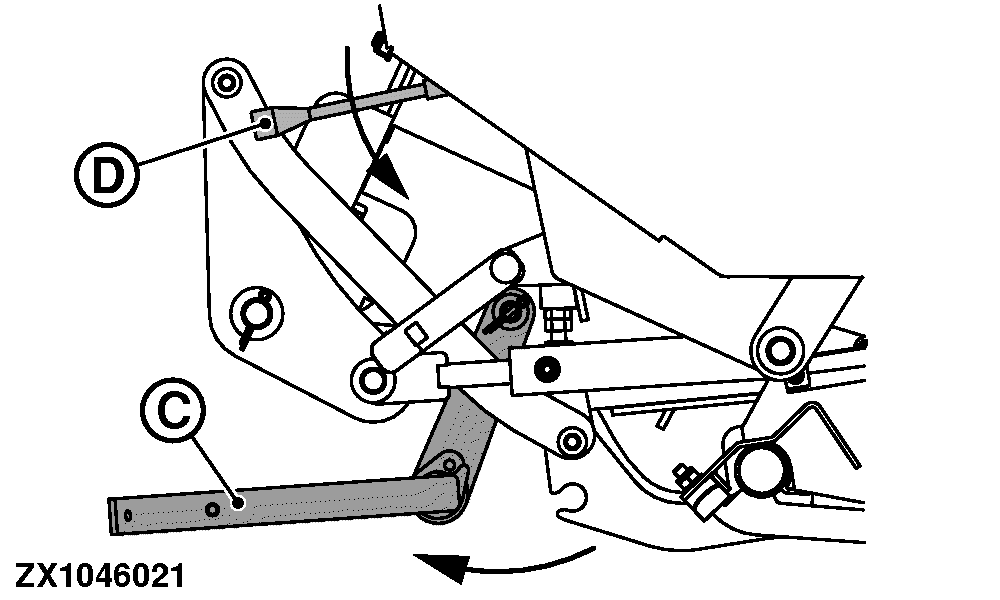
ZX1046021-UN-03JAN12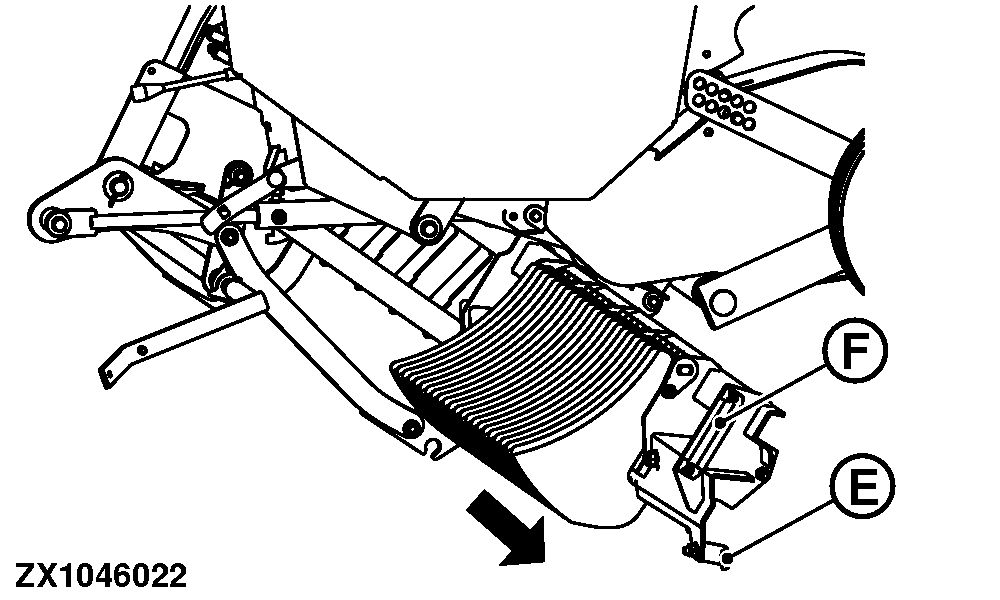
ZX1046022-UN-03JAN12A - Lock Button
B - Leaf Spring
C - Lever
D - Lever
E - Leaf Spring
F - Handle
Press lock button (A) to switch from operating to basic (Lock) display (see Operate Baler Application section). -
Fully lift pickup (see Operate Baler section).
-
Disengage tractor PTO.
-
Apply flywheel brake (see Operating the Baler section).
-
Put hydraulic pressure for bale ejector – bale chute – knife cassette with relevant selective control valve lever.
-
Go to right-hand side of machine, and open knife cassette.
-
Lift leaf spring (B) and pull down lever (C) until it bottoms.
-
Swing lever (C) towards rear of machine.
-
Push lever (D) on hydraulic block down to lower knife cassette.
-
Lift leaf spring (E) and pull cassette out using handle (F) until it bottoms.
-
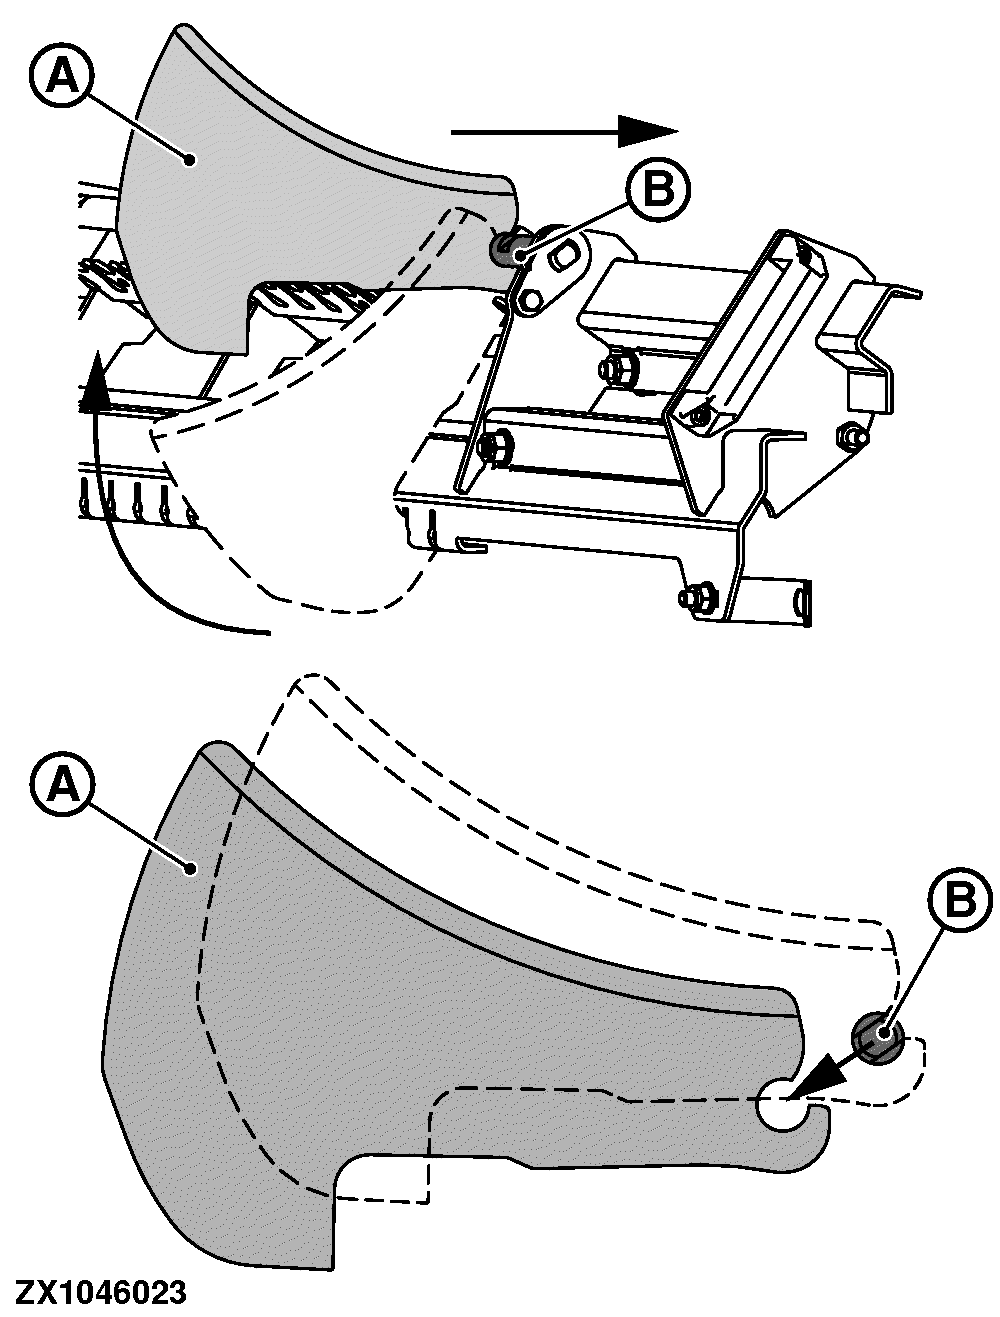
ZX1046023-UN-03JAN12A - Knife
B - Rod
Lift back of knife (A). -
Slide knife (A) sideways over rod (B) towards nearest flat surface on rod (B).
-
Slide knife (A) backwards over flat surface and remove.
Install The Knives:
To mount a knife on cassette, proceed in reverse order.
Always keep precutter knives sharp. Sharp knives save power and provide a higher capacity. See Service section.
-
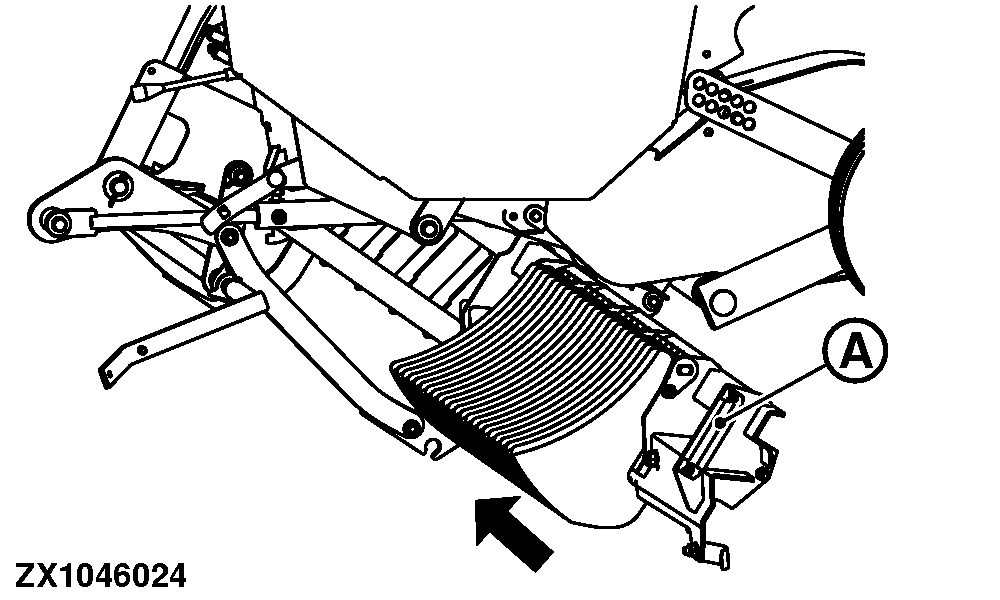
ZX1046024-UN-03JAN12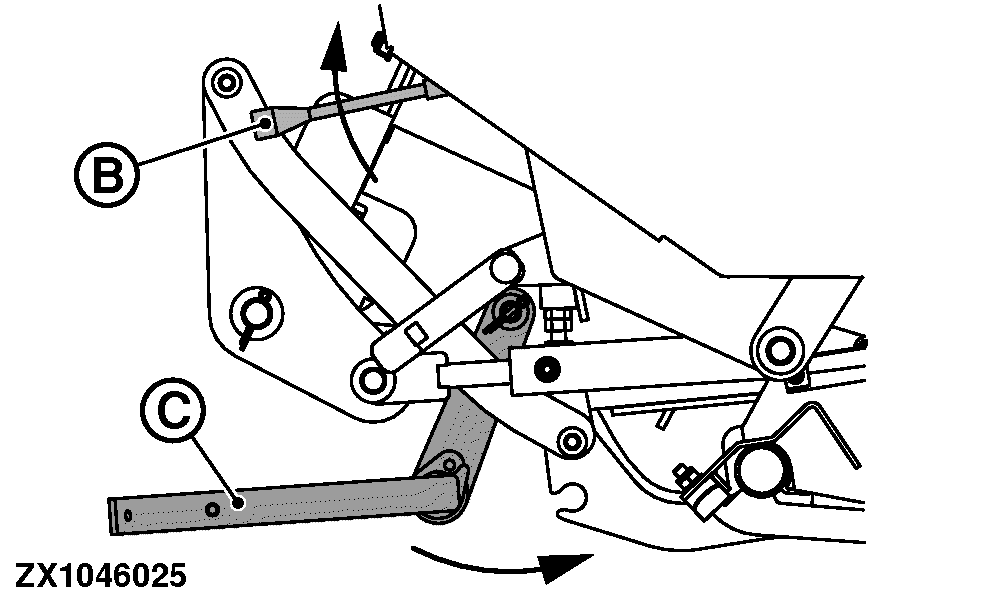
ZX1046025-UN-03JAN12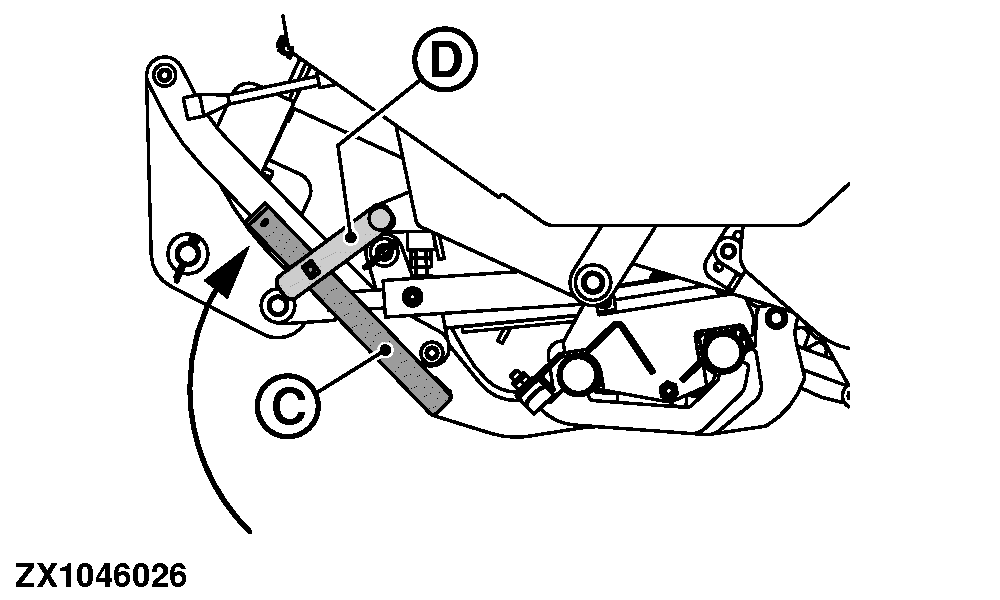
ZX1046026-UN-03JAN12A - Cassette
B - Lever
C - Lever
D - Leaf Spring
Push cassette (A) in by its handle until it bottoms.Clean cassette. Make sure that all knives are down when cleaning cassette. Make sure that knives are in slots of cassette, before closing cassette.
-
Push up lever (B) on hydraulic block moving cassette up.
-
Swing lever (C) towards front of machine until rod falls into hole in cassette.
-
Turn lever (C) upwards until leaf spring (D) catches it.
-
Remove hydraulic pressure for bale ejector – bale chute – knife cassette with relevant selective control valve lever.
ZX1046029-UN-03JAN12

ZX1046030-UN-03JAN12
ZX1046031-UN-03JAN12
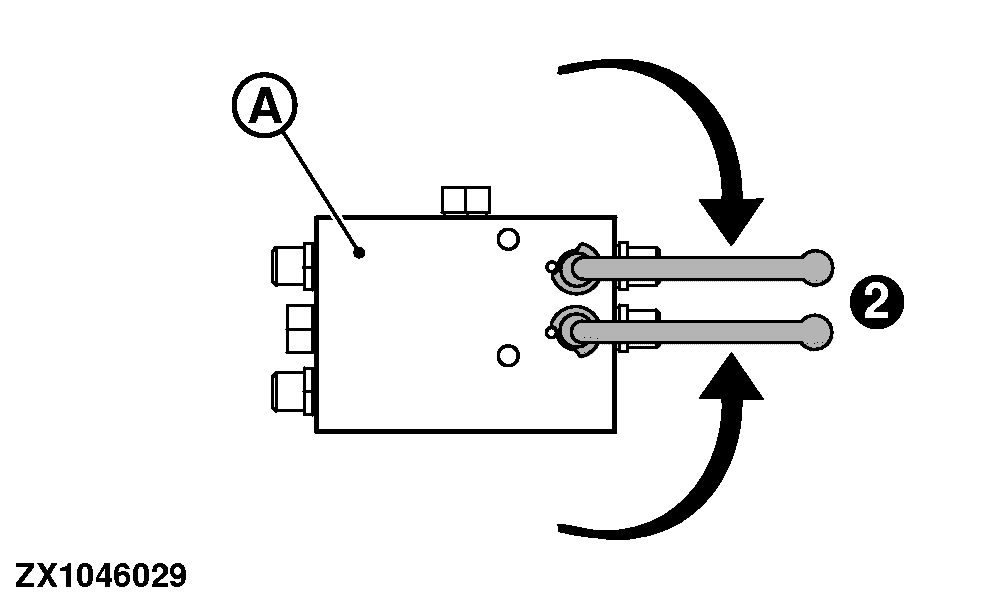
A - Hydraulic Block
B - Unlock Button
C - Engage Knives Button
2 - Lever (Open Position)
Set Cutting Length:Set cutting length, by varying amount and position of knives.
Minimum cutting length of about 45 mm (1.77 in) is reached by using 23 knives only.
Number of knives, and cutting length, is chosen as desired. All variations from zero through 23 knives are possible.
When using 11 or fewer knives at once, quick-change of knives is possible by changing between 2 main bars with each 11, 12 or less knives.
Selecting knives is only possible if:
- Knives are selected
- Concerning hydraulic valve is operated
- Machine is in operation
- Density system has reached preset pressure value
For a use of 23 knives, proceed as follows:
-
Ensure that all 23 knives are installed.
-
Open both valves (place lever into position 2) at hydraulic block (A) on left-hand side.
-
Engage tractor PTO.
-
Press unlock button (B) to switch from basic to operating display (see Electronic Control System section).
-
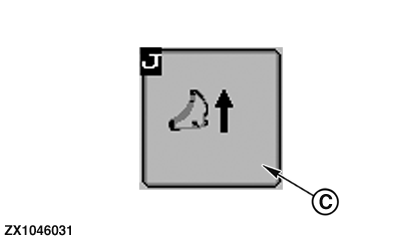
Press engage knives button (C) to move knives in. Wait until knife symbol appears.
ZX1046029-UN-03JAN12
ZX1046030-UN-03JAN12

ZX1046032-UN-03JAN12
ZX1046033-UN-03JAN12
ZX1046034-UN-03JAN12
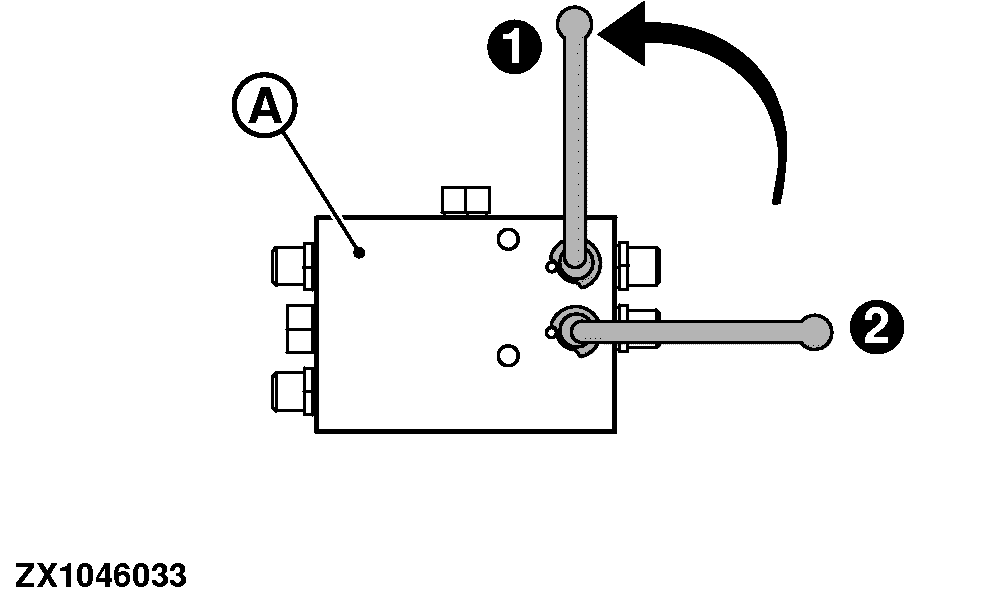
A - Hydraulic Block
B - Unlock Button
C - Disengage Knives Button
D - Engage Knives Button
1 - Lever (Closed Position)
2 - Lever (Open Position)
For a use of 12 or 11 knives, proceed as follows:-
Open both valves (place lever into position 2) at hydraulic block (A) on left-hand side.
-
Engage tractor PTO.
-
Press unlock button (B) to switch from basic to operating display (see Operate Baler Application section).
-
Press disengage knives button (C) to move out knives.
-
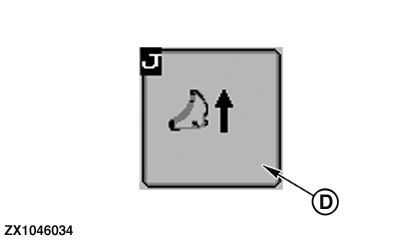
Wait until knife symbol disappears.
-
Disengage tractor PTO.
-
Close one of both valves (place lever into position 1) of hydraulic block (A) on left-hand side.
-
Engage tractor PTO.
-
Press engage knives button (D) to move knives in. Wait until knife symbol appears.
Half of knives are used.
When other half of knives have to be used, repeat procedure but close other valve.
ZX1046029-UN-03JAN12
ZX1046030-UN-03JAN12
ZX1046032-UN-03JAN12
A - Hydraulic Block
B - Unlock Button
C - Disengage Knives Button
2 - Lever (Open Position)
For a use without knives, proceed as follows:-
Open both valves (place lever into position 2) at hydraulic block (A) on left-hand side.
-
Engage tractor PTO.
-
Press unlock button (B) to switch from basic to operating display (see Operate Baler Application section).
-
Press disengage knives button (C) to move out knives.
-
Wait until knife symbol disappears.
-
Disengage tractor PTO. Knives are not in use.
|
SF04007,0000A72-19-20160106 |