Remove Net Wrap Actuator
-
Use the monitor when removing the net wrap actuator to allow the EXTEND and RETRACT functions to control actuator position and remove load from the actuator mounting pins.
Open the net wrap cover.
-
Unlatch and open the actuator door.
-
Turn the tractor ignition key to the ON position. Do not start the tractor engine.
-
Select the Settings softkey.
E84879-UN-09OCT17 -
Select the Baler Diagnostics softkey.
E64643-UN-11MAY12 -
Select the Test Output softkey.
E84890-UN-09OCT17 -
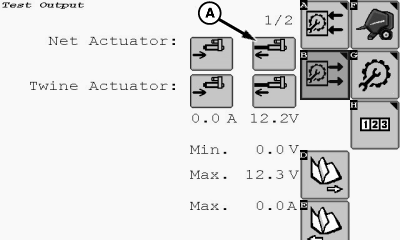
E85172-UN-25OCT17A - Actuator Extend Icon
Select the Actuator Extend icon (A) and extend the actuator. -
Retracting the actuator causes the mounting pins to bind.
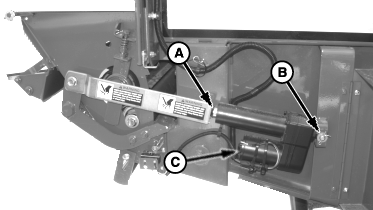
E54540-UN-01MAY06A - Pin
B - Pin
C - Actuator
Verify that the actuator (C) has released the load from mounting pins (A and B). -
 To avoid personal injury from unexpected knife movement,
disconnect power from the net wrap actuator. Disconnect the ISOBUS
baler plug from the tractor ISO socket when working in this area.
To avoid personal injury from unexpected knife movement,
disconnect power from the net wrap actuator. Disconnect the ISOBUS
baler plug from the tractor ISO socket when working in this area.Turn the tractor ignition key to the OFF position and remove key. Disconnect the ISOBUS baler plug from the tractor ISO socket.
-
Remove the tie band from around the actuator motor and disconnect the actuator wiring connector.
-
Record the location of washers on the mounting pins to aid in installation of the actuator.
Remove mounting pins (A and B), washers, and actuator (C). Retain pins and washers for use at installation.
|
DP99999,0000E73-19-20171106 |