Operate Baler in Automation Mode Using Net or Twine (Automation Level 2)
Before attempting to operate the tractor and baler in the automation mode, the operator must be familiar with the tractor (with IVT transmission) and round baler in normal operation. It is recommended that the operator make several bales before changing to the automation mode to become familiar with the tractor and baler combination.
Before automation mode activation, check following conditions:
- Desired baler settings are all selected (baler push bar must be used with automation mode).
- Automation level is selected. (See SELECT AUTOMATION LEVEL in this section.
-
See ADJUST TRACTOR BEHAVIOR in this section to change
acceleration and deceleration settings.
Baler rear gate selective control valve is selected. (See SELECT REAR GATE SELECTIVE CONTROL VALVE in this section.) - Automation state pie (B) shows Ready-to-Enable (2/4 of pie). (See AUTOMATION STATE PIE in this section.)
-
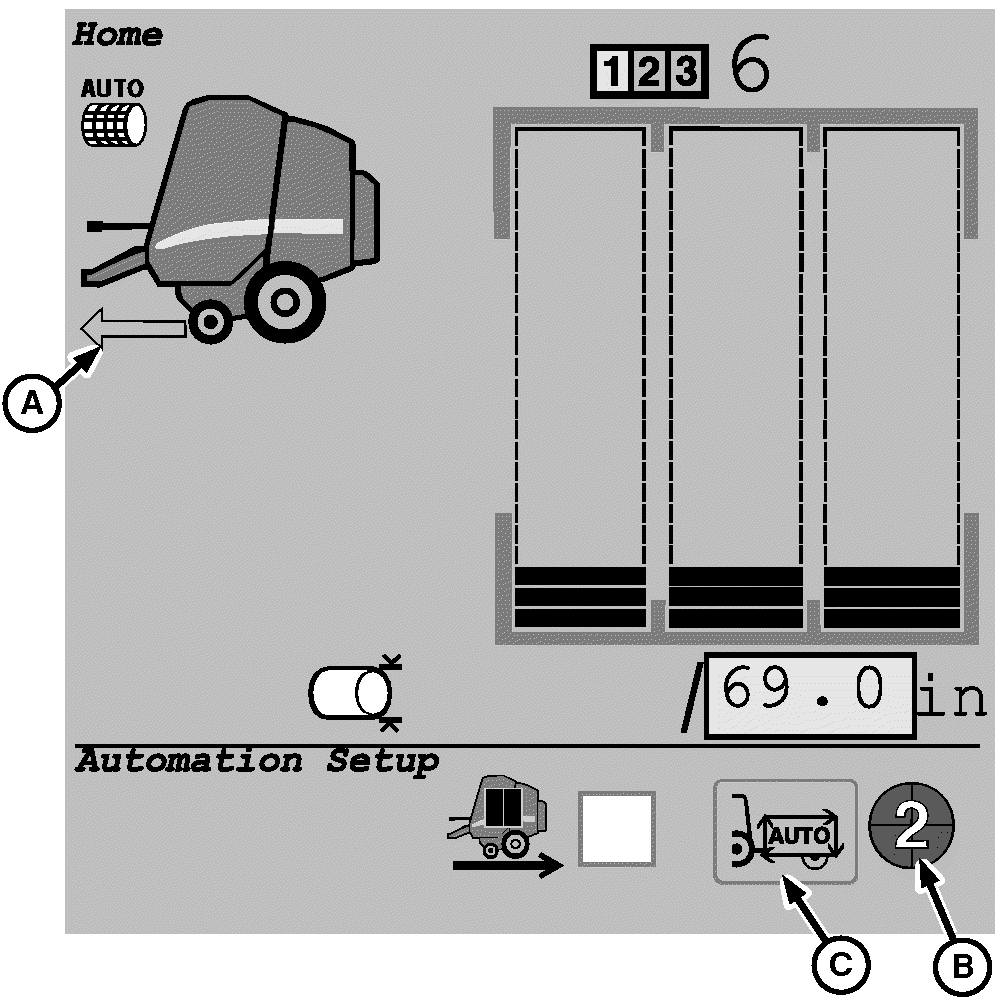
E67306-UN-14AUG12A - Baler Ready to Go
B - Automation State Pie
C - Enable or Disable Automation
Select and activate icon (C) to switch automation state (B) to Enabled (3/4 of pie). -
Engage PTO, set engine to operating speed, and select an initial ground speed.
-

E76701-UN-29JUL14Automation Resume Switch Shown

E76707-UN-30JUL14Active State Pie Shown
Move tractor reverser level to forward position (automation level 2 only) and press tractor-implement automation resume switch. (See TIA—TRACTOR-IMPLEMENT AUTOMATION section in your tractor operator’s manual.) -
Automation state pie is switched to Active (4/4 of pie) and monitor beeps to indicate that automation mode is activated.
-
The tractor accelerates to the speed selected and baling begins.
-
The operator can adjust ground speed as necessary for baling normally at any time except deceleration when preparing to wrap.
-
If tractor ground speed control lever is moved forward (faster) as tractor begins to decelerate when selected bale diameter is reached and wrapping starts, automation is deactivated.
Since the tractor reverser lever is still in forward, the tractor continues to go forward rather than stopping, even through the bale is wrapped.
Additional layers of hay are applied to the outside of the wrapped bale.
The oversize bale alarm sounds when the bale exceeds the machine capability. The stop sign on the monitor is displayed and alarms sound. Immediately stop forward motion and wrap the bale using operator controlled wrap softkey.
Failure to stop baler immediately can result in serious damage to the baler.
If Automation Level 2 was selected and the baler is set to wrap twine or net when the bale diameter selected is reached, the tractor decelerates and stop while the baler is wrapping the bale.
-
After the wrapping cycle is complete, the tractor SCV selected to control the baler gate will open the gate to discharge the bale and then close the gate.
 Bale push bar is activated when gate is opened. Be
sure that bystanders are clear and there is sufficient clearance behind
bale when opening the gate.
Bale push bar is activated when gate is opened. Be
sure that bystanders are clear and there is sufficient clearance behind
bale when opening the gate.To prevent injury or damage from a rolling bale, discharge bales on level ground or in such a manner that the bale does not roll.
Baler automation requires the use of the push bar to move the bale from under the gate before the gate can be closed. The Automation Pause function can be used to help bale placement by allowing the operator to maneuver the baler before opening the gate and discharging the bale with a pushbar. Operating the baler in Automation mode or Automation Pause mode may not be appropriate for field conditions where there is a potential for rolling bales.
See Automation Pause Function (Manual Bale Unload) in this section for details about its operation.
-
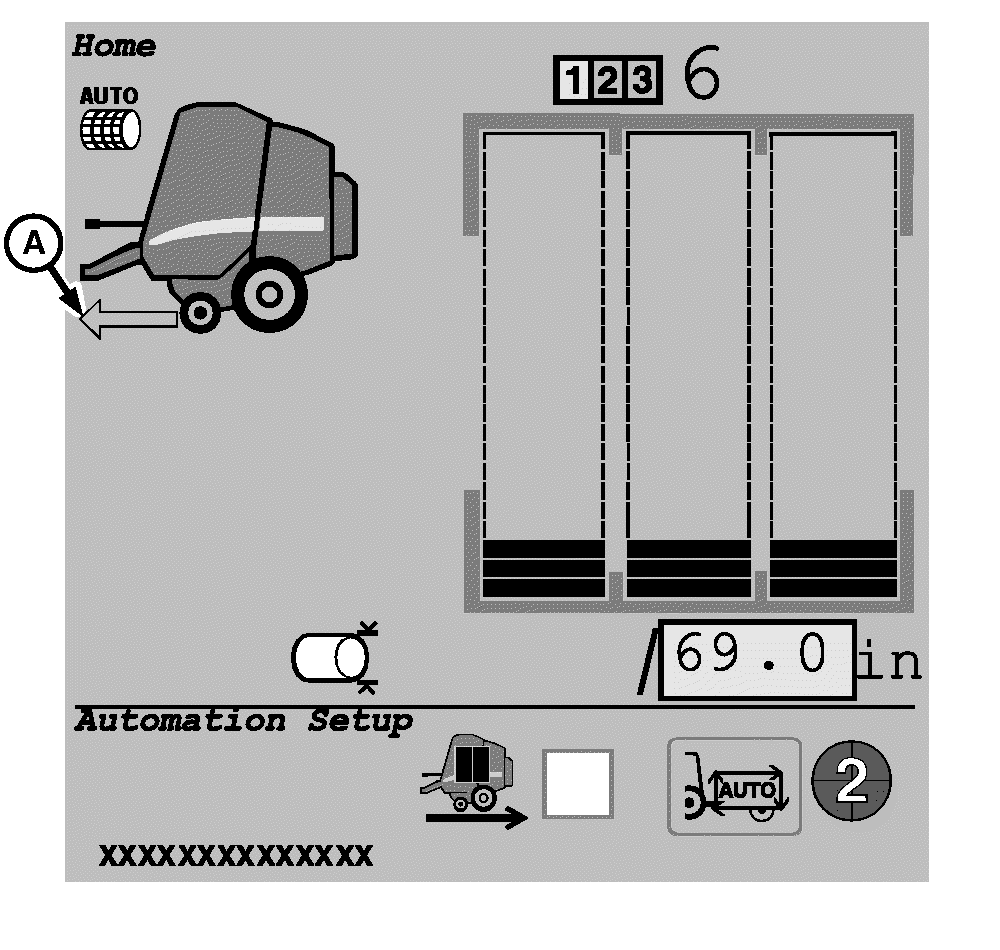
E67469-UN-21AUG12A - Baler Ready to Go
After bale unloading is complete, Baler Ready to Go arrow (A) is displayed to indicate that the baler is ready to proceed in automation mode. -
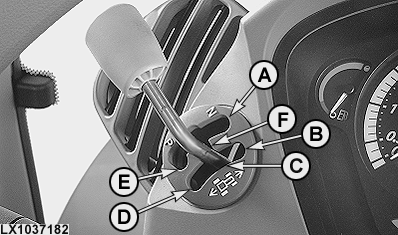
LX1037182-UN-06JUN06A - Neutral
B - Forward
C - “Power Zero”
D - Reverse
E - Corner Park
F - Center Park
Move tractor reverser lever from forward (B) to center park (F) and then to forward (B) again. The tractor accelerates and resume baling normally. -
Operator may want to use pause automation function in rolling or hilly terrain. (See OPERATE BALER IN HILLY TERRAIN—AUTOMATION PAUSE FUNCTION in this section.)
An alternative method: When the selected bale diameter is reached, the tractor begins to slow down. Press firmly on both brake pedals simultaneously to stop tractor and hold them firmly until the wrapping is completed, the gate opens to discharge the bale, the gate closes, and the Baler Ready to Go arrow comes on indicating the tractor can proceed.
-
The operator must apply both brakes prior to tractor stopping. If the tractor stops first (before brakes are applied), the reverser must be cycled to resume baling after gate closes and Baler Ready to Go arrow comes on.
Release the brakes and the tractor begins to accelerate forward to resume baling. You do not have to cycle the reverser lever (from forward to center park and forward again) or depress the clutch pedal, just firmly hold the brakes until Steps 7—9 are completed.
-
The operator can stop the tractor forward motion with the clutch at any time during the baling cycle without interrupting the automation process.
The operator can use the clutch to stop forward motion during deceleration if both brake pedals are applied simultaneously and held until after the bale is unloaded, gate closed, and Baler Ready to Go arrow comes the monitor to proceed.
Release the clutch and brakes and automation resumes.
|
PP98408,000004A-19-20140729 |