Remove and Install Net Wrap V-Belt
-
Lock the gate.
-
Start the tractor and raise the tension arm fully using tractor hydraulics.
-
Turn the tractor ignition key to the off position and remove the key.
-
Disconnect the monitor-controller power plug from the tractor convenience outlet.
-
Open the net wrap cover.
-
Place a support under the drive roll to help support weight of roll.
-
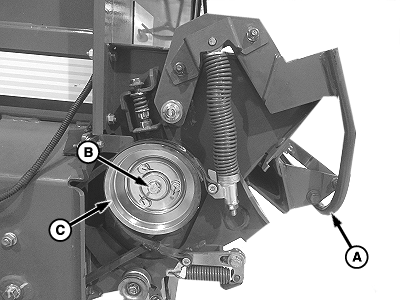
E84242-UN-24AUG17A - Brake Lever
B - Cap Screw and Washer
C - Sheave
Raise the brake lever (A) to rest on the latch tab. -
Remove cap screw and washer (B) and sheave (C).
-
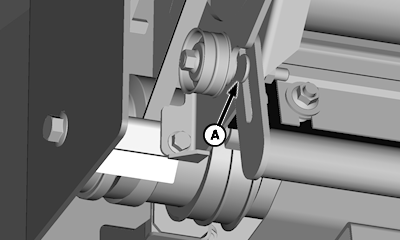
E62348-UN-05APR12Left-Hand Side
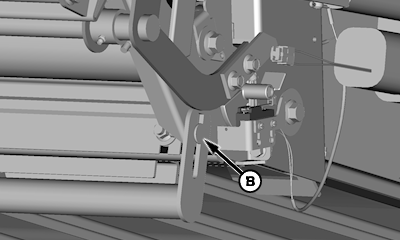
E62349-UN-05APR12Right-Hand Side
A - Carriage Bolt
B - Carriage Bolt
Remove carriage bolts (A and B) on the ends of the cross-tube and lower the net pan. -
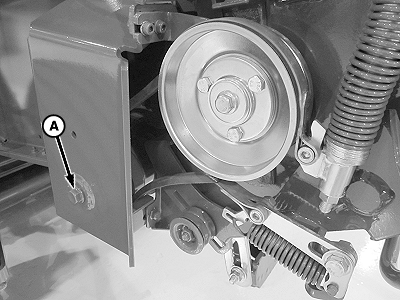
E83407-UN-07JUN17Left-Hand Side
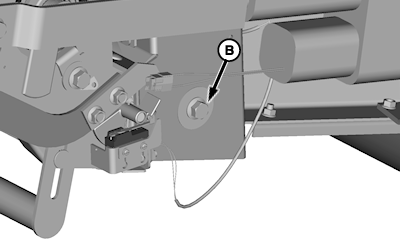
E62356-UN-05APR12Right-Hand Side
A - Cap Screw
B - Cap Screw
Remove cap screw (A). -
Loosen cap screw (B) until the roll on the left-hand side drops enough to remove the v-belt.
-
Replace the v-belt and install in reverse order of removal.
-
Check and adjust the net wrap v-belt idler tension. (See CHECK AND ADJUST NET WRAP V-BELT IDLER TENSION in this section.)
-
Check the net pan pressure. (See CHECK AND ADJUST NET PAN PRESSURE in this section.)
|
DP99999,0000D53-19-20170915 |