Repair Belts
-
For further information or to order belt lacing tool, phone or write to:
MATO Corporation
P.O. Box 7268
Beckley, West Virginia 25926-0268
Telephone: (800) 344-6286
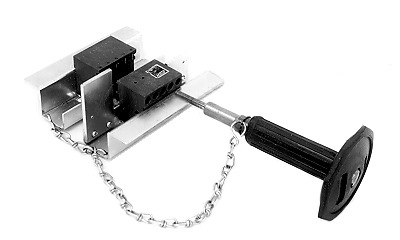
Fax: (304) 255-2501Belts can fray at the edges. Cut off the frayed cords as they appear; this procedures reduces the chances of frayed cords being caught as the bale is formed, causing additional fraying or damage to the belts.
E39821-UN-21MAR96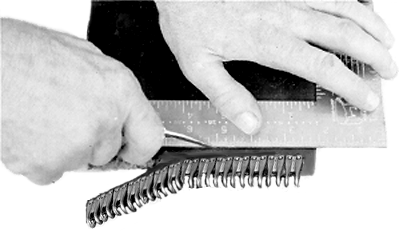
E40026-UN-30MAY96
Remove broken belt.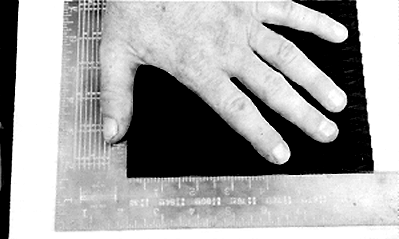
E21798-UN-24JUN99 -
Remove damaged area using a square and a sharp knife. Check to be sure that belt end was cut squarely.
-
If belt lengths are less than specified, belts will contact each other between the rear two tension arm rollers when baler is empty and gate is closed. When this happens, excessive wear to the belt diamond pattern will occur.
Make sure that all belts are within 38 mm (1-1/2 in.) of the other belts of similar length. There must not be more than 177 mm (7 in.) or less that 101 mm (4 in.) difference between the long and short belts.
If belts are shorter than the specified dimensions, a short piece of belt can be added. Splices (on same belt) must be at least 305 mm (12 in.) apart.
Check belt length. Make sure that belt is neither longer or shorter than specified.
Belt Lengths
mm (in.)
Minimum
Repair
Maximum
Short Belts
11 628 mm (457-3/4 in.)
11 679 mm (459-3/4 in.)
11 717 mm (461-1/4 in.)
Long Belts
11 768 mm (463-1/4 in.)
11 819 mm (465-1/4 in.)
11 857 mm (466-3/4 in.)
-
Cut only the diamond pattern. Cutting deeper can damage the belt cords.
Do not use a grinder to remove diamond pattern. Heat from grinder can damage rubber and fabric.
Remove diamond pattern from belt using a knife or skiving tool.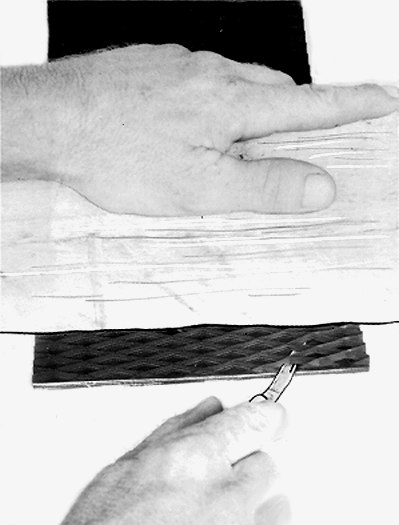
E21799-UN-24JUN99-
To reduce cutting effort, dip knife blade in liquid soap.
If using a knife:- Use approximately 25—51 mm (1—2 in.) thick board to hold belt as shown.
- Measure 25 mm (1 in.) from end of belt. Use a sharp knife to remove diamond pattern while being careful not to cut to the cord.
-
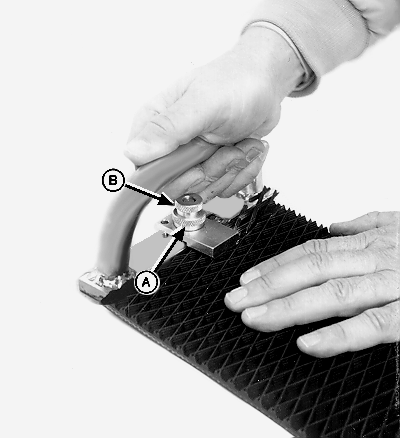
E39823-UN-24JUN99A - Thumb Screw
B - Outer Screw
If using a skiving tool:- Lay belt on a flat surface against a back stop.
- Adjust skiving tool pressure plate to thickness of belt using thumb screw (A).
- Turn thumb screw (A) down another half turn and lock with outer screw (B).
- Holding skiver firmly against belt, push skiver along full width of belt.
- Repeat, if necessary, until diamond pattern is removed.
Do not leave more than 0.5 mm (0.020 in.) of pattern on belt in area to be laced. If too much material is left on belt, hooks will not fasten properly to belt.
Do not remove too much material. If belt cords show, repeat Steps 2—4. Make sure that belt length is still within specifications. Add section of belt if necessary.
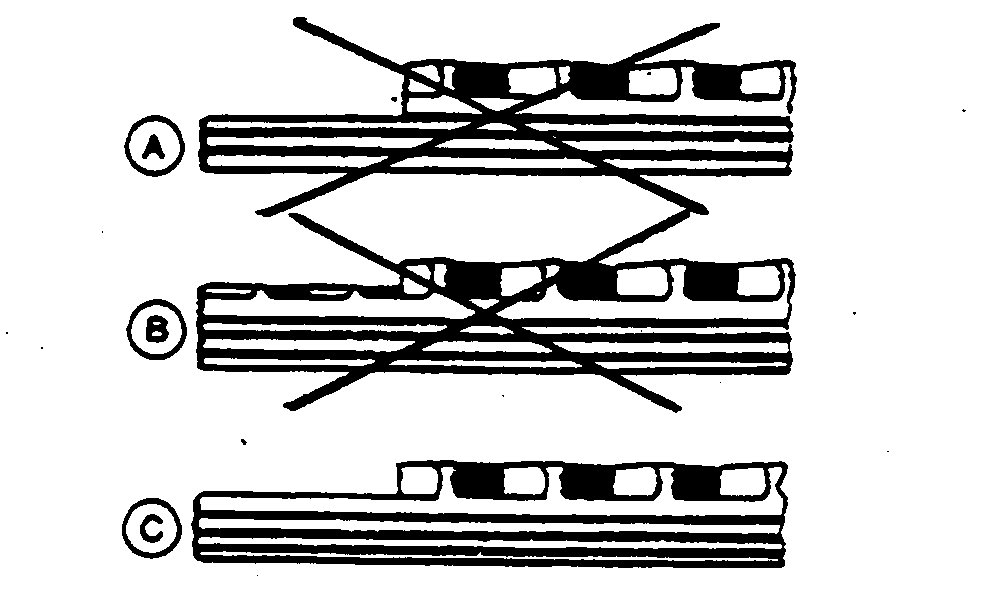
E27606-UN-12SEP88Belt Cross Section
A - Cut Too Deep
B - Cut Too High
C - Cut Correctly
Belt (A) is cut too deep. Damage to belt cords can occur.Belt (B) is cut too high. Hooks will not fully penetrate through the belt.
Belt (C) is cut correctly.
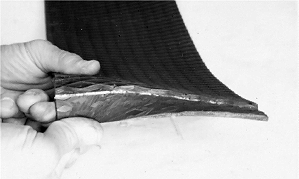
E27614-UN-12SEP88
More examples of incorrectly cut belts: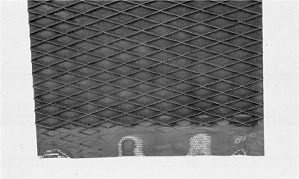
E27615-UN-12SEP88- Top photo shows vertical cut too deep; belt cords have been damaged (cut), seriously weakening the belt.
- Bottom photo shows too much diamond pattern was removed, exposing the belt cords.
-
To reduce cutting effort, dip knife blade in liquid soap.
-
Trailing end of belt must be trimmed using dimensions shown in illustration. DO NOT vary from these dimensions.
Trim trailing end of belt as shown.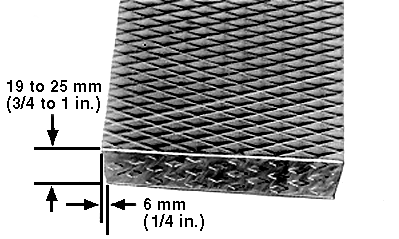
E39835-UN-27MAR96 -
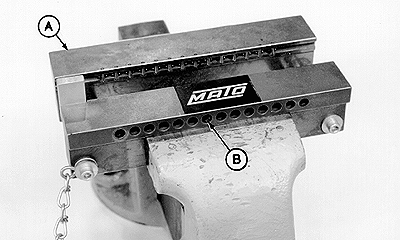
E40773-UN-08AUG96A - Lacer Tool
B - Holes
Put belt lacer tool (A) in vice with holes (B) toward the operator. The shoulder of lacer must rest on jaws of vise. -
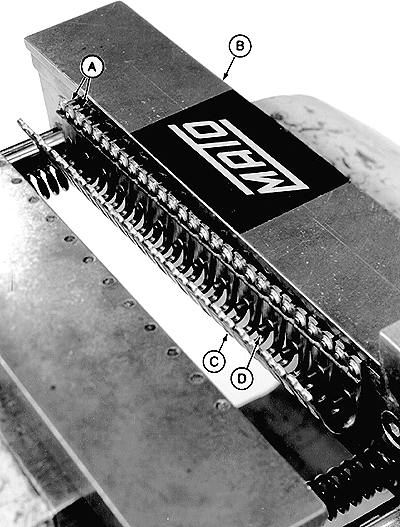
E40774-UN-08AUG96A - Rivet Pins
B - Lacer Tool
C - Lacing Strip
D - Stop Pins
Install lacing strip (C) in lacer tool (B). Make sure two rivet pins (A), of each lacing segment are inserted into each of the tools' 14 holes in lacer tool. The lacing segments must rest against stop pins (D). -
Tighten vise until lacing strip is lightly gripped and belt can be easily inserted.
-
E40775-UN-08AUG96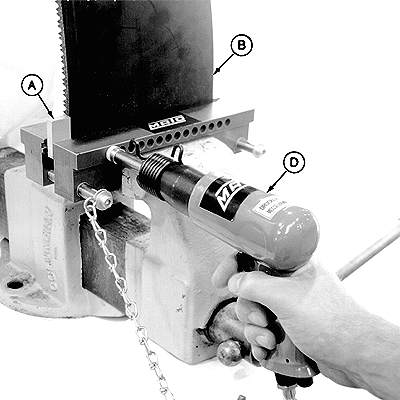
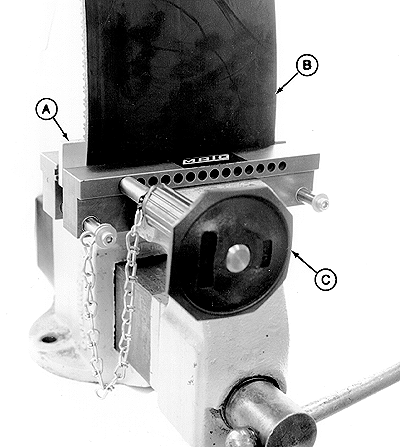
E40776-UN-08AUG96A - Stop Plate
B - Belt
C - Hand Punch
D - Pneumatic Hammer
Install belt (B) in lacing strip with diamond pattern away from operator. While holding edge of belt against stop plate (A), uniformly push belt down to the stop pins. Make sure that lacing strip is against stop pins. -
Make sure that belt and lacing are positioned squarely in lacer tool. Close vise on belt and lacing until distance between lacer jaws equals width of belt.
-
If using a hand punch, using too large of a hammer or striking punch too hard can damage lacing tool or belt lacing.
If using pneumatic hammer, too high air pressure and too long riveting time can damage lacing tool or belt lacing.
Drive rivets through belt using a punch (C) or pneumatic hammer (D).
Rivet the two outer lacing segments first, then working from the outside to the inside, rivet the rest of lacing segments.
- If using punch (C), drive rivets until shoulder on punch shaft contacts lacer jaw. Hit punch an additional time to ensure contact between shoulder and lacer jaw.
- If using pneumatic hammer (D), set air pressure to 500—600 kPa (5—6 bar) (72—87 psi). Operate hammer for 1—2 seconds for each rivet. Reriveting is not necessary.
-
Remove belt from vise and inspect lacing. All rivets must be driven through belt and show punch marks in center of rivets.
-
Do not hit loop area of fastener when using hammer to flatten heads of rivets.
Do not hit rivets too hard or rivets can buckle and damage joints.
Put belt and lacing on a solid base. Flatten heads of rivets using the flat face of a small hammer. Strike several rivets at a time using a light tapping motion. Rivets must be flush with splice.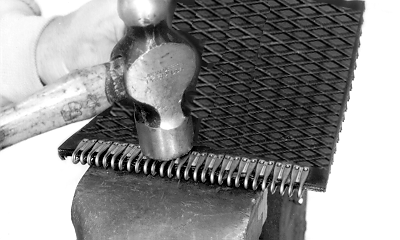
E40027-UN-30MAY96 -
Repeat procedure for other end of belt.
|
PP98408,0000F92-19-20130221 |