Calibrate Slip Clutch Alert PTO and Pickup RPM Sensors (Channels 206 and 207)
The following procedure is not used on a 450M and 550M Baler with a Regular pickup.
Both the PTO and pickup rpm sensors must be activated within the baler monitor-controller to enable operation of slip clutch alert and speed compensation features.
To Calibrate PTO RPM Sensor:
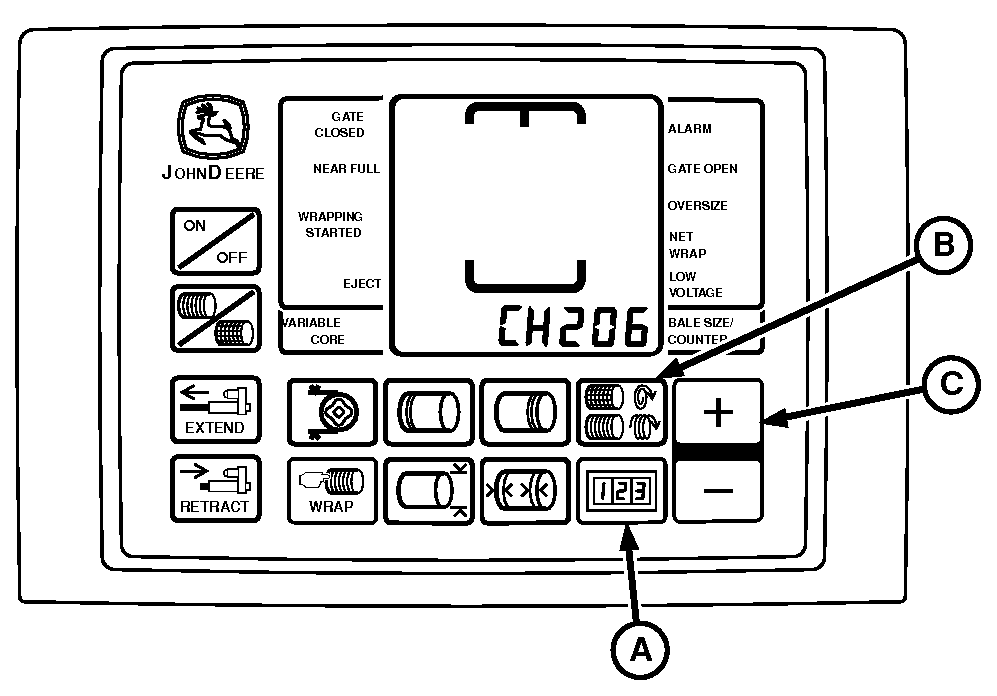
E57098-UN-13MAY09
BaleTrak™ Pro Monitor-Controller Shown
A - COUNTER Key
B - NUMBER OF WRAPS Key
C - PLUS Key
-
Turn tractor key to ON position. Do not start the tractor.
-
Press and hold both COUNTER key (A) and NUMBER OF WRAPS key (B) for the BaleTrak™ Pro or the COUNTER key and the BALE SIZE key for the BaleTrak™ Plus while turning the monitor-controller to ON. CH201must be displayed.
-
Release both keys. Baler model is displayed.
-
Press and hold COUNTER key (A) and press the PLUS key (C) until CH206 is displayed.
-
Release COUNTER key (A).
-
Press the PLUS key (C) until desired value 6 is shown in display.
-
Release PLUS key (C).
-
To enter the setting into memory, turn the monitor-controller OFF.
-
To verify the baler model number, turn the monitor-controller ON. Model number is displayed for approximately 2 seconds. If displayed baler model number is incorrect, see Baler Model Program (Channel 201) in this section.
-
Turn tractor key to OFF position and remove key.
To Calibrate Drive Roll RPM Sensor:
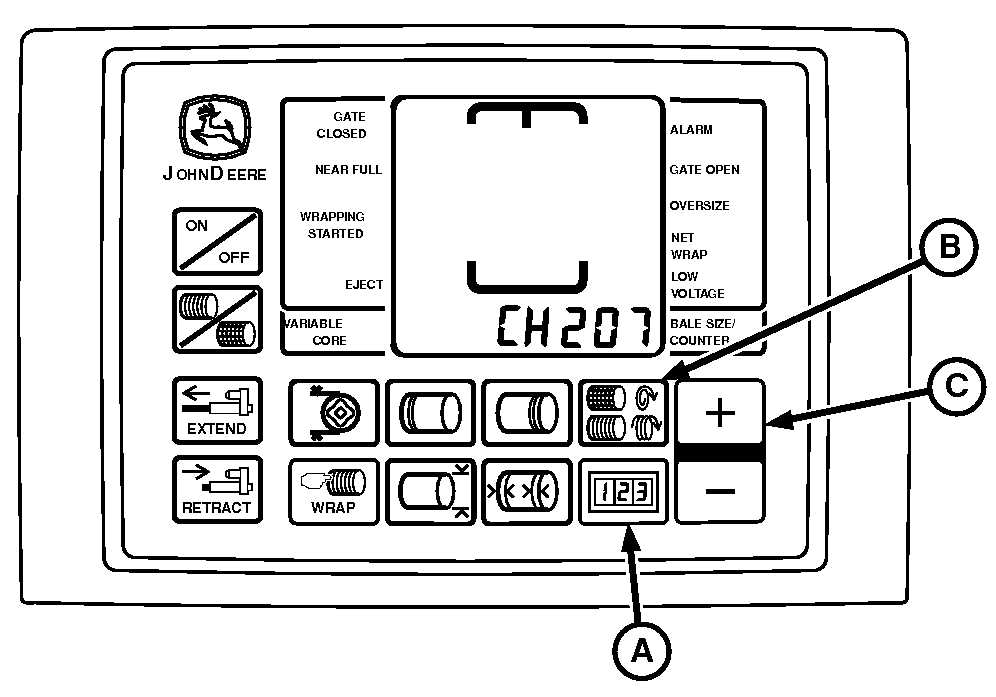
E57099-UN-13MAY09
BaleTrak™ Pro Monitor-Controller Shown
A - COUNTER Key
B - NUMBER OF WRAPS Key
C - PLUS Key
-
Turn tractor key to ON position. Do not start the tractor.
-
Press and hold both COUNTER key (A) and NUMBER OF WRAPS key (B) for the BaleTrak™ Pro or the COUNTER key and the BALE SIZE key for the BaleTrak™ Plus while turning the monitor-controller to ON. CH201 must be displayed.
-
Release both keys. Baler model is displayed.
-
Press and hold COUNTER key (A) and press the PLUS key (C) until CH207 is displayed.
-
Release COUNTER key (A).
-
Press the PLUS key (C) until desired value 6 is shown in display.
-
Release the PLUS key (C).
-
To enter the setting into memory, turn the monitor-controller OFF.
-
To verify the baler model number, turn the monitor-controller ON. Model number is displayed for approximately 2 seconds. If the displayed baler model number is incorrect, see Baler Model Program (Channel 201) in this section.
Check the sensor output and verify the proper operation using the following procedure.
-
Turn tractor key to OFF position and remove the key.
Verify Operation and Adjustment of Sensors:
-
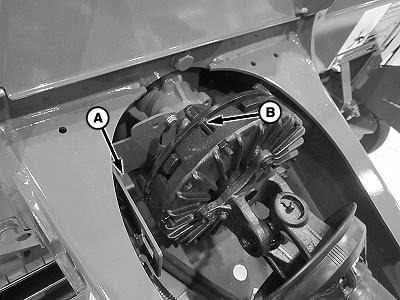
E83505-UN-14AUG17PTO Sensor (540 rpm) Shown
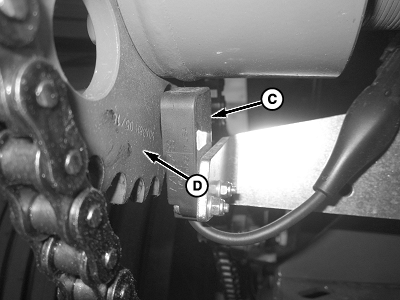
E83506-UN-14AUG17Lower Drive Roll (Pickup) Sensor
A - PTO Sensor
B - Clutch Bushing or Lobe (6 used)
C - Pickup Sensor
D - Sprocket
Start tractor. Operate tractor engine at low idle and engage PTO. -
Press and hold COUNTER key while turning monitor-controller ON.
-
Continue to hold COUNTER key and press PLUS key until CH016 appears in digital display.
-
Release COUNTER key and PTO speed are displayed. Speed readout must be stable and not vary by ± 5 rpm.
-
Press and hold COUNTER key and press PLUS key until CH017 appears in digital display.
-
Release COUNTER key and pickup drive speed are displayed. Speed readout must be stable and not vary by ± 5 rpm.
-
If speed variation exceeds ± 5 rpm, shut off the tractor engine and remove the key.
The PTO sensor (A) distance is between 3—8 mm from the sensor face to the clutch bushings or lobes (B). The pickup sensor (C) distance is between 3—8 mm from the sensor face to the sprocket (D) and aligned with the holes passing the sensor face in the sprocket.
|
BaleTrak is a trademark of Deere & Company |
SF04007,0000E50-19-20170914 |