Install and Adjust Net Wrap Brush
-
E85570-UN-16NOV17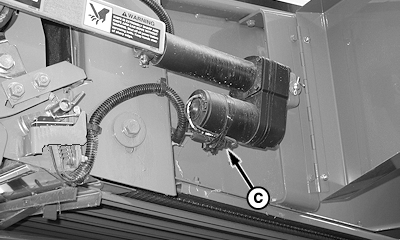
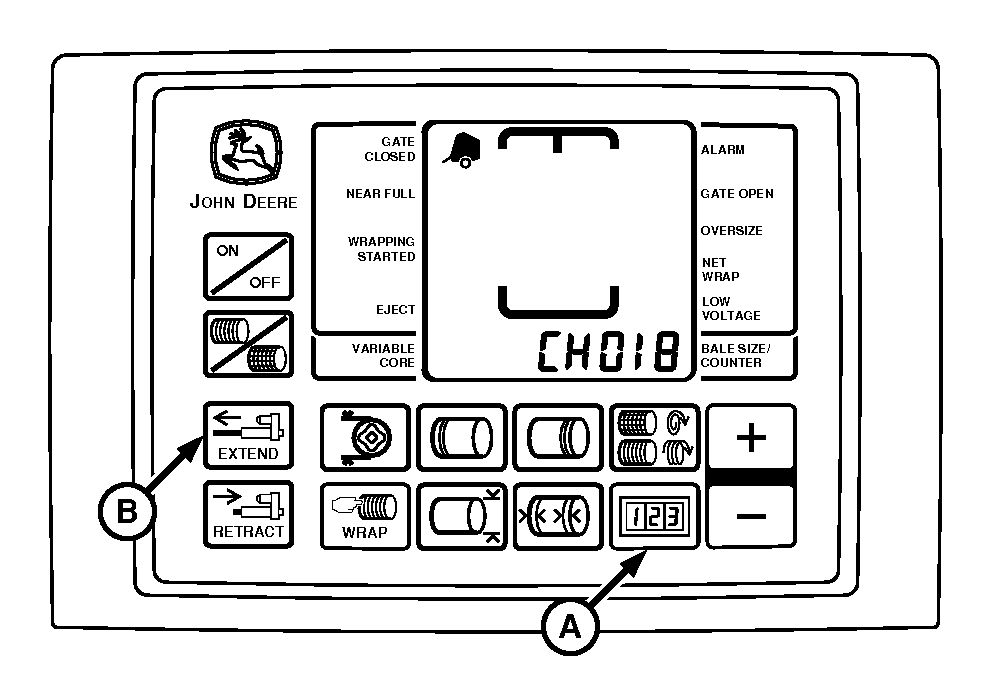
E85611-UN-16NOV17A - COUNTER Key
B - EXTEND Key
C - Connector, Net Wrap Wire Harness
Turn tractor key to ON position. Turn monitor-controller ON. -
Ensure that monitor is in NET mode. Turn monitor OFF.
-
Press and hold COUNTER key (A) while turning monitor-controller ON. CH001 appears in the digital display.
-
To advance to CH018, continue to hold the COUNTER key (A) and press PLUS key. Release the COUNTER key (A).
-
To move the counterknife to the up position, press and hold the EXTEND key (B).
-
 To avoid personal injury from unexpected knife movement,
disconnect connector (C) or power plug when performing adjustment
or working in area.
To avoid personal injury from unexpected knife movement,
disconnect connector (C) or power plug when performing adjustment
or working in area.Turn monitor-controller selector switch to OFF. Turn tractor key to OFF position. Remove key. Disconnect monitor-controller power plug from the power source or disconnect plug at the connector (C).
-
Open the net wrap cover.
-
If the knife is bowed, bend brush away from the steel roll between center bolts to maintain 1—3 mm (0.040—0.12 in) clearance.
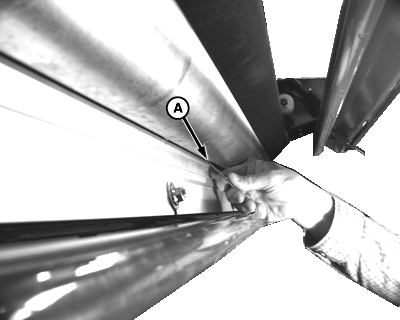
E53030-UN-12JAN04A - Feeler Gauge
Install brush with bristle holder offset, towards plated roll. Using a feeler gauge (A), set clearance between the steel roll and the aluminum brush holder bracket to dimension.Brush-to-Steel Roll Clearance 1—3 mm (0.040—0.12 in) -
Tighten hardware to specification.
Knife-to-Brush Torque 55 N·m (40 lb·ft) -
To ensure that clearance remains within specification, rotate the rolls.
-
Check the net wrap switch adjustment. (See Check and Adjust Net Wrap Switch in this section.)
-
Connect net actuator wire connector.
-
Make sure to move the net wrap counterknife fully downward to the home position. If the baler is operated with the counterknife at the up position, the net feeds continuously during baling.
Turn tractor key to ON position.
-
To move the counterknife fully downward to the home position, press the WRAP key on the monitor-controller.
-
Turn tractor key to OFF position. Turn OFF monitor-controller.
-
Close the net wrap cover.
|
SF04007,000109B-19-20171116 |