Checking and Adjusting Twine Cutter Knife
 Twine arms can move unexpectedly. To avoid crushing,
keep hands out of the twine arm path. Turn off power BEFORE servicing
or adjusting twine arms or twine cutter mechanism.
Twine arms can move unexpectedly. To avoid crushing,
keep hands out of the twine arm path. Turn off power BEFORE servicing
or adjusting twine arms or twine cutter mechanism.
Stay out of the path of twine arms at all times when power to twine ares is ON.
Twine knife has two cutting edges. Be careful when
working around the knife. It is sharp.
Make sure that cutter anvil is properly adjusted before adjusting knife. (See Adjusting Twine Cutter-to-Twine Arm in this section.)
Do not operate twine arm with the pickup in raised position, or damage to pickup teeth can occur.
Make sure that knife edge is straight. If not, rotate, replace, or sharpen the knife.
If knife edge is less that 3 mm (1/8 in) from rear of hex flat, the knife has become too short due to sharpening. Invert or replace the knife, if necessary.
-
Remove crop material from knife and hex anvil area.
-
Move twine arms behind twine cutter as follows:
- Turn tractor key to ON position. Do not start tractor engine.
- Turn monitor-controller ON.
- To move the twine arm behind twine cutter, In TWINE mode, press the monitor-controller EXTEND key (B).
- Turn monitor-controller OFF. Turn tractor key to OFF position. Remove key.
Electric Twine Wrap;
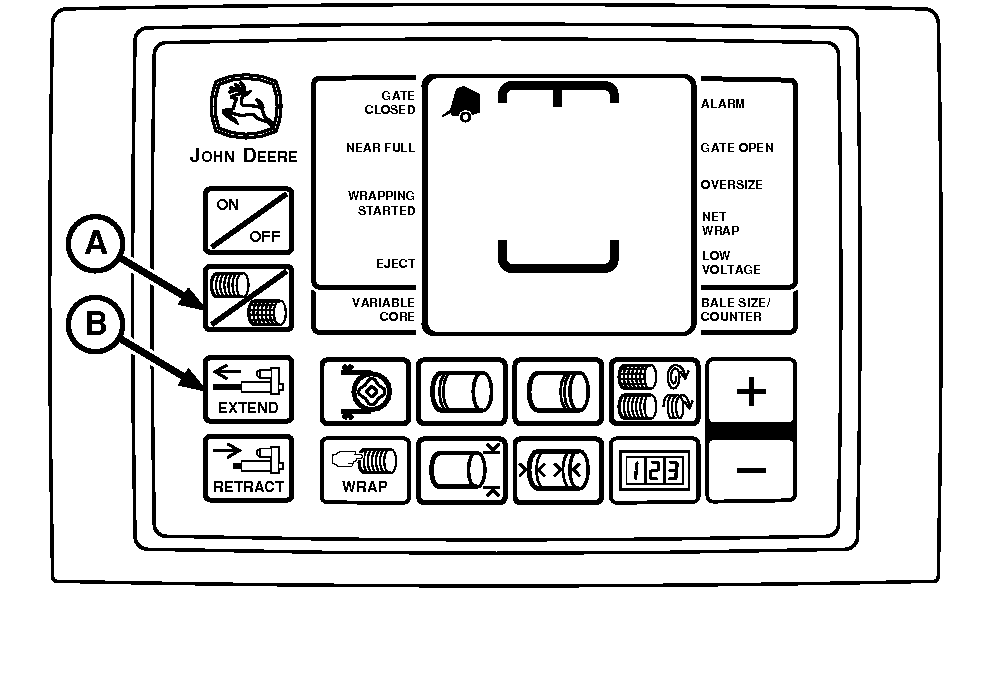
E52523-UN-02JUN08A - Twine Symbol
B - Extend Key
-
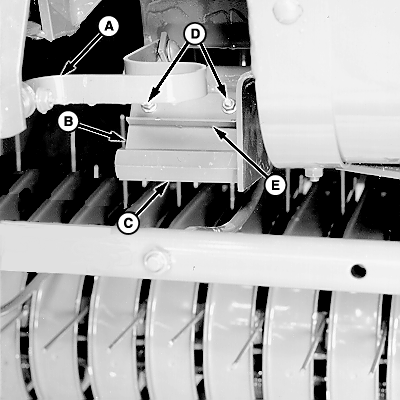
E39690-UN-06SEP00A - Cutter Strap
B - Knife
C - Hex Anvil
D - Nuts
E - Angle
Pull cutter strap (A) forward until knife (B) contacts hex anvil (C). If full length of knife does not contact hex anvil, adjust knife.To adjust the knife:
- Loosen nuts (D).
- Pull angle (E) down until full width of knife (B) contacts hex anvil (C). Knife edge should be near center of hex flat.
- Tighten nuts (D). Pull cutter strap forward to make sure full width of knife contacts hex anvil. If not, repeat adjustment procedure.
- Check twine cutter-to-twine arm clearance. (See Adjusting Twine Cutter-to-Twine Arm this section.)
|
SF04007,00010A2-19-20171117 |