Installing Mower Deck (42A)
-
Park machine safely. (See Parking Safely in the SAFETY section.)
-
Allow engine and muffler to cool completely
-
 CAUTION: Avoid injury! Rotating blades are dangerous.
 Before adjusting or servicing mower:
- Disconnect spark plug wire(s) or battery negative (-) cable to prevent engine from starting accidentally.
- Always wear gloves when handling mower blades or working near blades.
Remove lock pin and raise mower lift lever fully upward. Install lock pin just below lever to lock lift mechanism in raised position.
-
Slide mower deck under machine, insert belt into machine center belt shield. Align deck with machine shield and roll rearward.
-
Remove lock pin (A), push handle (B) to its lowest position and install lock pin just above lever to lock deck in lowered position.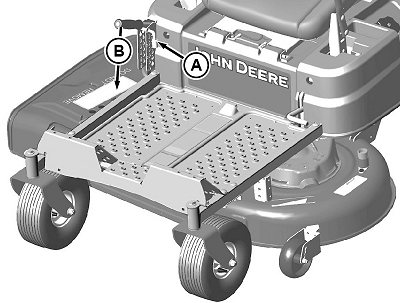
GXT002281-UN-16JUN15 -
Install pin (C) and spring clip (D) onto each rear mower bracket.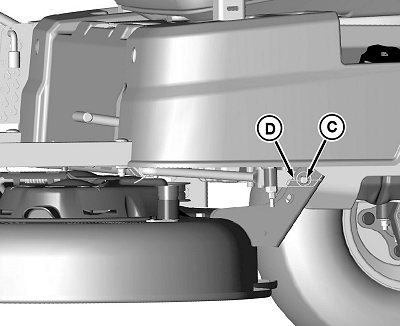
GXT002282-UN-16JUN15 -
Install front draft rod (E) into deck bracket and secure with washer and locking clip (F).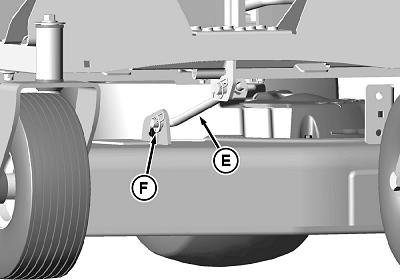
GXT002283-UN-16JUN15 -
Install deck belt (G) onto engine drive sheave.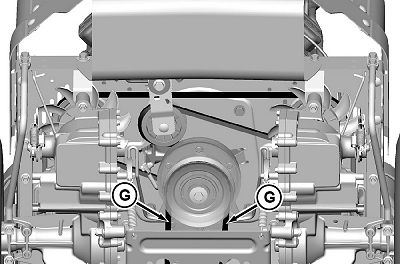
GXT002284-UN-16JUN15 -
Make sure belt is completely seated on the three right deck sheaves.
-
CAUTION: Avoid injury! Component is spring-assisted and under
tension. Injury can occur if spring-assisted component is released
suddenly.
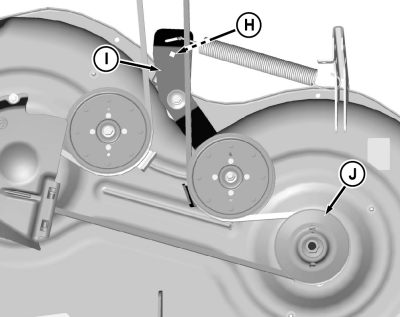
GXT002291-UN-17JUN15Deck shown removed from machine for better view.
Install a 3/8 in. ratchet with extension into bottom of square hole (H) in sheave tension arm (I). Rotate arm counterclockwise and install belt on left spindle sheave (J). -
GXT002287-UN-17JUN15Deck shown removed from machine for better view.
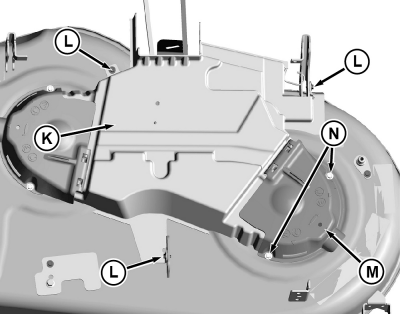
Install center deck shield (K) with 3 screws (L). -
Install left spindle shield (M) with 2 screws (N).
-
Install shield (O) under engine drive sheave and secure with 4 bolts (P).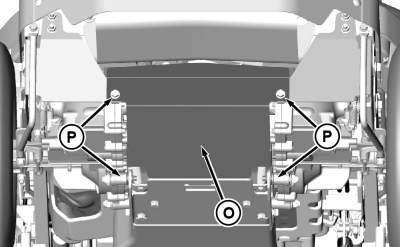
GXT002288-UN-17JUN15 -
Install foot plate and secure with original hardware.
|
TH84124,000022A-19-20150618 |