Removing and Installing Chaffer
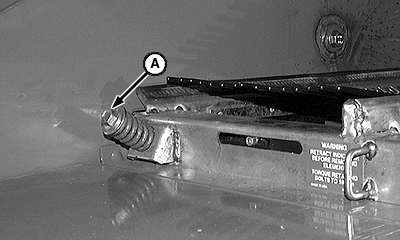
NOTE: If equipped with straw chopper, raise the chopper. If equipped with a straw spreader, raise the spreader and remove the disks for clearance when removing the chaffer. 1. Loosen gauge adjustment screw (A) in chaffer element (B). |
|
 CAUTION:
Shut off engine, set park brake and remove key.
CAUTION:
Shut off engine, set park brake and remove key.

AG,OUO1035,1561 -19-24JAN00-1/5 |
|
2. Slide chaffer opening gauge (A) inside chaffer element.
|
|

AG,OUO1035,1561 -19-24JAN00-2/5 |
|
3. Remove chaffer retainer bolts (A) on both sides. 4. Remove chaffer element from rear of machine. 5. Repair or replace as necessary. 6. Install chaffer element in rear of machine. 7. Install retainer bolts (A) on both sides.
|
|
AG,OUO1035,1561 -19-24JAN00-3/5 |
|
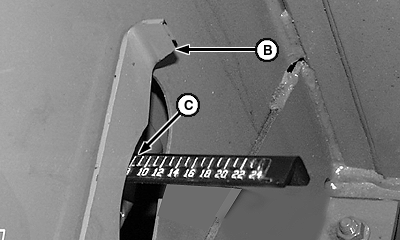
8. Slide opening gauge (A) through side sheet. Calibrate opening gauge to proper dimension: a. Crank chaffer to full open position.
|
|
AG,OUO1035,1561 -19-24JAN00-4/5 |
|
b. Close chaffer slowly until opening measures approximately 8 mm with combine clearance gauge (A). c. Slide opening gauge in or out until gauge reads 8 mm (B) with position indicator (C).
|
|

AG,OUO1035,1561 -19-24JAN00-5/5 |